Author: Green Design and Build Team

  • How Much Does a Roof Replacement Cost in Los Angeles?

    How Much Does a Roof Replacement Cost in Los Angeles?

    A roof replacement in Los Angeles typically costs $12,000 to $65,000 for the 1,500 to 2,000-square-foot roof on a single-story house: about $5 to $10 per square foot for composition shingle, $8 to $15 for a tile lift and relay, $10 to $20 for new concrete tile, and $15 to $30 for clay tile or standing-seam metal, all with tear-off, material and labor. Green Design and Build is a licensed general contractor (CSLB #1110975) based in Van Nuys that tears off, repairs and replaces roofs for homeowners across Los Angeles County, Orange County, Ventura County, western Riverside County and western San Bernardino County. The figures on this page are typical Los Angeles budgeting ranges, not a quote; your number depends on the material, the size and pitch of the roof, and what the tear-off finds underneath.

    We are led by Dekel Sofer; the company has completed hundreds of projects and holds a 4.7-star rating across 146 reviews on Yelp.

    Roof replacement cost by material

    The material sets most of the number. The table gives the per-square-foot range for each kind of roof we install, and what that comes to on a typical 1,500 to 2,000-square-foot single-story roof, including tear-off of the old covering, underlayment, flashing and the new roof. Repairs are priced by the job.

    Roofing work Per sq ft of roof 1,500–2,000 sq ft single-story roof
    Roof repair (flashing, a few tiles, one leak) By the job $500–$3,000
    Composition (asphalt) shingle, tear-off and replace $5–$10 $12,000–$25,000
    Tile lift and relay (new underlayment, tile reused) $8–$15 $15,000–$30,000
    Concrete tile, new roof $10–$20 $20,000–$45,000
    Clay tile, new roof $15–$30 $30,000–$65,000
    Standing-seam metal $15–$30 $30,000–$65,000
    Flat roof, torch-down modified bitumen $5–$10 $8,000–$20,000
    Flat roof, TPO single-ply $7–$14 $11,000–$28,000

    Roofers quote in “squares” (100 square feet of roof), so a $5 to $10-per-square-foot shingle roof is $500 to $1,000 a square. The roof area is larger than the floor area because of the pitch and the overhangs; a 1,600-square-foot single-story ranch house in the San Fernando Valley usually carries 1,800 to 2,100 square feet of roof, and a two-story house of the same floor area has roughly half that. Our guide to what a Los Angeles general contractor costs covers how these trade prices fit into a larger remodel.

    What changes the price of a roof replacement

    Two houses on the same street can get quotes $15,000 apart for what sounds like the same roof. When they do, it is one of the items below.

    The material and its weight

    Composition shingle is the least expensive roof to install and the right choice for most pitched roofs, including the 1950s to 1970s Valley ranch houses we re-roof most often: laminated architectural shingles in a Cool Roof Rating Council-rated color over synthetic underlayment, with ice-and-water membrane in the valleys and around penetrations. Concrete and clay tile cost two to three times as much and weigh roughly 9 to 12 pounds per square foot, so moving from shingle to tile needs a structural review of the framing, and that engineering is part of the price. Standing-seam metal costs about what clay tile does and is gaining ground on hillside and fire-zone homes because it is Class A in a tested assembly, sheds embers and takes solar clamps instead of roof penetrations.

    What the tear-off finds

    Rotten plywood only shows itself after the old roof comes off, and the deck is the most common reason a roofing job costs more than the quote. We replace up to 10 percent of the deck at no additional charge and price anything beyond that per sheet, before we cover it, so you see the damaged sections and the number at the same time. A house with two layers of old shingles also costs more to tear off and dispose of than a house with one, and California code does not allow a third layer, so a roof that already has two must come down to the deck.

    Size, pitch and complexity

    A simple gable roof with two planes is the cheapest roof to cover. Every hip, valley, dormer, skylight, chimney and plumbing vent adds cut tile or shingle, flashing and labor, and a steep pitch slows the crew and adds fall protection. A 2,000-square-foot roof cut up by four valleys and three skylights can cost as much as a plain 2,600-square-foot roof in the same shingle.

    Solar, gutters and ventilation

    If you have solar panels, they come off before the tear-off and go back on after the final inspection. That work is performed by licensed solar and electrical contractors and scheduled and supervised by us as your general contractor, and it runs roughly $1,500 to $5,000 depending on the size of the array. Seamless aluminum gutters and downspouts installed with the roof run about $8 to $20 per linear foot. Attic ventilation is worth adding while the roof is open: the residential code calls for net free vent area of at least 1/150 of the attic floor, and on most 1950s to 1970s Valley houses the soffit vents are painted shut or missing.

    Cool-roof and fire-zone requirements

    These are code requirements rather than options, and they narrow which products you can use. Under the 2025 California Energy Code, in effect for permits filed on or after January 1, 2026, replacing more than 50 percent of a roof (or 2,000 square feet, whichever is less) triggers the cool-roof requirement, and products must carry a Cool Roof Rating Council label; the City of Los Angeles has separately required cool roofs on residential re-roofs since 2014. In a Very High Fire Hazard Severity Zone, which now includes much of the hillside Valley, the Santa Monica Mountains and the Orange County canyons after CAL FIRE’s March 2025 maps, the roof must be a Class A assembly with closed gaps under tile at the eaves and ridges, metal valley flashing, ember-resistant vents and no wood shakes or shingles. Cool-rated shingles and Class A assemblies are standard products now and rarely move the price much, but a fire-zone roof that also needs new vents, gutter covers and eave closures is a larger job than a like-for-like re-roof.

    Repair, overlay or full replacement?

    Repair makes sense when the covering has years left and the leak has a specific cause: a cracked pipe-jack boot, a rusted valley, a slipped tile, or a failed seam on a flat roof. Most repairs land between $500 and $3,000. What a repair cannot fix is underlayment gone brittle everywhere; patching one spot moves the leak to the next.

    Overlay means new shingles over the existing layer. The California Residential Code does not allow it where the roof already has two or more layers, where the covering or deck is water-soaked or deteriorated, or over wood shake, slate or tile. We rarely recommend one even when it is legal: it hides damaged decking, adds weight, traps heat, and makes the next replacement cost more because there are two layers to remove instead of one.

    Full replacement is a tear-off to the deck, replacement of damaged sheathing, new underlayment, new flashing at every penetration, and the new covering. It is the only option that lets you see the deck, and it is what every figure in the table above describes.

    Tile roofs: lift and relay for about half the cost of new tile

    If your tile roof dates from the 1980s or 1990s, the felt underneath is probably at the end of its life even if the tile looks perfect; the first signs are leaks at valleys and skylights and staining on the underside of the sheathing. A lift and relay removes the tile in sections, tears off the old underlayment and battens, replaces damaged sheathing, installs new underlayment with new metal at every valley, eave, wall and penetration, and resets the original tile with new fasteners. Broken tiles come from matching salvage stock. At $8 to $15 per square foot you keep the look for roughly half the cost of a new tile roof, and because the weight does not change, the job qualifies for the same express permit as any re-roof.

    Do you need a permit to replace a roof in Los Angeles?

    Yes. In the City of Los Angeles, which includes most of the San Fernando Valley, a re-roof is an express permit with no plan check when the new covering is Class A or B, weighs less than 6 pounds per square foot, and goes over solid sheathing. Heavier tile, new skylights, a pitch change or rafter work means plan check. The contractor certifies the finished work on the LADBS Re-roofing Certificate of Compliance, and any new sheathing gets a nailing inspection before it is covered. Our post on whether you need a permit to replace a roof in Los Angeles walks through the process. Burbank, Glendale, Pasadena, Santa Clarita, unincorporated Los Angeles County and every Orange County city issue their own re-roof permits under the same state codes.

    The permit is a small part of the cost, and a quote that leaves it out is not cheaper. Without one there is no inspection of the new sheathing, no Certificate of Compliance for the next buyer’s disclosure, and no cool-roof or Class A documentation if the house is ever in a fire-zone insurance review.

    How long does a roof replacement take?

    Job Typical duration once material is on site
    Composition shingle tear-off and replace 2–5 working days
    Tile lift and relay, or new tile roof 1–2 weeks
    Standing-seam metal 1–2 weeks
    Flat roof (torch-down, TPO or foam) 2–4 working days

    These are typical Los Angeles budgeting estimates, not a price list or a quote. Your project can come in lower or higher depending on the house, the scope and the finishes; the only real number is a written proposal after a site visit.

    An LADBS express re-roof permit is usually issued in days; heavier tile or new skylights go through plan check, and solar removal adds about a week on each side of the roofing work for the panels to come off and go back on. Add a week or two for shingle or tile to arrive if you choose a color that is not stocked locally.

    A real roof: what the tear-off found in Newport Beach

    Before: rotted decking at the eave — roof replacement in Newport Beach, CA
    Before: rotted decking at the eave
    After: new shingle roof — roof replacement in Newport Beach, CA
    After: new shingle roof

    In October 2025 we replaced the roof on a single-story house in Newport Beach that looked fine from the street. Once the old roofing came off, the original plank decking at the eaves was rotted through in several places, with old vent openings cut into it. The damaged boards were cut out and replaced and the fascia checked before any underlayment went on; then synthetic underlayment, new flashing and a light-grey architectural shingle went across the full roof, including the chimney and vent details. The homeowner saw the damaged sections before we covered them, which is the point of a full tear-off. Photos of every stage are on the Newport Beach roof replacement project page, and a Buena Park roof from August 2026 shows the same thing: one area of rotted decking under curling shingles, cut out and replaced before the new underlayment.

    The same lesson is in our permit post: on a 1960s San Fernando Valley shingle replacement, tear-off exposed about 80 square feet of soft, stained deck around a bathroom vent from a slow leak nobody had seen from inside. Covering it would have put a new roof over a failing deck.

    How to compare roofing quotes

    Quotes for the same roof are only comparable when they describe the same work. Check that each one lists the tear-off and disposal of every existing layer, the underlayment product (synthetic or felt, and the ice-and-water membrane at valleys and penetrations), new flashing at every pipe, wall and chimney rather than reuse of the old metal, the exact shingle or tile product and its Cool Roof Rating Council listing, how much deck replacement is included and the per-sheet price beyond it, the permit and the Certificate of Compliance, ventilation, and the manufacturer’s and the contractor’s workmanship warranties. A quote priced in squares should say how many squares it counted; a difference of five squares on a 20-square roof explains a lot of price gaps. Confirm the licence on the CSLB site: roofing must be done by a contractor holding an active C-39 roofing classification or a B general building licence, with workers’ compensation on file.

    Where we replace roofs

    We re-roof houses from our Van Nuys office across the San Fernando Valley, the rest of Los Angeles County, Orange County, Ventura County, western Riverside County and western San Bernardino County. The material mix changes with the area: composition shingle on Valley and South Bay ranch houses, concrete and clay tile on the Spanish and Mediterranean homes of Pasadena, Orange County and the Inland Empire, flat torch-down and TPO on mid-century Valley houses and garage conversions, and Class A shingle or metal on hillside and canyon homes in the fire zones. The cool-roof rule reaches all of it: the Valley and Los Angeles basin, Orange County, inland Ventura, Riverside and San Bernardino all sit in climate zones where a steep-sloped re-roof needs a cool-rated product, and only the coast in Climate Zone 6 escapes the steep-slope rule. See all of our service areas.

    Roof replacement cost FAQs

    How much does a new roof cost in Los Angeles?

    A new roof on a typical 1,500 to 2,000-square-foot single-story house in Los Angeles costs about $12,000 to $25,000 in composition shingle, $15,000 to $30,000 for a tile lift and relay, $20,000 to $45,000 in new concrete tile, and $30,000 to $65,000 in clay tile or standing-seam metal, including tear-off. Flat roofs run $8,000 to $28,000 depending on the system. These are typical Los Angeles budgeting ranges, not a quote.

    How much does a roof replacement cost per square foot?

    In Los Angeles, composition shingle runs about $5 to $10 per square foot of roof with tear-off, a tile lift and relay $8 to $15, new concrete tile $10 to $20, clay tile and standing-seam metal $15 to $30, torch-down flat roofing $5 to $10 and TPO $7 to $14. Roofers often quote per “square” (100 square feet), so $5 to $10 per square foot is $500 to $1,000 per square.

    Is it cheaper to put new shingles over the old roof?

    An overlay is cheaper up front because it skips the tear-off, but California code does not allow it where the roof already has two layers, where the covering or deck is deteriorated, or over shake, slate or tile, and we rarely recommend it even when it is legal. It hides damaged decking, adds weight, traps heat and makes the next replacement more expensive because two layers must come off instead of one.

    Do I need a permit to replace my roof in Los Angeles?

    Yes. In the City of Los Angeles a like-for-like re-roof with a Class A or B covering weighing under 6 pounds per square foot over solid sheathing is an express permit with no plan check, and the contractor signs the LADBS Re-roofing Certificate of Compliance at the end. Heavier tile, new skylights or structural changes go through plan check. Other cities in Los Angeles, Orange, Ventura, Riverside and San Bernardino counties issue their own permits under the same state codes.

    How long does a roof replacement take?

    Once material is on site, a composition shingle tear-off and replacement on a single-family house takes two to five working days, a tile lift and relay or new tile roof one to two weeks, standing-seam metal one to two weeks, and a flat torch-down, TPO or foam roof two to four working days. An LADBS express permit is usually issued in days, and removing and reinstalling solar panels adds about a week on each side.

    Does a cool roof cost more?

    Usually not much. Since 2014 the City of Los Angeles has required cool roofs on residential re-roofs, and under the 2025 California Energy Code replacing more than half of a roof triggers the cool-roof rule across the Valley, the Los Angeles basin, Orange County, inland Ventura, Riverside and San Bernardino. Cool-rated architectural shingles, tile and metal are standard products carrying a Cool Roof Rating Council label, so the requirement narrows the color choices more than it raises the price.

    Get a written roof replacement price for your house

    We will measure the roof, count the layers, check the deck from the attic and the fire-zone and cool-roof rules for your address before we write a number, and give you an itemized proposal that lists tear-off, deck replacement, underlayment, flashing, the roofing product, ventilation, permit and warranties line by line. The site visit and the estimate are free.

  • How Much Does a Garage Conversion Cost in Los Angeles?

    How Much Does a Garage Conversion Cost in Los Angeles?

    A garage conversion ADU in Los Angeles typically costs $100,000 to $200,000, and most two-car conversions we price land between $98,000 and $150,000 once the kitchen, bathroom, insulation, electrical and plumbing are included. Green Design and Build is a licensed general contractor (CSLB #1110975) based in Van Nuys that designs, permits and builds garage conversion ADUs for homeowners across Los Angeles County, Orange County, Ventura County, western Riverside County and western San Bernardino County. Every figure on this page is either already published on our site or simple arithmetic from those figures; none of it is a quote for your garage.

    Green Design and Build is led by Dekel Sofer. We hold a 4.7-star rating across 146 Yelp reviews and have completed hundreds of projects. A standard two-car garage in the San Fernando Valley is usually around 400 square feet, already has a slab, walls and a roof, and often sits on a lot where a new detached unit would not fit.

    Garage conversion cost by scope

    The table puts the figures we have already published side by side so you can see where a conversion sits against the other routes to a legal ADU. All are typical Los Angeles budgeting ranges, not a quote.

    Scope Typical Los Angeles range
    Garage conversion ADU, most two-car garages (about 400 sq ft), kitchen, bathroom, builder-grade finishes $98,000 to $150,000
    Garage conversion ADU, full range including detached garages needing trenching, sewer work, a panel upgrade or upgraded finishes $100,000 to $200,000
    Same 400 sq ft garage at the all-in ADU rule of thumb of $300 to $450 per sq ft $120,000 to $180,000
    Attached ADU (new space added to the house) $150,000 to $300,000
    Detached new-construction ADU, 500 sq ft $180,000 to $260,000
    Detached new-construction ADU, any size $180,000 to $550,000 depending on size

    How we estimated these numbers

    The ranges on this page are budgeting estimates for Southern California, not a price list. They are drawn from Green Design and Build’s own written proposals and completed projects across Los Angeles, Orange, Ventura and western Riverside and San Bernardino counties, checked against current supplier and subcontractor pricing. A real project can come in lower or higher depending on the house, the scope and the finishes. Reviewed by Dekel Sofer, licensed general contractor (CSLB #1110975), September 2026. Publishers and journalists are welcome to cite these figures with a link to this page.

    These are typical Los Angeles budgeting estimates, not a price list or a quote. Your project can come in lower or higher depending on the house, the scope and the finishes; the only real number is a written proposal after a site visit.

    A $98,000 to $150,000 conversion of a 400 square foot garage works out to roughly $245 to $375 per square foot, below the $300 to $450 per square foot we quote for new construction, and that gap is the whole reason to convert rather than build. But the top of the conversion range overlaps the bottom of the detached range: a detached garage at the back of a deep Valley lot, with a cracked slab, a 100-amp panel and a clay sewer lateral, can cost as much as a small new unit. The garage is a head start, not a discount.

    The savings are specific: no foundation, no framing, no roof, and none of the solar panels that LADBS notes are required on detached ADUs built from scratch. What you still pay for is everything that makes a garage a home, which our ADU cost guide lists plainly: insulation, electrical, plumbing, HVAC, a complete kitchen, a full bathroom, code-compliance upgrades, windows and finishes. A kitchen and a bathroom are the two most expensive rooms in any house, and a 400 square foot ADU has both.

    What changes the price of a garage conversion

    When two quotes for the same garage are far apart, one of them usually skipped or deferred one of the items below. These are what we look at on the first site walk.

    The slab and the moisture barrier

    A garage slab was poured to hold a car, not a bedroom. Many older Valley slabs have no vapor barrier beneath them, slope toward the door, or sit below the finished floor of the house. In the conversion we describe in why ADU quotes vary so much, the slab “did not have a proper moisture barrier below it,” and correcting that meant additional preparation, materials, labor and concrete work before any framing started.

    Sewer and plumbing

    A garage has no drain, and a kitchen and bathroom need one. On an attached garage the tie-in is short; on a detached garage it can mean trenching across the yard, which is why our ADU cost guide notes that detached conversions typically cost more than attached ones. The lateral itself is the bigger risk: in the quote-variation post a camera inspection found “root intrusion and bellying,” and a section of sewer had to be replaced before the ADU could connect; in our ADU cost guide a cracked clay sewer line cost approximately $14,000 to reroute. We camera the lateral before we price the plumbing, which is performed by licensed plumbers and scheduled and supervised by us as your general contractor; see our plumbing page.

    The electrical panel

    Most 1950s to 1970s Valley houses still run on a 100-amp panel that is already at capacity. Add an electric range, a heat pump and a subpanel for the ADU and the main service has to grow to 200 amps. In our ADU cost guide that upgrade ran $6,000 to $8,000 and added around three weeks of delay for permitting, inspections and utility coordination. It is performed by licensed electricians and scheduled and supervised by us; our electrical page covers the panel and circuit work.

    Door opening, insulation, windows and fire separation

    The garage door span has to be framed in as a real wall with a header, sheathing and stucco that matches the house. Walls, roof and often the floor need insulation to the residential Title 24 standard, a bedroom needs an emergency escape window, and the unit needs light and ventilation openings a garage does not have. On an attached garage, the wall and any ceiling shared with the house must meet the code’s separation requirements between dwelling units, usually a rated assembly and a self-closing door. A quote that says “insulate and drywall” with no line for these is not describing a legal ADU.

    Kitchen, bathroom and finishes

    This is where most of the money goes and where most of the movement happens after signing. In the $180,000 to $265,000 project in our ADU cost guide, the homeowner added approximately $30,000 in finish upgrades once framing was done: a better tile package, solid-surface counters instead of laminate, better cabinetry and upgraded HVAC. That is why we recommend a 15 to 20 percent contingency on top of any base bid, and why you should ask what allowance a quote carries for cabinets, tile, fixtures and appliances.

    The ADU rules that shape a garage conversion budget

    California’s ADU statute now lives in Government Code sections 66310 to 66342. We verified each rule below against the code and the state’s guidance; the sources are listed at the end.

    You do not have to replace the parking

    When a garage, carport or covered parking structure is converted to an ADU, the local agency “shall not require that those offstreet parking spaces be replaced” (Government Code 66314(d)(11)). LADBS puts it plainly: “If you remove covered parking to build an ADU, you don’t need to replace it.” That removes what used to be the biggest hidden cost of a conversion, a new carport or driveway pad.

    Setbacks do not apply inside the existing footprint

    No setback is required for an existing accessory structure converted to an ADU (Government Code 66314(d)(7)). Under the state-exemption category for conversions, the unit must be within the existing space of the structure with side and rear setbacks “sufficient for fire and safety,” and may add up to 150 square feet for ingress and egress (Government Code 66323(a)(1)). A garage a foot off the rear property line can become an ADU where a new building could not, as long as fire separation is handled in the wall assembly. The four-foot setback is for new detached units. Our ADU rules calculator walks through what applies to your lot.

    Fire sprinklers follow the main house

    ADUs “shall not be required to provide fire sprinklers if they are not required for the primary residence” (Government Code 66314(d)(12); the same language appears in section 66323). Most existing single-family homes in Los Angeles have no sprinklers, so most garage conversions do not need them. If the main house is sprinklered, the ADU will be too.

    The City’s standard plans are for new detached units

    The LADBS ADU Standard Plan Program pre-approves complete designs, from studios of about 200 square feet to three-bedroom units of 1,200 square feet, in one- and two-story detached configurations. A conversion starts from the garage you already have, so it does not use a standard plan and goes through regular plan check with its own drawings. Our guide to ADU standard plans in Los Angeles explains when the catalogue helps and when a custom design is faster.

    Impact fees, utility connections and the 60-day clock

    An ADU of 750 square feet or less is exempt from local impact fees. For an ADU converted from existing space, the city and the utility cannot require a new or separate utility connection, or a connection fee or capacity charge, unless the ADU is built with a new single-family home (Government Code 66324); a separate electric meter for a rental is your choice, not a requirement. Once a complete application is filed, the agency must approve or deny it within 60 days or it “shall be deemed approved,” and a denial must list what is deficient (Government Code 66317). The word that matters is complete: a submittal missing Title 24 forms or a site plan does not start the clock.

    How long does a garage conversion take?

    Our published guidance for ADUs is six months to a year, and our garage conversion service page says most projects run several months from planning through completion. A conversion sits at the shorter end because there is no foundation or framing phase. The stage durations below are our working estimates, not published figures.

    Stage Typical time
    Site walk, sewer camera, panel check, design and written proposal Four to eight weeks
    Plan check (City of Los Angeles through LADBS, or the local building division) Up to 60 days from a complete application under state law
    Electrical service upgrade, if needed About three weeks, often overlapping plan check
    Construction: demolition, slab work, framing, rough trades, inspections, insulation, drywall, kitchen and bath, finishes Three to five months
    Final inspections and certificate of occupancy One to two weeks

    The biggest schedule risks are what the camera finds in the sewer and what the utility says about the panel. Both are cheaper to learn before the contract than after demolition.

    A real garage conversion that rose 40 percent

    In why ADU quotes vary so much between contractors, we describe a homeowner converting a detached two-car garage, roughly 400 square feet, into a one-bedroom ADU with a kitchen, bathroom, bedroom and laundry area. The original estimate was $85,000 to $95,000. Three discoveries moved it to about $130,000, an increase of roughly 40 percent: the slab had no proper moisture barrier and needed preparation and concrete work; the home’s 100-amp panel was already insufficient and had to be upgraded to 200 amps; and a camera inspection found root intrusion and bellying in the sewer, so a section had to be replaced before the new fixtures could connect. Nothing on that list was a luxury. Each was a condition the garage already had.

    The $180,000 project in our ADU cost guide that finished at $265,000 was a new detached unit replacing an old garage, not a conversion, but two of its three surprises, the $14,000 clay sewer reroute and the $6,000 to $8,000 panel upgrade, are exactly the ones a garage conversion faces. That is why we check the lateral and the panel on every site walk.

    How to compare garage conversion quotes

    Ask every bidder for the same six items in writing. The lowest quote has usually left two or three of them out.

    1. Slab: what was assumed about the existing slab and moisture barrier, and what happens if it fails inspection.
    2. Sewer: whether a camera inspection was done, and whether lateral repair or trenching is included or excluded.
    3. Electrical: whether a 200-amp service upgrade is included, excluded or a change order, and who coordinates the utility.
    4. Allowances: the dollar amount carried for cabinets, counters, tile, plumbing fixtures and appliances.
    5. Envelope and code: Title 24 insulation, the framed-in door opening with matching stucco, the egress window, and fire separation on an attached garage.
    6. Permits: who pulls them, whether fees are included, and whether the price assumes a standard plan that does not apply to a conversion.

    Our ADU cost guide explains when a quote is simply too cheap and what a legitimate proposal should include. Read more on the garage conversion service page, or compare the route against a new unit on our ADU page.

    Where we build garage conversions

    We convert garages from our Van Nuys office across the San Fernando Valley, where 1950s to 1970s ranch houses with attached two-car garages are the classic candidate and permits run through LADBS; the rest of Los Angeles County, where Burbank, Glendale, Pasadena and Long Beach run their own building divisions; Orange County, where HOA architectural review often runs alongside the city permit; Ventura County; and western Riverside County, where larger lots make detached garages more common. Every city applies the same state ADU law with its own plan-check process. See all the areas we serve on our service areas page.

    Garage conversion cost FAQs

    How much does a garage conversion cost in Los Angeles?

    A garage conversion ADU in Los Angeles typically costs $100,000 to $200,000, and most two-car garage conversions land between $98,000 and $150,000 including a kitchen, bathroom, insulation, electrical and plumbing. The top of the range is reached by detached garages that need utility trenching, sewer lateral repair, a 200-amp panel upgrade or upgraded finishes. These are typical Los Angeles budgeting ranges, not a quote.

    Is converting a garage cheaper than building a detached ADU?

    Yes, usually. A garage conversion in Los Angeles typically runs $100,000 to $200,000, while a detached new-construction ADU of 500 square feet runs $180,000 to $260,000 and larger units $230,000 to $550,000 depending on size. The conversion saves the foundation, framing, roof and the solar panels required on a new detached unit, but it still needs a full kitchen and bathroom, so it is never as cheap as finishing the garage as a room.

    Do I have to replace the parking if I convert my garage into an ADU?

    No. Under California Government Code section 66314, when a garage, carport or covered parking structure is converted to an ADU, the city cannot require the lost off-street parking spaces to be replaced. LADBS states the same rule for the City of Los Angeles. That removes what used to be the largest hidden cost of a garage conversion.

    Does a garage conversion ADU need fire sprinklers?

    A garage conversion ADU does not need fire sprinklers if sprinklers are not required for the main house, under Government Code sections 66314 and 66323. Most existing single-family homes in Los Angeles are not sprinklered, so most conversions are exempt. If the primary residence has a sprinkler system, the ADU will need one and it should be in the budget.

    Can I use the Los Angeles pre-approved ADU standard plans for a garage conversion?

    No. The LADBS ADU Standard Plan Program pre-approves complete designs for new detached units, from about 200 square foot studios to 1,200 square foot three-bedroom plans, and a garage conversion works within the structure you already have. A conversion goes through regular plan check with its own drawings, and under state law the agency must approve or deny a complete application within 60 days.

    How long does a garage conversion take in Los Angeles?

    A garage conversion ADU in Los Angeles usually finishes at the shorter end of our published six-month to one-year ADU timeline, because there is no foundation or framing phase. Plan check is capped at 60 days from a complete application under state law, and construction typically takes three to five months. The most common delays are a sewer lateral that needs repair and a 200-amp service upgrade, which added about three weeks on a project we have written about.

    Get a written garage conversion price for your house

    We will walk the garage, camera the sewer lateral, check the panel and the slab, and give you an itemized proposal that lists allowances, exclusions and the permit path for your city. The site visit and the estimate are free.
  • How Much Does a Room Addition Cost in Los Angeles?

    How Much Does a Room Addition Cost in Los Angeles?

    A room addition in Los Angeles typically costs $300 to $500 per square foot all-in for a ground-floor addition and $400 to $650 per square foot for a second story, which puts a 250 square foot bedroom at roughly $75,000 to $125,000 and a full second story at $350,000 to $650,000 or more. Green Design and Build is a licensed, bonded and insured general contractor (CSLB #1110975) based in Van Nuys, led by Dekel Sofer; we design, engineer, permit and build additions for homeowners across Los Angeles County, Orange County, Ventura County, western Riverside County and western San Bernardino County. The figures on this page are typical Los Angeles budgeting ranges, not a quote, and “all-in” means design, structural engineering, permits, construction and standard finishes.

    Our room additions service page covers zoning and how we build. This guide is about the money: what the number includes, what pushes it up, what the permit set costs, and how to read two quotes that are $80,000 apart.

    Room addition cost by type

    Every range below includes design, engineering, permits, construction and standard finishes for a home on a flat lot with a conventional foundation.

    Addition type Typical size Typical Los Angeles range
    Bedroom or home office, ground floor 200–350 sq ft $75,000–$150,000
    Primary suite with bathroom, ground floor 350–500 sq ft $130,000–$250,000
    Family room or kitchen expansion, ground floor 300–500 sq ft $110,000–$230,000
    Partial second story (one or two rooms over part of the house) 400–600 sq ft $200,000–$350,000
    Full second story 800–1,200 sq ft $350,000–$650,000+

    How we estimated these numbers

    The ranges on this page are budgeting estimates for Southern California, not a price list. They are drawn from Green Design and Build’s own written proposals and completed projects across Los Angeles, Orange, Ventura and western Riverside and San Bernardino counties, checked against current supplier and subcontractor pricing. A real project can come in lower or higher depending on the house, the scope and the finishes. Reviewed by Dekel Sofer, licensed general contractor (CSLB #1110975), September 2026. Publishers and journalists are welcome to cite these figures with a link to this page.

    The arithmetic is simple: a 400 square foot ground-floor addition at $300 to $500 per square foot is $120,000 to $200,000; a 500 square foot partial second story at $400 to $650 is $200,000 to $325,000; a 1,000 square foot full second story is $400,000 to $650,000. Where a project sits inside its range depends on whether it contains a bathroom or kitchen, what the existing structure and soil require, and the finish level. Our guide to what a Los Angeles general contractor costs puts general contractor pricing at $150 to $450 per square foot by project type; additions sit at the top of that range because every square foot involves foundation, framing, roof and exterior, where a remodel reuses the shell.

    Why a second story costs $400 to $650 per square foot

    The premium over a ground-floor addition, roughly $100 to $150 more per square foot, is not the upstairs rooms; it is what has to happen to the first floor and the roof to make them possible. The existing foundation and first-floor walls were sized for one story, so on most pre-1980 homes the engineer calls for new footings, posts, beams and shear walls threaded through finished rooms. The roof comes off and a new one goes on over the new floor. A stair takes floor space downstairs. A second story almost always needs its own HVAC zone and often a panel upgrade. And most families move out for the roof-off phase; that rent is not in the construction number, but it belongs in the budget. On a small Valley lot where a ground-floor addition would consume the backyard, the second story is still often the right answer, budgeted as a structural project first and a set of rooms second.

    What the all-in number includes, and what it does not

    The all-in ranges include drawings, engineering, the Title 24 report, plan check and permit fees, and every trade from foundation through paint, with electrical, plumbing and HVAC performed by licensed electricians, plumbers and HVAC contractors and scheduled and supervised by us as your general contractor. They do not include furniture, landscaping beyond what construction disturbed, work in rooms outside the addition, temporary housing, HOA fees, or the contingency. Our ADU cost guide recommends holding 15 to 20 percent of the accepted bid as a true contingency, and additions on pre-1980 homes deserve the same rule, because the tie-in opens walls, roofs and foundations nobody has seen in decades.

    Soft costs on a Los Angeles addition

    These third-party costs are inside the all-in ranges above, but they arrive before a shovel goes in and they surprise homeowners. We itemize each of them in the written estimate.

    Item When it applies
    Architectural drawings and structural engineering Every addition; second stories and hillside lots at the top
    Plan check, building permit and related city fees Every addition; fees scale with the permit valuation
    Geotechnical (soils) report Hillside lots, mapped hazard zones, and wherever the plan checker asks for one
    Title 24 energy compliance report Every addition

    What changes the price of a room addition

    When two bids for the same addition are far apart, one of them usually priced a different set of these.

    Bathrooms and kitchens inside the addition

    A wet room carries the cost of a bathroom remodel on top of the shell: drain and supply lines, a roof vent, waterproofing, tile and fixtures. A kitchen expansion with a relocated sink and new circuits costs more still.

    Foundation, soil and the structural tie-in

    A conventional footing on a flat lot is the baseline. Hillside lots in the Santa Monica Mountains, the Hollywood Hills and the Valley foothills usually need a geotechnical report and deeper footings, grade beams or caissons. LADBS requires geologic or soils reports under Los Angeles Building Code Sections 7006.2 and 1803 on sites in state-mapped liquefaction and landslide zones, Alquist-Priolo Earthquake Fault Zones and the city’s Preliminary Fault Rupture Study Areas, prepared by a state-licensed engineer or geologist and approved by the LADBS Grading Division. Expansive clay soils in parts of Santa Clarita and western Riverside County change footing design too. At the tie-in, opening the existing wall means a beam, posts and new footings, and on a pre-1980 house the engineer will often add shear panels, hold-downs and anchor bolts where the walls connect. Where the existing foundation has settled or cracked, the repair is part of the project.

    Roof, exterior and the cost of matching

    A new roof tied into a low-slope 1960s roofline, matching eave detail, and new stucco blended into old are what make an addition invisible from the street; we re-stucco the whole affected elevation rather than patching, because a patch line never disappears. If the existing roof is near the end of its life, re-roofing the whole house at the same time is often cheaper than tying new into old and returning in five years.

    Electrical panel and HVAC

    Many Valley ranch houses still run on a 100-amp panel, and a suite with a heat pump and new circuits is often what pushes it to a 200-amp upgrade, which our ADU guide puts at about $6,000 to $8,000 plus utility coordination time. A ground-floor addition can sometimes extend the existing HVAC system; a second story usually cannot.

    Fire zones, historic zones, HOA review and finish level

    In a Very High Fire Hazard Severity Zone (the hills above the Valley, Malibu, much of Santa Clarita and Ventura County), new work must meet Chapter 7A ignition-resistant requirements for siding, vents, eaves and glazing. In an HPOZ historic zone the addition goes through the Office of Historic Resources before LADBS, and in master-planned Orange County communities HOA review runs alongside the city permit. Standard finishes are in the ranges; wide-plank hardwood, slab countertops and a steam shower are not, and they are the most common reason a final number lands above the estimate.

    Permits and plan check for a room addition in Los Angeles

    Every room addition in Los Angeles needs a building permit, and unlike a re-roof or a same-size window replacement, an addition cannot use an LADBS Express Permit. LADBS states that building plans must be filed and approved through Building Plan Check before a permit is issued for any “addition to building,” and its Express Permit bulletin (the no-plan-check list) has no category for additions or new floor area. In practice that means a full drawing set with structural calculations and a Title 24 report, submission through ePlanLA or over the counter, one or more rounds of corrections, then plumbing, electrical and mechanical permits, staged inspections from foundation through final, and a Certificate of Occupancy. LADBS covers the City of Los Angeles, including Van Nuys, Sherman Oaks, Encino, Studio City, Woodland Hills, Northridge and North Hollywood; Burbank, Glendale, Pasadena, Santa Clarita, Long Beach, Torrance and every Orange County city run their own building divisions. The code baseline is the same everywhere; the fees, the queue and the correction culture are not.

    What your lot allows: setbacks and the 45 percent floor-area cap

    Zoning is a cost question because it decides whether the addition you want can exist. On a standard R1 lot in the City of Los Angeles, the Municipal Code requires a front yard of 20 percent of lot depth up to 20 feet (or the prevailing setback on the block), side yards of at least 5 feet for a house of up to two stories, and a rear yard of at least 15 feet. Under the Baseline Mansionization Ordinance, the residential floor area of all buildings on most R1 lots is capped at 45 percent of the lot area, and second-story walls must stay inside an encroachment plane that starts 20 feet above grade at the side setbacks, which pushes upper floors inward on narrow lots. A 7,500 square foot R1 lot therefore allows about 3,375 square feet: with a 1,900 square foot house, roughly 1,475 square feet is available before overlays; with a 3,000 square foot house, a 375 square foot bedroom is the ceiling. RS, RE, RA and hillside lots use different ratios. We run these numbers on the first site visit; our ADU rules calculator is a quick first check.

    How long does a room addition take?

    All addition projects run 9 to 14 months from the first design meeting to final inspection; on a second story, plan-check months are also months of rent.

    Phase (second-story addition) Typical time
    Design, structural engineering and Title 24 8–12 weeks
    Plan check and permits (LADBS or city) 2–4 months
    Construction 5–7 months
    Total, ground floor or second story 9–14 months

    These are typical Los Angeles budgeting estimates, not a price list or a quote. Your project can come in lower or higher depending on the house, the scope and the finishes; the only real number is a written proposal after a site visit.

    A ground-floor addition follows the same phases with shorter design and construction stretches. Plan check is the phase homeowners underestimate: HPOZ, hillside, coastal and HOA reviews sit in front of the building department, and each correction cycle adds weeks.

    A real example of what “hidden” costs look like

    We have not yet published a room addition project story, but the closest example on our site applies directly, because the same discoveries happen when an addition’s foundation goes in beside a 1950s house. In our ADU cost guide we describe a roughly 600 square foot detached unit the homeowner expected to cost about $180,000. Digging the foundation exposed the main house’s original clay sewer line under the new footprint, cracked and full of roots; rerouting it cost about $14,000. The 100-amp panel was full, and an electric range and heat pump forced a 200-amp upgrade at about $6,000 to $8,000 with about three weeks of utility delay. Then, walking through framed rooms, the owner upgraded tile, countertops, cabinets and HVAC, about $30,000 beyond the allowances. The unit finished at about $265,000. Two of those were conditions nobody could see and one was a decision made with better information, which is why the contingency is real money and why our proposals state every allowance before demolition.

    Room addition or ADU: which costs less?

    Per square foot, the two are close. Our published figures put a detached 500 square foot ADU at $180,000 to $260,000 and ADU construction at $300 to $450 per square foot all-in, against $300 to $500 for a ground-floor addition; the ADU number includes a kitchen, a bathroom and its own utility connections. The real difference is what each buys. An addition makes the house you live in bigger. An ADU is a separate unit that can be rented or house a parent, and it can go where an addition cannot: under California Government Code Section 66323, a detached ADU of up to 800 square feet with 4-foot side and rear setbacks must be approved even where the lot’s floor-area cap would block an addition of the same size. On a lot at its 45 percent limit, the ADU is the only new square footage available.

    How to compare room addition quotes

    Ask every bidder for the same six things in writing; the cheap quote usually stops being cheap somewhere in this list.

    1. Square footage. Conditioned area of the addition, plus any first-floor rooms reworked for a stair or a post.
    2. Design, engineering and permits. Included, excluded or an allowance, and who answers plan check corrections.
    3. Foundation and structure. The footing type assumed, whether a soils report is included, and whether seismic upgrades at the tie-in are in scope or “if required.”
    4. Systems. Whether a panel upgrade, a new HVAC zone and new plumbing runs are included.
    5. Exterior matching. Roof tie-in or whole-house re-roof, stucco to the full elevation or a patch, window brand and series.
    6. Allowances. The dollar amount assumed for flooring, tile, fixtures, cabinets and lighting, so an upgrade later is a known number.

    Green Design and Build puts all six in the proposal, with a fixed price for the defined scope and named allowances for selections you have not made yet. Our guide on how to hire a general contractor without getting scammed shows what a $28,000 kitchen became when none of this was written down.

    Where we build room additions

    Most of our additions are in the San Fernando Valley and the rest of Los Angeles County, where single-story post-war ranch houses leave room for a primary suite off the back or a second story over the garage wing, and where LADBS plan check and the floor-area cap shape most projects. In Orange County, city building divisions and HOA architectural review run side by side. Ventura County adds fire-zone construction on hillside and canyon lots, and western Riverside County adds expansive soils and tract-home HOAs in Corona, Eastvale and Murrieta. Every city and county we serve is listed on our service areas page.

    Room addition cost FAQs

    How much does a room addition cost per square foot in Los Angeles?

    A room addition in Los Angeles typically costs $300 to $500 per square foot all-in for a ground-floor addition and $400 to $650 per square foot for a second story, including design, engineering, permits, construction and standard finishes. A dry bedroom on a flat lot sits near the bottom; a suite with a bathroom, a hillside foundation or a second story sits near the top. These are typical Los Angeles budgeting ranges, not a quote.

    How much does a second-story addition cost in Los Angeles?

    A second-story addition in Los Angeles typically costs $400 to $650 per square foot, or $200,000 to $350,000 for a 400 to 600 square foot partial second story and $350,000 to $650,000 or more for a full 800 to 1,200 square foot second story. The premium over a ground-floor addition pays for structural work through the first floor, removing and rebuilding the roof, the stair and a separate HVAC zone, plus several months of temporary housing for most families.

    How much does it cost to add a primary bedroom and bathroom in Los Angeles?

    Adding a ground-floor primary suite with a bathroom in Los Angeles typically costs $130,000 to $250,000 for 350 to 500 square feet. The bathroom is what separates a suite from a plain bedroom of the same size: drain and supply lines, a roof vent, waterproofing, tile and fixtures add the cost of a bathroom remodel on top of the shell. Finish level and whether the panel needs a 200-amp upgrade move the number within the range.

    Is a room addition or an ADU cheaper in Los Angeles?

    Per square foot they are close: a ground-floor room addition in Los Angeles runs $300 to $500 per square foot and ADU construction $300 to $450 per square foot, with a detached 500 square foot ADU at $180,000 to $260,000. The ADU price includes a kitchen and its own utility connections; the addition price assumes the space joins a house that already has them. On a lot at its floor-area limit, a detached ADU of up to 800 square feet is usually the only new square footage allowed.

    How much contingency should I budget for a room addition?

    Hold 15 to 20 percent of the accepted bid as a contingency for a room addition in Los Angeles, especially on a pre-1980 home. The tie-in opens walls, roof framing and foundation that have not been seen since the house was built; the common surprises are deteriorated sewer lines, a full 100-amp panel, undersized footings and dry rot at the roof edge. The contingency is separate from finish upgrades you choose during the build.

    What does the permit for a room addition cost in Los Angeles?

    Plan check, building permit and related city fees for a room addition in Los Angeles scale with the permit valuation and come on top of the drawings, structural engineering and the Title 24 report; we itemize all of them in the written estimate. Additions cannot use an LADBS Express Permit; they go through full Building Plan Check with staged inspections and a Certificate of Occupancy at the end. They are included in the all-in figures on this page.

    Get a real number for your addition, not a per-square-foot guess

    Tell us what you need the space for, and we will check setbacks, floor-area allowance, the foundation and the panel on a free site visit, then give you a written estimate that lists design, engineering, permits, structure, systems and named allowances line by line. If an ADU turns out to be the cheaper way to get the space, we will say so.

  • How Much Does a Kitchen Remodel Cost in Los Angeles?

    How Much Does a Kitchen Remodel Cost in Los Angeles?

    A kitchen remodel in Los Angeles typically costs $25,000 to $100,000 or more: roughly $25,000 to $40,000 for a cosmetic refresh in the existing layout, $40,000 to $70,000 for a mid-range remodel that replaces everything but keeps the layout, and $70,000 to $100,000 or more when walls, plumbing and electrical move. Green Design and Build is a licensed general contractor (CSLB #1110975) based in Van Nuys that designs, permits and builds kitchen remodels for homeowners across Los Angeles County, Orange County, Ventura County, western Riverside County and western San Bernardino County. The figures on this page are typical Los Angeles budgeting ranges, not a quote; the number for your kitchen depends on the house, the scope and the finishes you choose.

    We are led by Dekel Sofer; the company has completed hundreds of projects and holds a 4.7-star rating across 146 reviews on Yelp.

    Kitchen remodel cost by scope

    Scope drives the price more than any single finish does. The table groups the three kinds of kitchen remodel we see most often in Los Angeles, assuming a typical single-family kitchen of roughly 150 to 250 square feet, permits where required, and a licensed general contractor managing the trades.

    Scope Typical Los Angeles range What is usually included
    Cosmetic refresh, same layout $25,000 to $40,000 Stock or semi-custom cabinets in the existing footprint, or refacing; new countertops and backsplash; sink and faucet; paint; new lighting in existing locations; appliances swapped in place. Nothing moves.
    Mid-range remodel, same layout $40,000 to $70,000 Semi-custom or custom cabinets; quartz or stone countertops; new flooring; recessed and under-cabinet lighting; counter electrical brought to current code; new plumbing fixtures and supply lines; range hood ducted outside. Layout stays.
    Full remodel with layout, plumbing and electrical changes $70,000 to $100,000 or more Everything above plus removing or opening a wall (often with a beam and engineering), relocating the sink, range or dishwasher, new drain and water lines, new circuits or a panel upgrade, an island with power, custom cabinetry built to the new plan.

    How we estimated these numbers

    The ranges on this page are budgeting estimates for Southern California, not a price list. They are drawn from Green Design and Build’s own written proposals and completed projects across Los Angeles, Orange, Ventura and western Riverside and San Bernardino counties, checked against current supplier and subcontractor pricing. A real project can come in lower or higher depending on the house, the scope and the finishes. Reviewed by Dekel Sofer, licensed general contractor (CSLB #1110975), September 2026. Publishers and journalists are welcome to cite these figures with a link to this page.

    The bands overlap on purpose: a same-layout kitchen with custom cabinets, a 48-inch range and slab marble can cost more than a modest layout change with semi-custom boxes. And the floor of the first tier is real; once a permitted job has a crew, a dumpster, cabinets, counters and an electrician in it, there is little room under $25,000 without leaving something out. Our guide to what a Los Angeles general contractor costs puts full kitchen remodels in the same $30,000 to $100,000-plus band.

    What changes the price of a kitchen remodel

    Two kitchens with the same square footage can land $40,000 apart, and when they do it is almost always one of the five items below.

    Whether the layout changes

    Keeping the sink, range and refrigerator where they are keeps the drain, the gas line and most of the electrical where they are, and that is the biggest cost lever you control. Moving the sink to an island on a slab-foundation house means cutting the slab for a new drain and vent; on a raised foundation it is easier, but it is still new plumbing that is permitted and inspected. Moving a range means a new gas line or a 240-volt circuit for induction.

    Removing a wall

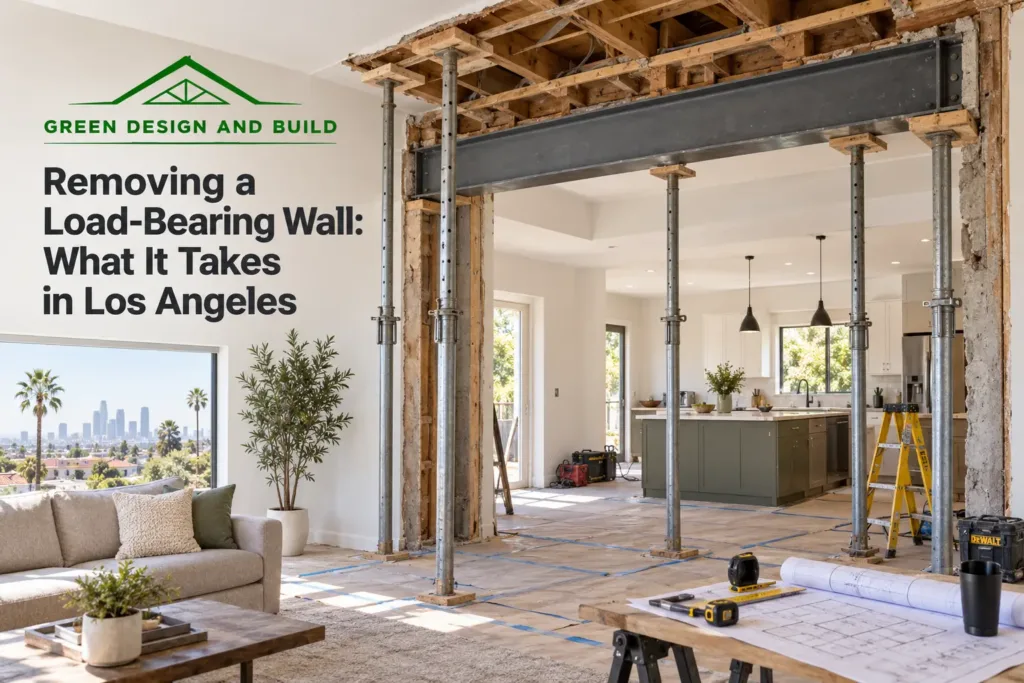
    Opening the wall between the kitchen and the dining room is one of the most requested remodels we see in 1950s to 1970s San Fernando Valley ranch houses, and it is the change that turns a mid-range kitchen into a full remodel. If the wall is load-bearing, the job needs a structural engineer, a beam sized for the span, posts and footings to carry it, and a plan-check permit rather than an express permit; our guide to removing a load-bearing wall walks through how that is determined and what it involves. If it is not bearing, it is a day of demolition and some drywall. You cannot tell which you have from the paint side, so we do not price the wall until we have looked in the attic and at the framing.

    Cabinets and finishes

    Cabinets are usually the largest single line in a kitchen and the widest range; stock, semi-custom and full custom cabinetry can differ by tens of thousands of dollars in the same room. Custom cabinets take about three weeks to manufacture once the drawings are approved, so they also set the schedule. Spend on box construction, drawer slides and hinges, which cannot be changed later; save on door hardware and pendant lights, which can. Countertops are the other swing item: the choice between quartz, granite, marble or porcelain slab can move a quote $5,000 to $15,000 inside the same tier, which is why every selection is made before demolition, not during it.

    The condition of the house

    Pre-1980 houses hide the costs that were never in the first bid: a 100-amp panel with no room for new circuits, galvanized supply lines, cast-iron drains, a slab that is not level, and framing notched by three previous owners. We recommend holding 15 to 20 percent of the budget as a contingency on an older home, meaning money that stays unspent until the walls are open. If the panel does need to go from 100 amps to 200 amps, the ADU cost guide on this site puts that upgrade at $6,000 to $8,000, the utility coordination can add weeks, and our electrical panel upgrade cost guide explains when a 200-amp service is actually needed.

    Permits, engineering and who pulls them

    A same-layout kitchen can go through the express permit system in the City of Los Angeles; a kitchen that moves walls or runs new plumbing and electrical inside them needs a full permit with plans, and a beam needs engineering. A quote that leaves out the permit, the engineering and the inspections is not cheaper; it has moved the cost to later, and sometimes onto you.

    Do you need a permit to remodel a kitchen in Los Angeles?

    In the City of Los Angeles, which includes Van Nuys, Sherman Oaks, Encino, Studio City, Woodland Hills, Northridge and North Hollywood, permits are issued by LADBS. Painting, refacing cabinets and setting new countertops on existing cabinets do not by themselves trigger a building permit; most real kitchen remodels do, because they touch plumbing, electrical or a wall.

    LADBS lists “remodeling kitchens or bathrooms” among the projects eligible for its Express Permit (e-permit) system. The kitchen e-permit covers repairing or replacing cabinets, flooring, wall finishes, tile, counters and plumbing and electrical fixtures only; it does not allow changes to walls or openings, or new plumbing or electrical run into an existing wall. Anything beyond that, which means most layout changes, new circuits, a relocated sink or a removed wall, needs permits issued through an LADBS Construction Services Center with plans and usually a plan check. An e-permit kitchen normally gets one inspection at the end; a full remodel gets rough plumbing, rough electrical, framing and drywall inspections before the final.

    Three code items catch homeowners by surprise on a permitted kitchen anywhere in Southern California, because they come from the state codes every city adopts:

    • Electrical at the counters. The California Electrical Code requires at least two 20-amp small-appliance circuits for the counters, receptacles spaced so no point along the counter is more than 24 inches from an outlet, and GFCI protection for every countertop receptacle and any receptacle within six feet of the sink. Under the current code the dishwasher circuit needs GFCI protection too, and major appliances get dedicated circuits. A 1960s kitchen with two ungrounded outlets meets none of this, and once the permit is open the counters are brought up to code.
    • Title 24 lighting. Under the 2022 California Energy Code, kitchen lighting that is added or altered must be high-efficacy, which in practice means JA8-certified LED fixtures on a dimmer or vacancy sensor, with under-cabinet lighting switched separately from the ceiling lights. Only the work covered by the permit has to comply; the rest of the house is not affected.
    • Ventilation. The energy code, through ASHRAE 62.2, expects a kitchen exhaust fan vented to the outdoors, with a 100 cfm minimum for a range hood. If the existing hood recirculates into a cabinet, part of the job is a duct through the roof or an exterior wall.

    Two more items for older houses. If the house was built before 1978, a paid contractor disturbing painted surfaces must be EPA Lead-Safe certified and follow lead-safe work practices under the federal Renovation, Repair and Painting rule, which covers most of the Valley’s housing stock. And before demolition on a pre-1980 kitchen we test vinyl floor tile, mastic and textured ceilings for asbestos, because abatement is a separate, regulated line item and it is cheaper to know before the crew starts.

    How long does a kitchen remodel take?

    Stage Typical time
    Site visit, measurements, written estimate About a week
    Design, 3D rendering and all selections approved Three to six weeks
    Cabinet manufacturing (custom) About three weeks, ordered as soon as drawings are approved
    Permit: e-permit for a same-layout remodel About one week, sometimes same day
    Permit: plan check for structural or new plumbing and electrical Two to six weeks
    Construction: same-layout remodel Four to eight weeks
    Construction: layout or structural changes Eight to twelve weeks

    These are typical Los Angeles budgeting estimates, not a price list or a quote. Your project can come in lower or higher depending on the house, the scope and the finishes; the only real number is a written proposal after a site visit.

    From the first meeting to a working kitchen, most same-layout remodels in Los Angeles run about three months and a full remodel with a wall removal runs four to six months, with design and permitting taking about as long as the build. Two things protect that schedule: we produce a 3D rendering and get every selection approved before demolition, so the cabinets are in production when the old kitchen comes out, and we build the inspection days into the schedule rather than around them.

    A real kitchen remodel that changed how we prepare clients

    In what we wish every homeowner knew before remodeling a kitchen, we describe a family in a house built around 1960 who came to us with a clear plan: open the kitchen to the dining room, new cabinets, counters and appliances. The budget was built around what they could see. Demolition showed three things they could not: an original electrical panel that could not safely carry the planned appliances, original cast-iron drains that had to be replaced, and a wall that turned out to be load-bearing, which meant a structural engineer, a beam and a permit revision. Those discoveries added roughly three weeks and costs the family had not budgeted. Their words afterward: “I wish I had understood how much the unseen stuff would drive the budget and the timeline.” That project is why we check the attic and crawlspace of every pre-1980 kitchen before we write a number, and why we tell homeowners to keep the 15 to 20 percent contingency in reserve rather than spending it on upgrades on day one.

    The opposite lesson comes from a kitchen that was not ours. In our guide to hiring a general contractor without getting scammed, a homeowner collected three bids for a complete kitchen. Two came in near $45,000. The third was $28,000, on a one-page contract that read, in full, “Remodel kitchen, cabinets, countertops, flooring, electrical — $28,000,” with 60 percent, $16,800, due up front. Demolition happened fast; then the crew showed up one day in five. Two verbal change orders followed, $4,000 for a panel upgrade and $3,500 for water-damaged subfloor. At roughly 60 percent complete, with cabinet boxes and no doors, no countertops ordered and electrical never inspected, the contractor disappeared. The homeowner had paid about $24,000, no electrical permit had been pulled, and the licence number on the contract was an expired plumbing licence, not a general building licence. She paid a second contractor to finish, plus permits, inspections and electrical corrections. The $28,000 kitchen was a $45,000 kitchen with the scope, the permit and the contingency removed from the paper.

    How to compare kitchen remodel quotes

    Get every bid to answer the same six questions in writing. Where the answers differ, that is where the price difference lives.

    1. Cabinets. Brand or shop, box construction (plywood or particleboard), door style, finish, and whether drawings and installation are included.
    2. Countertops and tile. Material, slab or prefabricated, edge profile, and the allowance if the slab has not been picked.
    3. Plumbing and electrical. Whether the sink, range or dishwasher move; the number of new circuits; whether the panel is included; whether the counters are brought to current GFCI and circuit requirements. On our projects this work is performed by licensed plumbers and electricians and scheduled and supervised by us as your general contractor.
    4. Structural. If a wall comes out, whether engineering, the beam, posts and footings are in the price or “to be determined.”
    5. Permits and inspections. Who pulls the permit, whether fees and plan check are included, and how many inspections are planned.
    6. Payment terms and change orders. Under California law the down payment on a home improvement contract cannot exceed $1,000 or 10 percent of the contract price, whichever is less, and every change in scope or price should be a signed written change order before the work happens.

    A quote with a single line and a big deposit is not a lower price; it is a missing scope. Read more on the kitchen remodeling service page, or, if the kitchen is part of a larger plan, see room additions and whole-home renovation.

    Where we build kitchens

    We remodel kitchens from our Van Nuys office across the San Fernando Valley, the rest of Los Angeles County, Orange County, Ventura County and western Riverside County. The work is the same; the paperwork is not. Inside the City of Los Angeles, LADBS issues the permit, and in an HPOZ historic district exterior changes such as a new vent or window go through the Office of Historic Resources first. Burbank, Glendale, Pasadena, Santa Clarita, Long Beach, Torrance and every Orange County city run their own building divisions; HOA review in Orange County master-planned communities rarely touches an interior kitchen unless a window or exterior vent changes. Ventura County Building and Safety covers unincorporated areas, with Thousand Oaks, Simi Valley, Oxnard, Ventura and Camarillo issuing their own permits, and Corona, Riverside, Murrieta and Eastvale each have their own building department. The Valley’s 1950s to 1970s ranch houses almost always need electrical and plumbing brought up to code, while newer Orange County and Riverside tracts usually have the panel capacity and copper plumbing already. See all of our service areas.

    Kitchen remodel cost FAQs

    How much does a kitchen remodel cost in Los Angeles?

    A kitchen remodel in Los Angeles typically costs $25,000 to $100,000 or more. A cosmetic refresh in the existing layout runs about $25,000 to $40,000, a mid-range remodel that replaces cabinets, counters, flooring and lighting without moving anything runs $40,000 to $70,000, and a full remodel with layout, plumbing and electrical changes runs $70,000 to $100,000 or more. These are typical Los Angeles budgeting ranges, not a quote.

    What is the cheapest way to remodel a kitchen?

    The cheapest kitchen remodel keeps the sink, range and refrigerator where they are, because that keeps the drain, gas line and most of the electrical in place. Refacing or replacing cabinets in the same footprint, new countertops, a tile backsplash and new lighting in the existing locations usually fits the $25,000 to $40,000 tier in Los Angeles. Moving plumbing or removing a wall is what pushes a kitchen into the higher tiers.

    Do I need a permit to remodel my kitchen in Los Angeles?

    Usually, yes. In the City of Los Angeles, LADBS offers an express e-permit for a kitchen remodel that only replaces cabinets, flooring, finishes, counters and plumbing and electrical fixtures in place. If the remodel changes walls or openings, or runs new plumbing or electrical into the walls, it needs full permits through an LADBS Construction Services Center, and a removed load-bearing wall needs engineering. Other cities follow the same state codes with their own permit processes.

    How long does a kitchen remodel take?

    A same-layout kitchen remodel in Los Angeles usually takes four to eight weeks of construction, and a remodel with layout or structural changes takes eight to twelve weeks. Add three to six weeks for design and selections and one to six weeks for permits, so most same-layout kitchens run about three months from the first meeting and full remodels four to six months. Custom cabinets take about three weeks to manufacture, so we order them before demolition.

    How much does it cost to remove a wall between the kitchen and dining room?

    Removing the wall between the kitchen and dining room is what moves a kitchen from the mid-range tier into the $70,000 to $100,000-plus full remodel tier in Los Angeles, because a load-bearing wall needs a structural engineer, a beam, posts and footings, and a plan-check permit. If the wall is not bearing the cost is much lower, but that cannot be confirmed from the finished side, so we inspect the attic and framing before pricing it.

    How much should I set aside for surprises in an older home?

    For a kitchen in a home built before 1980, keep 15 to 20 percent of the budget as a contingency that stays unspent until the walls are open. The common surprises in Los Angeles are an undersized electrical panel, cast-iron or galvanized plumbing, an out-of-level slab and a wall that turns out to be load-bearing. A 100-amp to 200-amp panel upgrade alone typically runs $6,000 to $8,000 and can add weeks of utility coordination.

    Get a written kitchen remodel price for your house

    We will measure the kitchen, look at the panel, the plumbing and the framing before we write a number, and give you an itemized proposal that lists the cabinets, counters, electrical, plumbing, structural work and permits line by line. The site visit and the estimate are free.
  • How Much Does a Patio Cover Cost in Los Angeles?

    How Much Does a Patio Cover Cost in Los Angeles?

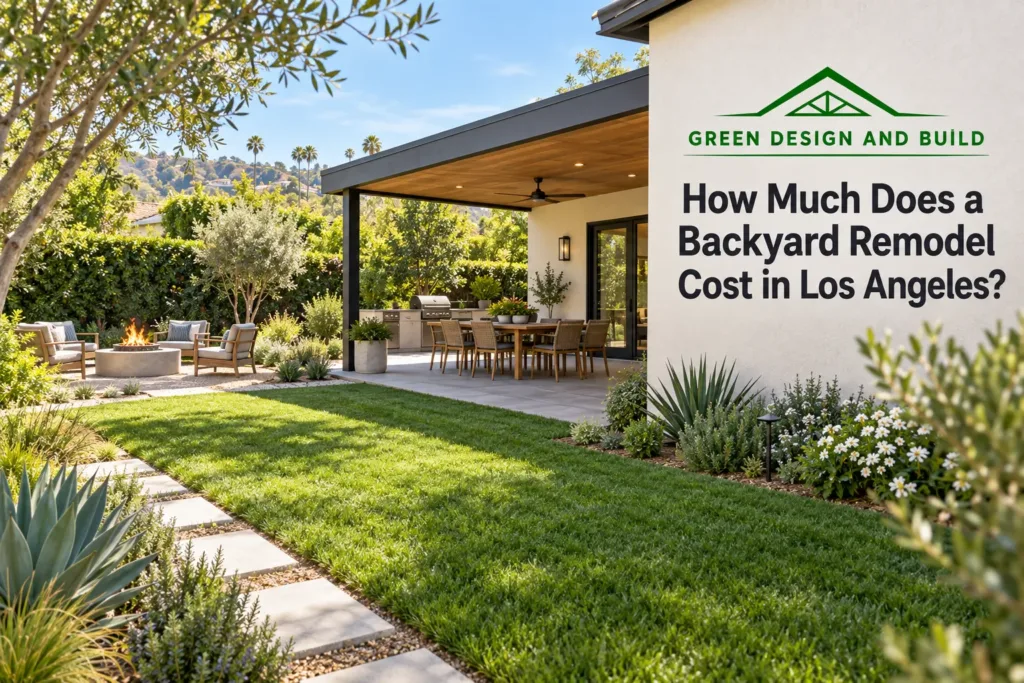
    A patio cover in Los Angeles typically costs $25 to $75 per square foot installed, which puts a common 12 by 20 foot cover at roughly $6,000 to $18,000 depending on the material, whether it is attached to the house or freestanding, and whether it needs a permit, engineering and electrical. Green Design and Build is a licensed general contractor (CSLB #1110975) based in Van Nuys that designs, permits and builds patio covers for homeowners across Los Angeles County, Orange County, Ventura County, western Riverside County and western San Bernardino County. The figures on this page are typical Los Angeles budgeting ranges, not a quote; the number for your yard depends on the site and the product you choose. A patio cover is usually one part of a larger project; our backyard remodel cost guide prices the paving, fencing, electrical and drainage that normally go with it.

    Patio cover cost by material

    The material is the biggest single driver of price. The table shows installed budgeting ranges for a standard rectangular cover on an existing concrete patio, including posts, beams, roof panels and basic attachment to the house. It excludes permits, engineering, electrical, footings for freestanding covers and any new concrete.

    Material Installed cost per sq ft 10 x 12 (120 sq ft) 12 x 20 (240 sq ft) 14 x 24 (336 sq ft)
    Alumawood or aluminum lattice (open, filtered shade) $25 to $45 $3,000 to $5,400 $6,000 to $10,800 $8,400 to $15,100
    Alumawood solid (flat pan or W-pan, full shade) $30 to $55 $3,600 to $6,600 $7,200 to $13,200 $10,100 to $18,500
    Insulated aluminum (3-inch foam-core panel) $45 to $75 $5,400 to $9,000 $10,800 to $18,000 $15,100 to $25,200
    Wood (Douglas fir or redwood, solid or lattice) $40 to $80 $4,800 to $9,600 $9,600 to $19,200 $13,400 to $26,900
    Steel (custom, long spans) $60 to $110 $7,200 to $13,200 $14,400 to $26,400 $20,200 to $37,000

    Two notes on the table. Small covers rarely hit the bottom of the per-square-foot math, because a crew, a delivery and a permit cost about the same at 120 or 240 square feet; budget a floor of about $4,000 to $5,000 for anything installed and permitted. And the ranges overlap on purpose: a solid Alumawood cover with a fan and lights can cost more than a bare insulated one.

    Alumawood patio cover cost

    Alumawood is embossed aluminum that reads as painted wood from a few feet away, and it is what we recommend most often across Los Angeles. It does not rot, warp or feed termites, never needs staining, and takes the afternoon sun on a west-facing Valley yard without fading badly. An Alumawood patio cover typically costs $25 to $45 per square foot for lattice and $30 to $55 for a solid roof, installed. Lattice gives filtered shade; solid gives full shade and rain protection and can carry recessed lights and a ceiling fan.

    Insulated patio cover cost

    An insulated patio cover uses a three-inch foam-core aluminum panel, usually rated around R-40, and it is the material to choose if you want an outdoor room rather than a shade structure. It stops radiant heat far better than a single-skin pan, gives a finished ceiling, and carries fans, lights, speakers and heaters inside the panel. An insulated patio cover typically costs $45 to $75 per square foot installed, so a 12 by 20 cover in Los Angeles lands around $10,800 to $18,000 before electrical.

    Wood patio cover cost

    A wood patio cover in Los Angeles typically costs $40 to $80 per square foot installed, Douglas fir at the lower end, redwood and heavy custom beams at the upper end. Wood is the right choice when the house has real architectural character or the design calls for decorative rafter tails and oversized beams. The trade-off is maintenance: sealing or repainting every few years, and in a Valley summer an unsealed beam will check and grey inside two seasons. Our patio cover materials guide covers the pros and cons of each material in more depth.

    Steel patio cover cost

    Steel is the least common choice for a standard backyard and the most expensive, typically $60 to $110 per square foot. It earns its place for a long clear span with no mid posts, a cantilever, or a very thin modern roof profile. Steel needs engineering, a rust-protective finish and a welding crew; most homeowners who ask about steel end up with insulated aluminum once they see the numbers.

    What changes the price of a patio cover

    Beyond the material, six things move a patio cover quote up or down. When two bids for the same yard are far apart, one of them usually left some of these out.

    Attached or freestanding

    An attached cover fastens to the house with a ledger board bolted through the stucco into the framing and uses the house for half its support. A freestanding cover needs four or more posts, each on its own concrete footing, plus a stiffer frame. Budget roughly $1,500 to $4,000 more for freestanding than for the same cover attached. It is still the right call when the house has a low eave line, a second-storey deck or a roof edge that cannot take a ledger.

    Footings and the existing slab

    On an existing patio slab, the posts are normally anchored to new footings cut through the slab, not to the slab itself, because a four-inch patio slab is not designed to carry point loads or resist wind uplift. Expect two to four footings on an attached cover and four to six on a freestanding one. If there is no concrete, a new patio slab is priced separately, in the same range as other residential flatwork, roughly $8 to $18 per square foot. Pavers are an alternative surface; see our paver installation page.

    Permits, plan check and engineering in Los Angeles

    In the City of Los Angeles, which includes Van Nuys, Sherman Oaks, Encino, Studio City, Woodland Hills, Northridge and North Hollywood, permits are issued by LADBS. Permit and plan-check fees for a residential patio cover typically run $400 to $1,500. Manufactured aluminum systems usually come with an ICC evaluation report and pre-engineered span tables, which is why they can often be permitted over the counter or through an express process. Wood and steel covers, freestanding covers, hillside lots and anything outside the manufacturer’s span tables generally need a stamped engineering letter or drawings, typically $800 to $2,500. Burbank, Glendale, Pasadena, Santa Clarita, Long Beach, Torrance and every Orange County city run their own building divisions; unincorporated areas go through LA County, Ventura County or Riverside County Building and Safety.

    Electrical for fans, lights and heaters

    A ceiling fan, recessed lights, an outlet for a TV or an infrared heater all need a circuit run from the panel to the cover, conduit through the beam or panel, and a separate electrical permit and inspection. On our projects this work is performed by our licensed specialty-trade partners under our management. Budget roughly $1,000 to $3,500 depending on distance from the panel and the number of fixtures. If the house still has a 100-amp panel from the 1960s, common in Valley ranch houses, adding a patio circuit may be the moment it needs an upgrade; that is a separate line item and we tell you before you sign.

    Wind, seismic and fire zones

    Patio covers are designed for wind uplift and seismic loads, which is why post embedment, hardware and beam sizing matter more than the roof panel. In the hills above the Valley, Malibu, the Santa Clarita Valley and much of Ventura County, lots fall inside Very High Fire Hazard Severity Zones, where attached covers are treated as part of the house and must meet Chapter 7A ignition-resistant requirements. That usually rules out untreated wood and adds cost.

    HOA and CC&R review

    In master-planned Orange County communities and newer tracts in Santa Clarita, Eastvale and Corona, HOA architectural review runs alongside the city permit. Most HOAs restrict height, colour and street visibility; some forbid lattice. Approval costs little but can add several weeks if the committee meets monthly.

    When is a permit required for a patio cover?

    Generally, a building permit is required in the City of Los Angeles for any patio cover attached to the house, and for a freestanding cover larger than 120 square feet. A detached, one-storey accessory structure of 120 square feet or less may fall under the building-permit exemption in the California Residential Code; confirm with the LADBS counter that it applies to your cover before you rely on it, because three cautions apply: zoning setback and lot-coverage rules still apply even when a building permit does not; the exemption is for the structure only, so any electrical still needs its own permit; and 120 square feet is smaller than most people picture, roughly 10 by 12 feet. Other cities follow the same state code baseline and add their own rules, so confirm with the local building division before assuming a small cover is exempt.

    Skipping the permit on an attached cover is a bad trade. An unpermitted structure shows up in a sale or a refinance appraisal, it can void a homeowner’s insurance claim if it fails in a windstorm, and LADBS can require you to open it up for inspection or remove it. We pull the permit on every attached cover we build.

    How long does a patio cover take?

    Stage Typical time
    Site visit, design and written quote About a week
    Engineering (if required) One to two weeks
    HOA review (if applicable) Three to eight weeks, in parallel
    Permit: manufactured aluminum, over the counter or express Days to two weeks
    Permit: wood, steel, freestanding or hillside plan check Three to eight weeks
    Installation: Alumawood or insulated aluminum, attached One to three days
    Installation: wood One to two weeks including finish
    Freestanding: add footing pour and cure before framing About one extra week
    Electrical rough-in, finish and inspection One to two days, scheduled inside the build

    These are typical Los Angeles budgeting estimates, not a price list or a quote. Your project can come in lower or higher depending on the house, the scope and the finishes; the only real number is a written proposal after a site visit.

    From signed contract to finished cover, most attached aluminum projects in the Valley run three to six weeks, with the permit taking most of that. Wood, freestanding and HOA projects also land in the three-to-six-week range once approvals are in hand.

    A real example of choosing the right material

    In our materials guide we describe a homeowner who came to us set on wood for its warmth. Once we talked through how the family used the yard, the picture changed: most evenings outside, a west-facing patio that baked after 3 PM, no appetite for restaining, and a wish list of recessed lights and ceiling fans. We recommended insulated aluminum. They got full shade, a finished ceiling that carried the fans and lights, and a structure they have not had to touch since. The budgeting lesson: choose the material for how you will use the space, then price it.

    How to compare patio cover quotes

    Ask every bidder for the same five things in writing; the cheap quote usually stops being cheap.

    1. The exact product: manufacturer, panel type (lattice, flat pan, W-pan, insulated and its thickness), colour and gauge.
    2. Attachment method and footings: ledger through stucco or freestanding, number of footings, depth and size.
    3. Permit and engineering: who pulls it, whether fees are included, whether engineering is included or excluded.
    4. Electrical: what “lights and fan included” means, how many fixtures, whether the circuit and electrical permit are included.
    5. What happens to what is already there: stucco patching at the ledger, gutter and downspout, concrete cutting for footings, disposal of an old cover, landscape repair.

    Green Design and Build puts all five in the proposal. Read more on our patio covers service page, or see how a cover fits into a wider outdoor living or backyard remodeling project.

    Where we build patio covers

    We build patio covers from our Van Nuys office across the San Fernando Valley, the rest of Los Angeles County, Orange County, Ventura County and western Riverside County.

    Related cost guides: Pergola cost · Outdoor kitchens, decks and pergolas · Outdoor kitchen cost · Concrete patio cost · Backyard remodel cost

    Patio cover cost FAQs

    How much does a patio cover cost in Los Angeles?

    A patio cover in Los Angeles typically costs $25 to $75 per square foot installed, or about $6,000 to $18,000 for a common 12 by 20 foot cover, before permits, engineering and electrical. Lattice aluminum is the least expensive, insulated aluminum and wood sit in the middle to upper range, and custom steel is the most expensive. These are typical Los Angeles budgeting ranges, not a quote.

    How much does an Alumawood patio cover cost?

    An Alumawood patio cover typically costs $25 to $45 per square foot installed for lattice and $30 to $55 per square foot for a solid roof in the Los Angeles area. That puts a 12 by 20 solid Alumawood cover at roughly $7,200 to $13,200. Fans, lights, a permit and freestanding footings are extra.

    How much does an insulated patio cover cost?

    An insulated aluminum patio cover typically costs $45 to $75 per square foot installed in Los Angeles, so a 12 by 20 insulated cover runs about $10,800 to $18,000 before electrical. The premium over a solid Alumawood roof buys a three-inch foam-core panel that blocks radiant heat, gives a finished ceiling and carries fans, lights and heaters inside the panel.

    Do I need a permit for a patio cover in Los Angeles?

    Generally, yes for any patio cover attached to the house, and for a freestanding cover larger than 120 square feet, with the permit issued by LADBS in the City of Los Angeles. A detached cover of 120 square feet or less may be exempt from a building permit under the California Residential Code; confirm that with LADBS before relying on it, because zoning setbacks still apply and any electrical needs its own permit. Other cities and the county follow the same baseline with their own procedures.

    Is a freestanding patio cover more expensive than an attached one?

    Yes. A freestanding patio cover typically costs $1,500 to $4,000 more than the same cover attached to the house, because it needs more posts, a concrete footing under each one and usually an engineering stamp. It is the right choice when the roof edge or eave cannot take a ledger board or when you want the cover away from the house.

    How long does it take to install a patio cover?

    Installing an attached Alumawood or insulated aluminum patio cover usually takes one to three days once the permit is issued. Wood covers take one to two weeks including finish, and freestanding covers add about a week for footings to cure. From signed contract to completion, most attached aluminum projects in Los Angeles run three to six weeks, with the permit taking most of that time.

    Does a patio cover add value to a home?

    A well-built, permitted patio cover generally adds usable living space and buyer appeal in Southern California, where outdoor rooms are used most of the year. An unpermitted cover can do the opposite: it can be flagged in an appraisal or inspection and become a negotiating point or a removal order. Permitted, documented work is the version that helps at resale.

    Can I add lights and a fan to a patio cover later?

    Yes, but it is cheaper to plan the electrical before the cover goes up. On a solid or insulated aluminum cover the wiring runs inside the beam or panel, so adding it later means opening finished parts of the structure. If you think you might want a fan or lights, have the circuit and the mounting blocks installed during the build, even if the fixtures come later.

    Get a written patio cover price for your yard

    We will measure the patio, check the eave and the panel, tell you whether your city needs a permit, and give you an itemized quote that lists the exact product, footings, permit and electrical. The site visit and the estimate are free.
  • How Much Does a Los Angeles General Contractor Cost?

    How Much Does a Los Angeles General Contractor Cost?

    A Los Angeles general contractor typically charges in the range of $150 to $450 per square foot for remodeling and addition work, depending on the type of project, with smaller single-room remodels landing at the lower end and additions or ADUs landing at the higher end. Ground-up new construction sits above that range, at $300 to $600 per square foot all-in. There is no single flat rate, because the cost depends heavily on project type, scope, materials, and site conditions.

    Rather than quoting one number that would not apply to most projects, here is how cost actually breaks down by project type in the Los Angeles market, along with the pricing structures contractors use and what tends to move a project from the low end of a range to the high end.

    Typical Cost Ranges by Project Type

    Kitchen Remodel

    A full kitchen remodel in the Los Angeles area generally runs from $25,000 to $100,000 or more, depending heavily on cabinetry, countertop material, appliance package, and whether the layout is changing or staying the same. Moving plumbing or electrical to reconfigure a kitchen layout adds cost beyond a straightforward finishes-only remodel.

    Our kitchen remodeling page explains how we scope and price a kitchen line by line.

    Bathroom Remodel

    Bathroom remodels typically fall between $10,000 and $30,000, with higher-end projects using custom tile work, freestanding tubs, or layout changes reaching $50,000 or more.

    For a fuller breakdown by tier, read our bathroom remodel cost guide.

    Full Home Renovation

    A full home renovation covering most or all of a house commonly ranges from $100,000 to $300,000 or more, with the total driven primarily by square footage, how many rooms are involved, and whether structural or systems work (electrical, plumbing, HVAC) is part of the scope.

    If you are adding square footage rather than renovating what exists, see our room additions page.

    Accessory Dwelling Units (ADUs)

    ADU costs vary the most of any category because there are several distinct types of projects grouped under the same name. A garage conversion ADU generally runs $100,000 to $200,000. A new detached ADU is priced more by size: roughly $180,000 to $260,000 for 400 to 500 square feet, $230,000 to $330,000 for 600 to 800 square feet, $280,000 to $385,000 for 800 to 1,000 square feet, and $325,000 to $445,000 for 1,000 to 1,200 square feet, with two-story detached units running $400,000 to $550,000. On a per-square-foot basis, new ADU construction in the LA market generally falls in the $300 to $450 per square foot range, which is meaningfully higher than a standard home addition due to the cost of extending utilities and building a fully independent structure.

    We publish a full ADU cost breakdown, including a real project that went from $180,000 to $265,000.

    These are typical Los Angeles budgeting estimates, not a price list or a quote. Your project can come in lower or higher depending on the house, the scope and the finishes; the only real number is a written proposal after a site visit.

    Why the Range Is So Wide

    Scope and Structural Work

    Cosmetic work (new flooring, paint, fixtures) costs far less than structural changes (moving walls, reworking foundations, changing rooflines, or relocating plumbing and electrical). Any project that opens up walls or touches the structure of the home should be budgeted well above a finishes-only project of similar square footage.

    Materials and Finish Level

    Cabinetry, countertops, flooring, and fixtures carry an enormous price range on their own. Two kitchens of identical size and layout can differ by tens of thousands of dollars purely based on the materials selected.

    Permits and Site Conditions

    Projects requiring permits through the Los Angeles Department of Building and Safety (LADBS) or another local building department carry costs for plan review, permit fees, and inspections. Site conditions such as difficult access, older electrical panels that need upgrading, foundation issues discovered mid-project, or drainage problems can all add cost that a homeowner did not anticipate at the estimate stage.

    Labor Market and Timeline

    Labor costs in the LA market are shaped by demand for skilled trades at any given time, and a compressed timeline can also increase cost if it requires more crews working simultaneously.

    How General Contractors Structure Pricing

    Most residential general contractors in the LA market price projects one of two ways. A fixed-bid (or lump-sum) proposal quotes a single total price for the defined scope of work, which gives a homeowner cost certainty as long as the scope does not change. A cost-plus arrangement bills the actual cost of labor and materials plus an agreed contractor fee or percentage, which offers more flexibility on projects with scope that may evolve, but less certainty about the final number going in. Either structure can work well; what matters is that the proposal clearly states which one you are agreeing to and what happens if the scope changes.

    Getting an Estimate You Can Actually Compare

    A useful estimate should break down the scope of work, the specific materials or allowances included, and the payment schedule, not just a single bottom-line number. When comparing bids from multiple contractors, the lowest number is not automatically the best value if it is missing scope, using lower allowances than a competing bid, or leaving out permit costs that another contractor included. The most reliable way to get an accurate number for your specific project is a site visit and a written proposal that spells out exactly what is and is not included.

    For what a project actually involves rather than what it costs, see the work we take on across Los Angeles, Ventura, Orange, western Riverside and western San Bernardino counties.

  • How to Verify a Contractor’s License and Certifications in California

    How to Verify a Contractor’s License and Certifications in California

    Every contractor claim in California can be checked in a few minutes, and the order matters: start with the CSLB contractor license, which is the only credential the state actually requires; then verify any specialty certification the contractor advertises, whether that is a green building certification, a manufacturer installer program or a trade credential; and for homes built before 1978, confirm EPA Lead-Safe certification.

    Marketing labels get used loosely. “Green certified”, “certified installer” and “master craftsman” are not government licenses, and homeowners in Los Angeles often assume they are. Below is how we verify each claim ourselves, step by step, before we would hire anyone who advertises this way.

    Start With the California Contractor’s License

    Before any green credential matters, the contractor needs to hold an active, appropriately classified license issued by the Contractors State License Board (CSLB). You can look up any license for free using the CSLB’s online license search tool.

    What to Check on the License Record

    The CSLB record will show the license status (active, expired, revoked, or suspended), the classification (a B classification covers general building contracting), the bond status, and any disciplinary actions on file. As of January 1, 2023, California requires licensed contractors to carry a $25,000 contractor’s bond, which exists to compensate homeowners for losses tied to defective work or license law violations. If the bond shows as missing or lapsed, that is a serious red flag on its own, unrelated to anything about “green” claims.

    You can run this check on us right now: verify licence #1110975 on the CSLB site.

    Confirm Workers’ Compensation Insurance

    The CSLB record also indicates whether a contractor carries workers’ compensation insurance, which is required in California for contractors with employees. A homeowner can be exposed to liability if an uninsured worker is injured on their property, so this is worth confirming independently rather than taking a contractor’s word for it.

    Then Verify the Specific Green Certification Being Claimed

    Once the license and bond check out, the next step is figuring out which green credential the contractor is actually referring to. A few show up most often in the Los Angeles market.

    GreenPoint Rated

    GreenPoint Rated is a California-specific residential green building rating program administered by Build It Green. It is one of the credentials most relevant to LA homeowners because it was built around California homes and California climate zones, covering categories like energy efficiency, indoor air quality, water conservation, and resource-efficient materials. Contractors and consultants who hold this credential are typically listed as certified GreenPoint Raters, and a homeowner can ask to see that certification directly rather than relying on a logo on a website.

    LEED Accreditation

    LEED (Leadership in Energy and Environmental Design), administered through the U.S. Green Building Council and Green Business Certification Inc., is more common on commercial and larger residential projects than on a typical single-family remodel. An individual can hold a LEED Green Associate or LEED AP credential, which reflects personal training rather than a project certification. If a contractor cites LEED, it is fair to ask whether they mean their own personal accreditation or that the finished project itself will pursue LEED certification, since those are two different things.

    National Green Building Standard (NGBS)

    NGBS is a green building framework aimed specifically at residential and multifamily construction, with certification tiers similar in concept to LEED’s. It is less commonly seen on smaller LA remodel projects but does appear on new home construction and larger multi-unit builds.

    ENERGY STAR Partner

    Being an ENERGY STAR partner relates primarily to installing ENERGY STAR-certified products and, for new construction, building to ENERGY STAR’s home certification requirements. It is a useful signal but a narrower one than a full green building rating.

    For Older LA Homes, Ask About EPA Lead-Safe Certification

    This one is not optional, and it is not really a “green” credential so much as a legal requirement. Under the EPA’s Renovation, Repair, and Painting (RRP) Rule, any firm paid to disturb paint in a home built before 1978 must be an EPA Lead-Safe Certified Firm, and the individuals performing that work must complete the required renovator training. A large share of the Los Angeles housing stock was built before 1978, so this applies more often than homeowners expect, particularly on older bungalows and mid-century homes in neighborhoods throughout the city. If your home falls into that category, ask directly whether the contractor and the firm are RRP-certified, and ask to see the certificate rather than taking a verbal yes.

    Our whole-home renovation page explains how we handle EPA lead-safe practices on pre-1978 homes.

    Ask for the Certificate, Not Just the Claim

    A logo on a website or a truck wrap is not verification. Every credential described above comes with an actual certificate or a searchable record: a CSLB license number you can look up yourself, a GreenPoint Rater ID, a LEED credential ID searchable through the USGBC/GBCI credential directory, or an EPA Lead-Safe Certified Firm number. A contractor who is genuinely certified will not hesitate to provide these, because they are used to being asked.

    Questions Worth Asking Directly

    It helps to ask a contractor plainly which certification they hold, who issued it, and whether it applies to them personally or to the project as a whole. It also helps to ask what specifically the certification changes about how they will build your project, whether that is the materials they source, the insulation and air-sealing approach, water fixtures, or waste diversion during demolition. A contractor who understands their own certification will be able to answer in specifics. One who cannot explain what the certification actually covers is worth treating with more caution, regardless of what claims appear in their marketing.

    The Short Version

    Verifying a green-certified general contractor in Los Angeles means confirming an active CSLB license and bond first, then independently checking whichever specific green credential is being claimed, such as GreenPoint Rated, LEED, or NGBS, and separately confirming EPA Lead-Safe Certified status if your home was built before 1978. None of these checks take more than a few minutes each, and a legitimate contractor will expect you to run them.

    You can verify our licence directly with the CSLB — #1110975 — and read more about Green Design and Build.

    For the full checklist, read our guide to hiring a general contractor without getting scammed.

  • What Questions Should You Ask Before Hiring an Exterior Painter?

    What Questions Should You Ask Before Hiring an Exterior Painter?

    Hiring an exterior painter is one of those decisions that can look simple until something goes wrong.

    A fresh coat of paint can make almost any house look great on day one. The real test comes 12, 18, or 24 months later, when the south-facing wall starts peeling, caulking begins separating around the windows, or faded, chalky paint starts rubbing off on your hand.

    After seeing enough exterior painting projects, we’ve noticed that early paint failure is rarely random. Most problems can be traced back to shortcuts in preparation, poor materials, vague contracts, or underlying damage that should have been addressed before the first coat of paint ever went on.

    That is why we tell homeowners not to simply ask, “How much will it cost?”

    The better question is: What exactly am I getting for that price?

    Here are the questions we believe every homeowner should ask before hiring an exterior painter.

    1. What Preparation Work Is Included in Your Price?

    Preparation is probably the most important part of an exterior paint job.

    We’ve seen homeowners compare three quotes and choose one that was thousands of dollars cheaper because, understandably, they assumed paint was paint.

    Then six months or a year later, they’re looking for someone to repair peeling or alligatoring paint.

    When one exterior painting estimate is dramatically cheaper than the others, the savings usually have to come from somewhere. In many cases, it comes from:

    • Less pressure washing
    • Minimal scraping
    • No sanding
    • Limited caulking
    • Skipped primer
    • Fewer coats
    • Lower-quality paint

    In our experience, preparation can determine 60% to 70% of how well an exterior paint job ultimately holds up.

    Will You Pressure Wash the Entire Exterior?

    Ask:

    “Will you pressure wash the entire exterior, and do you adjust the pressure depending on the surface?”

    Pressure washing removes dirt, chalking residue, loose material, cobwebs, mildew, and contaminants that can interfere with adhesion.

    But more pressure isn’t always better.

    Old wood siding, delicate stucco, and solid masonry should not necessarily be treated the same way. Excessive pressure can gouge wood, damage stucco, or push water behind surfaces.

    A knowledgeable painter should understand that the washing method needs to change depending on the substrate.

    A red flag is hearing something like:

    “We don’t really pressure wash. We just wipe it down.”

    Another warning sign is a contractor who plans to use the same pressure and method on every surface without considering what the house is made of.

    How Do You Handle Peeling or Cracking Paint?

    Ask:

    “How do you handle areas where the existing paint is peeling, cracking, or alligatoring? Do you feather-sand the edges?”

    Loose paint needs to be removed.

    Simply rolling new paint over failing paint does not magically bond everything together. Eventually, the old failing layer underneath continues to separate, taking the new coating with it.

    We also want to hear that the painter plans to feather-sand the transition between scraped areas and sound existing paint. Otherwise, visible ridges can remain even after the new coating is applied.

    If someone tells you, “The new paint will seal it down,” we would consider that a major warning sign.

    For pre-1978 homes and lead-safe practices, see our guide to verifying a contractor’s licence and certifications.

    What Will You Caulk?

    Ask:

    “Will you caulk gaps around windows, trim, and siding joints? What type of caulk will you use?”

    Exterior caulking is not just cosmetic.

    Proper caulking helps prevent water from entering gaps around trim and joints, where it can eventually contribute to wood rot and paint failure.

    We prefer exterior-grade, paintable caulking designed to handle movement and weather exposure.

    Be cautious of vague answers such as, “We’ll caulk whatever needs it,” without any explanation of what areas are included or what material will be used.

    Where Will You Use Primer?

    Ask:

    “Where are you using primer? Are you spot-priming or applying a full prime coat?”

    Not every house necessarily needs a full primer coat, but certain areas absolutely may require actual primer.

    Those can include:

    • Bare wood
    • Newly repaired stucco
    • Exposed metal
    • Rust stains
    • Water stains
    • Knots or areas vulnerable to tannin bleed
    • Heavily repaired surfaces

    We’ve heard the phrase, “The paint already has primer in it,” used to justify skipping primer entirely.

    Paint-and-primer products can be useful, but they are not a substitute for the correct specialty primer on every bare or problem surface.

    2. What Exact Paint Are You Using, and How Many Coats Are Included?

    “Sherwin-Williams paint” is not specific enough.

    Neither is “Benjamin Moore.”

    Major manufacturers produce multiple product lines at very different price and performance levels.

    Ask:

    “What exact brand, product line, and sheen are you using?”

    For example, Sherwin-Williams offers products such as SuperPaint, Duration, and Emerald. They do not all cost or perform exactly the same.

    We want the contractor to be able to explain not only what product they are using, but why they believe that product makes sense for the particular house.

    Southern California sun can be especially hard on exterior coatings, particularly on south- and west-facing elevations that receive significant UV exposure.

    Lower-quality paints tend to lose color, chalk, and break down more quickly.

    We’ve seen homeowners save money purchasing cheaper paint themselves, only to discover that what looked like a smart savings upfront resulted in much faster deterioration.

    A quality exterior acrylic can cost more per gallon, but in the right conditions and with proper preparation, the difference in lifespan can be significant.

    Is the Price for One Coat or Two?

    Ask:

    “Does this estimate include one coat or two full coats?”

    We generally want two full coats on most exterior projects, particularly when:

    • The color is changing
    • The home has not been painted in many years
    • The existing color is uneven
    • The surface needs additional film build for protection

    One thin coat may look acceptable immediately after application, but it often provides less uniform coverage and less protection from UV exposure.

    We have seen homes begin showing uneven fading and blotchy sheen because one wall clearly received an insufficient amount of material.

    Do not accept a proposal that simply says “paint exterior” without stating the number of coats.

    “We’ll see how it looks” can easily turn into a mid-project upcharge when the second coat should have been priced from the beginning.

    Does Your Process Change Between Stucco, Wood, and Metal?

    Ask:

    “How does your preparation and product selection change between my stucco, wood trim, siding, fascia, and metal surfaces?”

    Different substrates have different needs.

    Stucco may require crack repairs, investigation of efflorescence, primer on patched areas, or a masonry-specific coating.

    Wood may require scraping, sanding, bare-wood primer, caulking, and inspection for rot.

    Metal may require rust treatment and the correct bonding or corrosion-resistant primer.

    If a contractor tells you that every surface receives essentially the same treatment, we would question how much attention is being given to substrate-specific paint failure.

    We handle stucco repair before painting as part of our remodeling services, so cracks are fixed rather than painted over.

    3. How Can I Verify That Your Company Is Properly Licensed, Insured, and Established?

    There is an important distinction between liking an estimator and trusting the company responsible for your home.

    A good salesperson may be personable, responsive, and easy to talk to.

    Those things matter, but they are not the same as verifying the company behind the sale.

    Can I Verify Your Contractor License?

    In California, ask for the contractor’s CSLB license number and look it up yourself.

    Do not simply take someone’s word that they are licensed.

    We recommend checking whether:

    • The license is active
    • The classification matches the work being performed
    • The company name matches
    • The license has been active for a reasonable period
    • There are disciplinary records worth investigating

    We also pay attention when a company markets itself as having “15 years of experience,” but the business or contractor license appears to be only several months old.

    There can be legitimate explanations, such as a restructure or new business entity, but it is reasonable to ask.

    Can Your Insurance Broker Send Me Proof of Coverage?

    Ask:

    “Can your insurance agent send me a current certificate of insurance?”

    Exterior painting often involves ladders, roofs, two-story homes, and occasionally lifts.

    You want to verify appropriate insurance coverage, including general liability and workers’ compensation when applicable.

    We prefer documentation coming directly from the insurance broker rather than an old screenshot or document forwarded without context.

    A reputable company should not become defensive because a homeowner wants to verify coverage.

    In fact, one of our strongest trust signals is when a contractor makes verification easy.

    Are Your Painters Employees or Subcontractors?

    Ask:

    “Will the people working on my home be your employees or subcontractors?”

    Neither answer automatically means good or bad work.

    There are excellent subcontracted crews.

    What matters is understanding who is responsible for the work, who supervises the project, whether the necessary insurance is in place, and who you should contact if there is a problem.

    We also like to know whether the same foreman or project lead will remain on-site throughout the job or whether the homeowner should expect different crews on different days.

    What Do Your Reviews Actually Say?

    Don’t stop at the star rating.

    We recommend reading a meaningful sample of recent reviews and looking for patterns.

    Pay attention to comments about:

    • Whether the crew arrived when promised
    • Whether the final bill matched the estimate
    • How change orders were handled
    • Communication during the project
    • Cleanup
    • How the company responded when something went wrong

    Interestingly, we often find three-star reviews especially useful because they can provide a more balanced picture than either glowing five-star praise or extremely angry one-star complaints.

    A company having a few negative reviews is not necessarily concerning.

    What matters more is the pattern and how the company responds.

    Can You Provide Recent References?

    Ask for references from exterior painting projects similar to yours and completed fairly recently.

    For example:

    “Can you give me two references from exterior stucco homes you’ve painted within the last year?”

    Then actually call them.

    Ask:

    • Did the crew show up consistently?
    • Were there unexpected charges?
    • How was communication?
    • Did anything go wrong?
    • How did the contractor handle it?
    • Would you hire them again?

    We would also want to see recent project photos, preferably before-and-after pictures of houses with similar materials.

    A gallery full of generic or stock-looking images does not tell you nearly as much as documented recent work.

    4. What Exactly Is Written Into the Proposal, Warranty, and Payment Schedule?

    This is where conversations become commitments.

    We’ve read plenty of proposals that look polished but become extremely vague in the areas most likely to cause a disagreement.

    If something matters to you, it should be written down before you sign.

    Which Surfaces Are Actually Included?

    The proposal should identify which surfaces are being painted.

    That could include:

    • Main exterior walls
    • Trim
    • Fascia
    • Soffits
    • Garage doors
    • Entry doors
    • Gutters and downspouts
    • Shutters
    • Railings
    • Gates

    We’ve seen situations where a homeowner believed “paint the exterior” obviously included the garage door, only to find out during the project that it would cost hundreds of dollars more.

    Our rule is simple:

    If a surface isn’t listed, assume it isn’t included until you confirm otherwise.

    What Is Excluded?

    A good proposal should also tell you what is not included.

    That might include:

    • Fence painting
    • Roof work
    • Extensive wood replacement
    • Major stucco repairs
    • Moving landscaping
    • Structural repairs

    A proposal with no exclusions at all doesn’t necessarily mean everything is included.

    Sometimes it simply means the exclusions have not been discussed yet.

    How Are Unexpected Repairs Handled?

    This may be one of the most important questions in the entire hiring process.

    Exterior prep often reveals hidden issues such as:

    • Dry rot
    • Damaged fascia
    • Cracked stucco
    • Failed caulking
    • Water damage

    Ask:

    “If you discover additional damage during prep, how will you price it, communicate it, and get my approval?”

    We have seen homeowners come home and discover that thousands of dollars in “necessary repairs” were already performed and added to the bill without prior approval.

    Even when the repair itself was legitimate, handling it that way destroys trust.

    We believe additional work should be explained and approved before it is performed whenever possible.

    Are the Color, Product, and Sheen Written Down?

    The contract should identify:

    • Manufacturer
    • Product line
    • Color name
    • Color code
    • Sheen
    • Number of coats

    We also recommend testing larger color samples directly on the exterior when possible.

    A color that looks perfect on a small sample card can look completely different when applied across an entire sun-facing wall.

    Spending a little extra time confirming the color is far easier than repainting the house.

    What Does the Warranty Actually Cover?

    Don’t just ask, “Do you offer a warranty?”

    Ask:

    “If the paint starts peeling on my south-facing wall 18 months from now, what happens?”

    That hypothetical forces the contractor to explain how their warranty actually works.

    Look for:

    • Length of labor warranty
    • What workmanship failures are covered
    • Whether peeling or blistering is covered
    • What exclusions apply
    • How warranty claims are submitted
    • Whether manufacturer coverage is separate from labor coverage

    A warranty stating only that workmanship is “guaranteed” without defining a time period or coverage is not very helpful.

    What Does the Payment Schedule Look Like?

    In California, home improvement contract deposit rules generally limit the down payment to the lesser of $1,000 or 10% of the contract price.

    Beyond the deposit, we prefer progress payments connected to actual project milestones rather than a contractor collecting most of the money before most of the work is completed.

    The proposal should clearly explain:

    • Deposit
    • Progress payments
    • What milestone triggers each payment
    • Final payment requirements

    We would not recommend handing over the final payment before completing a walkthrough and confirming that the agreed scope has been completed.

    Who Handles Cleanup and Protection?

    Exterior painting creates more mess than many homeowners expect.

    Scraped paint chips, sanding dust, tape, plastic, overspray, and debris all have to go somewhere.

    The proposal should address protection of:

    • Windows
    • Concrete and pavers
    • Landscaping
    • Outdoor furniture
    • Vehicles
    • Fixtures
    • Doors and hardware

    We also like to see expectations for daily cleanup and final cleanup written into the scope.

    5. What Happens If the Paint Starts Failing a Year or Two Later?

    Fresh paint hides a lot.

    This is one reason we caution homeowners against judging a painting contractor solely by how beautiful the house looks the afternoon the crew finishes.

    Many preparation shortcuts don’t reveal themselves immediately.

    They show up after months of sun exposure, temperature changes, and moisture.

    What Early Failure Looks Like

    Imagine a stucco home painted about 14 months ago.

    On the south and west-facing walls, you begin seeing powdery chalking when you rub the surface.

    Hairline stucco cracks start reopening.

    Caulking around window trim is pulling apart.

    One wall has a blotchy, uneven sheen, suggesting that it received a thin coat or insufficient coverage.

    We’ve seen this combination before, and the causes are usually predictable.

    The surface may not have been thoroughly cleaned before painting.

    Old chalky paint may have remained underneath the new coating.

    Caulking may have been skipped or rushed, allowing moisture into joints.

    The house may have received one coat instead of two.

    The paint itself may have been a lower-quality product that couldn’t tolerate years of intense sun exposure.

    Or damaged wood may simply have been painted over instead of repaired.

    Painting over rot does not stop rot.

    Eventually, the movement and moisture underneath begin cracking and bubbling the coating again.

    South- and west-facing walls take the worst of the heat, which is why we specify prep and coatings differently for painting in the San Fernando Valley than near the coast.

    What a Properly Prepared Exterior Looks Like Years Later

    Now picture a similar house five years after painting.

    The color may have faded slightly, which is normal.

    But the fading is even.

    There is no significant peeling.

    No major chalking.

    No failed caulking pulling away from windows.

    No obvious roller lap marks.

    No bubbling around fascia boards.

    What probably happened differently?

    The crew thoroughly washed the house.

    They scraped failing paint.

    They feather-sanded transitions.

    They caulked joints with a quality exterior product.

    They primed bare and repaired surfaces.

    They replaced damaged wood instead of hiding it.

    Then they applied two full coats of a quality exterior coating.

    That is what good preparation buys you.

    Not a house that somehow never ages, but a paint system that ages gradually and predictably instead of failing prematurely in problem areas.

    The Most Important Question Isn’t “How Much?”

    We understand why homeowners compare exterior painting estimates primarily by price.

    Painting is expensive, and two bids can appear to describe the same project.

    But two estimates saying “paint exterior of house” can represent completely different amounts of work.

    One contractor may be pricing:

    • Thorough washing
    • Scraping
    • Sanding
    • Caulking
    • Spot priming
    • Minor repairs
    • Two coats of premium exterior paint
    • Detailed masking
    • Cleanup
    • A meaningful labor warranty

    Another may be pricing a quick wash and one coat.

    Those are not the same paint job.

    Paint failure is rarely mysterious.

    In our experience, it tends to happen exactly where preparation, moisture control, repairs, or material quality were compromised.

    That is why the best questions to ask an exterior painter aren’t designed to make the hiring process complicated.

    They’re designed to help you understand what you’re actually buying.

    Before signing, make sure you know who is doing the work, how the home will be prepared, what exact materials will be used, how many coats you’re receiving, how unexpected repairs will be handled, what the warranty covers, and whether every important promise appears in writing.

    Because when it comes to exterior painting, the work you cannot see once the final coat goes on is often what determines how long the paint job lasts.

    Our own interior and exterior painting service includes the surface preparation and repair work these questions are designed to uncover.

  • How Much Does Vinyl Fence Installation Cost?

    How Much Does Vinyl Fence Installation Cost?

    If you’re considering a vinyl fence, one of the first questions is usually: how much is this actually going to cost?

    For a standard residential vinyl fence, a realistic planning number in our market is around $90 per linear foot installed.

    That means a 150-linear-foot fence could cost approximately $13,500 before accounting for unusual site conditions, upgraded materials, additional gates, difficult demolition, or other project-specific factors.

    We always tell homeowners to treat the per-linear-foot price as a starting point rather than a guaranteed price. Two properties with the exact same amount of fencing can have very different installation costs.

    Height, material quality, gates, demolition, slope, accessibility, soil conditions, reinforcement, and the overall design all affect the final number.

    How Much Does a Vinyl Fence Cost Per Linear Foot?

    For budgeting purposes, we recommend homeowners begin around $90 per linear foot for professionally installed vinyl fencing.

    Some straightforward projects may come in differently, while more complicated installations can easily exceed that number.

    For example:

    • 50 linear feet at approximately $90 per foot = around $4,500
    • 100 linear feet at approximately $90 per foot = around $9,000
    • 150 linear feet at approximately $90 per foot = around $13,500
    • 200 linear feet at approximately $90 per foot = around $18,000

    These are planning numbers, not quotes.

    Once we actually look at the property, we may find factors that increase or decrease the amount of labor and material required.

    That’s why we would never recommend choosing a contractor based only on a price-per-foot number you found online.

    What Makes Vinyl Fence Installation More Expensive?

    Linear footage is only part of the calculation.

    Several factors can change the final price significantly.

    Fence Height

    A taller fence requires more than simply taller panels.

    Going from a shorter decorative fence to a 6-foot privacy fence can mean:

    • Larger posts
    • Deeper post holes
    • More concrete
    • More vinyl material
    • Additional structural support
    • More labor

    The taller and heavier the fence becomes, the more important the installation underneath it becomes too.

    Gates

    Gates are one of the most commonly underestimated parts of a fence project.

    A gate isn’t simply another vinyl panel with hinges attached.

    It has to remain square, open and close properly, support its own weight, and resist sagging over time.

    A standard walk gate costs less than a large double gate, while wider vehicle-access gates require stronger hardware and reinforced supporting posts.

    If a homeowner thinks they may eventually motorize a driveway gate, we also recommend discussing conduit during the original project.

    Running conduit while the area is already under construction is much easier than trenching around a completed fence later.

    Removing an Existing Fence

    The condition of the existing fence can make a big difference in labor.

    Chain-link fencing can often be removed relatively quickly.

    An old wood fence with posts buried in large concrete footings is another story.

    Those old footings sometimes require considerable digging and demolition before we can even begin installing the new fence.

    This is why homeowners should always ask whether demolition, hauling, and disposal are included in the estimate.

    Sloped Properties

    A perfectly flat yard is usually easier to fence than a property with significant grade changes.

    With a sloped property, the fence may need to be stepped or racked to follow the grade.

    Racking means adjusting the panels so they follow the slope rather than remaining perfectly horizontal.

    That often requires additional measuring, cutting, fitting, and labor in the field.

    The slope also affects the finished appearance, so homeowners should know how the contractor plans to handle it before construction begins.

    Difficult Soil Conditions

    You don’t always know what you’re dealing with until you start digging.

    Rocky soil, old concrete, tree roots, irrigation lines, and other underground obstacles can slow down post installation.

    In difficult conditions, crews may need additional equipment or more hand excavation.

    A professional estimate should explain what happens if unexpected underground conditions are discovered.

    Limited Access

    Access matters more than people realize.

    If equipment cannot reach the backyard and every panel, post, tool, and bag of concrete has to be carried through a narrow side entrance, the project takes longer.

    The same applies during demolition when all of the old fencing and debris has to come back out.

    Over a large fence installation, those additional labor hours add up.

    Wind Exposure

    A 6-foot privacy fence essentially creates a large surface for wind to push against.

    On exposed properties, we may recommend additional reinforcement inside certain vinyl posts.

    Gate posts and corner posts are especially important.

    That reinforcement costs more, but it can also be the difference between a fence that stays straight and one that begins leaning after repeated wind exposure.

    Does the Type of Vinyl Affect the Cost?

    Absolutely.

    One of the biggest misconceptions homeowners have is that all vinyl fencing is basically the same.

    It isn’t.

    Quality varies considerably between manufacturers and product lines.

    Standard White Vinyl

    Standard white privacy fencing is usually the most economical vinyl option.

    It offers a clean appearance, full privacy, and relatively simple long-term maintenance.

    For many homeowners, it provides the best balance between appearance, durability, and cost.

    Wood-Grain Vinyl

    Textured and wood-look vinyl products have become much more realistic.

    They’re a good option for homeowners who like the appearance of wood but do not want the ongoing staining, painting, and sealing associated with real wood.

    The tradeoff is that upgraded finishes generally cost more than basic white vinyl.

    Colored Vinyl

    Tan, gray, and other colors can also increase material costs depending on the manufacturer and product line.

    Availability varies as well, so certain colors may have different lead times or pricing.

    Decorative Vinyl

    Lattice tops, scalloped designs, semi-privacy panels, decorative caps, and custom configurations can all increase the final cost.

    The more detail involved in the fence, the more material and installation work may be required.

    What Does a Typical Vinyl Fence Project Actually Cost?

    Here’s where a per-foot number becomes much easier to understand.

    Example: 140 Linear Feet of Privacy Fencing

    Consider a relatively straightforward backyard project with approximately 140 linear feet of 6-foot vinyl privacy fencing.

    At approximately $90 per linear foot, the homeowner would be looking at a starting planning figure of around $12,600.

    Now imagine that property has:

    • An old fence that needs demolition
    • One or more gates
    • Difficult post removal
    • Limited backyard access
    • Reinforced gate posts

    The final number could change depending on exactly what is required.

    This is why we don’t want homeowners automatically multiplying their footage by $90 and assuming that will be their final contract price.

    It’s a useful budgeting tool, but the property still needs to be evaluated.

    Example: A More Complicated 220-Foot Fence

    Now consider a property with approximately 220 linear feet of fencing.

    At around $90 per linear foot, the basic planning number is already approximately $19,800.

    But suppose this property also has:

    • A noticeable backyard slope
    • An old wood fence set in concrete
    • A walk gate
    • A large double gate
    • Textured wood-grain vinyl
    • Wind-exposed sections requiring reinforcement

    That project will likely cost more than a straightforward 220-foot installation.

    This is exactly why two homeowners can both say they’re installing a “vinyl fence” and receive dramatically different estimates.

    The phrase vinyl fence doesn’t tell us enough.

    We need to know what vinyl fence, installed where, under what conditions, and with what scope of work.

    The Biggest Mistake Homeowners Make When Comparing Fence Quotes

    The number-one mistake we see is choosing the lowest quote without asking why it’s lower.

    Imagine receiving three proposals for what appears to be the same project.

    One contractor is significantly cheaper than everyone else.

    That doesn’t automatically mean they’re doing anything wrong, but it should lead to more questions.

    What is different?

    Sometimes the answer is legitimate.

    Other times the savings are coming from:

    • Thinner vinyl
    • Shallower post holes
    • Less concrete
    • No reinforcement
    • Cheaper hardware
    • Demolition being excluded
    • Disposal being excluded
    • Less preparation
    • A vague scope that allows additional charges later

    The problem is that many installation shortcuts aren’t obvious on the day the fence is completed.

    The fence may look beautiful.

    The problems show up later when posts begin moving, gates sag, panels shift, or wind exposes weaknesses in the installation.

    We would much rather have a homeowner understand exactly what they’re paying for before construction starts.

    Not All Vinyl Fence Material Is the Same

    This is something we wish more homeowners knew.

    “Vinyl fence” is a category, not a material specification.

    Wall thickness, manufacturing quality, UV resistance, internal construction, and warranty coverage can vary.

    California sunlight is especially unforgiving to poor-quality exterior products.

    A lower-quality vinyl product may discolor, chalk, flex, or become brittle sooner than a quality product designed for long-term exterior exposure.

    Before choosing a contractor, ask:

    • What manufacturer are you using?
    • What product line?
    • What is the wall thickness?
    • What warranty comes with it?
    • What does the warranty actually cover?

    If an installer can’t tell you what product they’re installing, that’s something we would want clarified before signing anything.

    Why Post Installation Matters So Much

    When homeowners look at a finished vinyl fence, they naturally focus on the panels.

    From an installation standpoint, we’re paying just as much attention to the posts.

    The posts are what keep the fence standing.

    They need to be installed at the proper depth and anchored appropriately for the particular property, fence height, soil conditions, and exposure.

    One shortcut we’ve seen in poorly installed fencing is inadequate post depth or insufficient concrete.

    It saves time during installation.

    The fence may even look perfectly fine when the job is complete.

    Then a major wind event comes through and the weakness becomes obvious.

    The things you cannot see after installation are often what determine how long the fence will actually last.

    Should Vinyl Fence Posts Be Reinforced?

    Not every post on every project necessarily needs steel reinforcement.

    But there are situations where we strongly consider it.

    These can include:

    • Taller privacy fences
    • Gate posts
    • Double-gate posts
    • Corner posts
    • Wind-exposed sections
    • Long uninterrupted fence runs

    A properly reinforced post costs more than simply setting an unreinforced vinyl post.

    But we would rather build for the conditions that actually exist than save a little money upfront and create a problem later.

    Don’t Forget About the Property Line

    A beautiful fence installed in the wrong place is still a bad fence installation.

    We’ve seen property-line disagreements turn into major headaches over what initially seemed like a small difference.

    If there is any question about exactly where the property line sits, address it before installation.

    Depending on the situation, that might mean reviewing available property documentation or obtaining a professional survey.

    It is considerably easier to confirm the correct location before digging than it is to relocate a completed fence later.

    In master-planned communities the association can be a bigger hurdle than the city; see our notes on Orange County HOA and CC&R approval.

    Is Vinyl Fencing Worth Around $90 Per Linear Foot?

    For the right homeowner, absolutely.

    But vinyl isn’t automatically the right answer for every property.

    The upfront cost can be higher than some alternatives.

    The value is usually found in what happens over the next 10, 20, or even 30 years.

    Vinyl Requires Very Little Maintenance

    This is probably vinyl’s biggest advantage.

    Wood fencing requires maintenance over time.

    Depending on the material and finish, that may include:

    • Painting
    • Staining
    • Sealing
    • Replacing boards
    • Correcting warping
    • Addressing deterioration

    Vinyl usually requires much less work.

    For most homeowners, occasional cleaning is the majority of the maintenance.

    If you do not want fence maintenance becoming another recurring project around the house, that matters.

    Vinyl Works Well in California

    Our climate is one reason we like quality vinyl for the right project.

    Constant UV exposure can be hard on fencing materials.

    Wood can dry out, crack, fade, and weather.

    Quality vinyl is specifically manufactured for outdoor exposure and generally maintains a consistent appearance with much less ongoing maintenance.

    The word quality matters here.

    Cheap vinyl and quality vinyl should not be treated as the same product.

    Vinyl Offers Privacy

    A solid 6-foot vinyl fence provides a very clean privacy barrier.

    Unlike wood boards that can shrink, warp, or develop gaps, vinyl panels maintain a more consistent appearance.

    That makes it attractive for backyards, side yards, pool areas when allowed by local code, and properties where homeowners want separation from neighboring homes.

    Vinyl Works Well for Families

    Solid privacy panels can also work well for families with pets or younger children.

    There are no wood splinters, and the lack of large gaps provides a strong visual and physical barrier.

    Of course, fencing should never replace proper supervision or required pool-safety measures, and homeowners should always confirm applicable local codes.

    When We Would Not Recommend Vinyl

    We don’t believe in selling vinyl simply because someone asked for a fence.

    There are situations where another material makes more sense.

    When Lowest Upfront Cost Is the Priority

    If someone tells us, “We just need the least expensive fence possible,” vinyl may not be the best fit.

    Chain link is often more economical for basic containment.

    Certain wood configurations may also cost less upfront.

    Vinyl is generally more attractive to homeowners who care about long-term appearance and lower maintenance.

    When Someone Wants Real Wood

    Wood-look vinyl has improved considerably, but it’s still not actual wood.

    If someone loves natural grain, variation, and the character of real wood and understands the maintenance requirements, we aren’t going to tell them vinyl is automatically better.

    The right material depends on what the homeowner actually values.

    When Security Is the Main Priority

    If the primary goal is heavy-duty security or industrial-strength containment, metal fencing may be more appropriate.

    Vinyl is durable for residential applications, but it is not steel.

    When Visibility Is Important

    Solid privacy vinyl is specifically intended to block views.

    If homeowners want an open feeling, visibility through the fence, or a particular pool-fence design, another style or material may be more appropriate.

    What Should You Ask During a Vinyl Fence Estimate?

    We actually like when homeowners come prepared with questions.

    It usually makes the entire project clearer for everyone involved.

    Ask About the Vinyl

    Ask:

    • What manufacturer are you using?
    • What product line?
    • What is the wall thickness?
    • What manufacturer warranty is included?
    • What does that warranty cover?

    You want an actual answer, not simply, “We use good vinyl.”

    Ask About the Installation

    Ask:

    • How deep will the posts be installed?
    • How are the posts anchored?
    • Will gate posts be reinforced?
    • Are corner posts reinforced?
    • Do any sections need additional support because of wind exposure?
    • How will slopes be handled?

    A good contractor should be able to explain why they’re installing the fence a certain way.

    Ask What’s Included in the Price

    This is extremely important.

    Ask whether the price includes:

    • Existing fence demolition
    • Hauling
    • Disposal
    • Gates
    • Gate hardware
    • Concrete
    • Reinforcement
    • Cleanup
    • Permits when applicable

    And then ask one of our favorite questions:

    “What is not included in this price?”

    It sounds simple, but that question tells you a lot.

    A straightforward contractor should be able to identify exclusions clearly.

    Ask About Unexpected Conditions

    Ask:

    “What happens if you find old concrete, large roots, irrigation, or another unexpected condition while digging?”

    There should be a process for handling additional work.

    You don’t want to find out halfway through the project that every unexpected condition automatically becomes an unexplained additional bill.

    Ask About the Timeline

    Ask how long the installation should take and what might delay it.

    Possible delays can include:

    • Material availability
    • Custom products
    • Permitting
    • Weather
    • Unexpected site conditions
    • Additional work discovered during demolition

    The timeline should be realistic rather than simply whatever answer sounds best.

    Ask About Licensing and Insurance

    Always verify that you’re dealing with a properly licensed contractor for the work being performed.

    Ask for proof of insurance as well.

    We also recommend asking to see examples of similar completed projects.

    Green Design and Build is a licensed general contractor (CSLB #1110975); our About page shows how to verify it.

    How to Compare Two Vinyl Fence Estimates

    Don’t compare only the number at the bottom.

    Compare the actual scope.

    If one contractor is quoting $90 per linear foot and another appears significantly cheaper, look at:

    • Fence height
    • Manufacturer
    • Product line
    • Material thickness
    • Post installation
    • Concrete
    • Reinforcement
    • Number of gates
    • Gate hardware
    • Demolition
    • Disposal
    • Slope work
    • Cleanup
    • Warranty
    • Exclusions

    Once you compare those things, you may discover that the two contractors weren’t actually quoting the same fence at all.

    Related: Fencing and gates · Retaining walls · Retaining wall cost

    How Much Should You Budget for Your Vinyl Fence?

    If you’re in the early planning stage, around $90 per linear foot installed is a much more realistic starting point for the type of professionally installed vinyl fencing we are discussing.

    So if you’re considering approximately 150 linear feet, starting with a budget around $13,500 gives you a more realistic expectation before the property is evaluated.

    From there, the cost may change depending on:

    • Gates
    • Demolition
    • Material upgrades
    • Height
    • Slope
    • Soil
    • Access
    • Reinforcement
    • Property conditions

    Rather than trying to find the cheapest possible online cost per foot, we recommend focusing on what you are actually getting for the price.

    If the fence is part of a larger backyard remodeling project, pricing it together usually saves money.

    Our Bottom Line on Vinyl Fence Installation Cost

    For homeowners asking, “How much does vinyl fence installation cost?”, we would use approximately $90 per linear foot as a realistic planning number, with the understanding that every property is different.

    Vinyl isn’t necessarily the least expensive fencing material.

    But for homeowners who want privacy, low maintenance, durability, and a consistently clean appearance, it can make a lot of sense over the long term.

    When you’re comparing estimates, don’t just ask:

    “How much per foot?”

    Ask:

    • What material am we getting?
    • How is it being installed?
    • Are the posts properly supported?
    • Are gates included?
    • Is demolition included?
    • Is reinforcement included where needed?
    • What happens if unexpected conditions are discovered?
    • What isn’t included?

    The goal isn’t simply to get the lowest number.

    The goal is to understand exactly what you’re paying for and make sure the fence is installed correctly the first time.

  • How Much Does a Concrete Driveway Cost?

    How Much Does a Concrete Driveway Cost?

    A standard concrete driveway typically costs $8 to $18 per square foot installed, depending on the property, site conditions, concrete specifications, and finish you choose.

    For a typical two-car driveway of about 600 square feet, that puts many homeowners in the range of roughly $4,800 to $10,800.

    Decorative options such as stamped, stained, or exposed aggregate concrete can increase the price significantly. A more customized driveway can easily reach $15 to $25 or more per square foot.

    But after working with homeowners on concrete projects, one thing we always explain is that square-foot pricing only tells part of the story.

    Two driveways can be exactly the same size and end up thousands of dollars apart in price because of what is underneath the existing driveway, how accessible the property is, how much preparation is required, and what the homeowner wants the finished driveway to look like.

    Here is what actually determines how much a concrete driveway costs and what homeowners should look for before choosing a contractor.

    What Is the Average Cost of a Concrete Driveway?

    For a standard residential driveway, a realistic starting point is:

    • Standard concrete driveway: $8–$18 per square foot
    • Stamped concrete: approximately $15–$25+ per square foot
    • Typical 600-square-foot driveway: approximately $4,800–$10,800
    • Higher-end decorative projects: $10,000+ is very common depending on design and site conditions

    For example, consider a 20-foot-by-30-foot driveway, which gives you approximately 600 square feet.

    For a straightforward broom-finish installation with good access and no major site problems, you might see:

    • 600 sq. ft. × $10–$12 per sq. ft. = approximately $6,000–$7,200
    • Permits, if required: approximately $100–$300
    • Total ballpark: approximately $6,100–$7,500

    Now take that exact same driveway and add demolition of an existing driveway plus a decorative stamped border.

    You might add another $2,000 for demolition and haul-away and approximately $2,500 for the decorative work.

    Suddenly, the same 600-square-foot driveway is closer to $10,600–$12,000.

    That is why we never recommend judging a driveway project based on square footage alone.

    What Actually Determines the Cost of a Concrete Driveway?

    Concrete Thickness and Reinforcement

    A standard residential driveway is commonly poured approximately 4 inches thick.

    That may be appropriate when the driveway will primarily support standard passenger vehicles.

    If the homeowner plans to regularly park heavier vehicles such as:

    • RVs
    • Work trucks
    • Boat trailers
    • Large SUVs
    • Commercial vehicles

    we may recommend increasing the slab to approximately 5–6 inches and adding appropriate reinforcement such as rebar or wire mesh.

    Depending on the project, increasing the thickness and reinforcement can add roughly $1–$3 per square foot.

    This is also one of the easiest places for a low bid to hide cost savings.

    A three-inch driveway and a four-inch driveway can look nearly identical when they are first poured. The difference may not become obvious until years later when the thinner slab begins cracking or failing under repeated vehicle loads.

    Thickness should always be written into the contract.

    Demolition and Site Preparation

    Site preparation is probably the most underestimated part of driveway pricing.

    Homeowners naturally focus on the concrete because that is what they see when the project is finished. From our experience, however, some of the most important work happens before the concrete truck ever arrives.

    If an existing driveway needs to be demolished, hauled away, and disposed of, that alone can often add around $1,500–$3,000, depending on the size and circumstances.

    Then we still have to consider:

    • Excavation
    • Soil conditions
    • Grading
    • Compaction
    • Aggregate base
    • Drainage
    • Disposal fees
    • Access for equipment

    And sometimes the real conditions underneath an old driveway are impossible to confirm until demolition begins.

    Drainage and Grading

    Water and concrete do not mix well over the long term when drainage is poorly designed.

    A driveway generally needs to direct water away from structures rather than allowing it to collect against the garage, foundation, or underneath the slab.

    Depending on the property, that may require careful grading or an additional drainage system.

    A contractor who simply pours concrete without thinking about where rainwater is going may leave the homeowner with a much more expensive problem later.

    Concrete Finish

    The finish you choose can dramatically affect pricing.

    A basic broom finish is normally the most affordable option.

    Decorative finishes typically add approximately:

    • Stamped concrete: $4–$8 per square foot
    • Exposed aggregate: $3–$6 per square foot
    • Colored or stained concrete: $2–$5 per square foot

    These are general ranges rather than guaranteed prices. Pattern complexity, color selections, sealing, labor rates, and the individual contractor can all change the number.

    Property Access and Pour Logistics

    Access is another factor homeowners often do not think about.

    If the concrete truck can pull close to the driveway and discharge directly into the work area, the pour is relatively straightforward.

    If the crew has to transport concrete through a narrow side yard, around a house, down a slope, or across a property where large equipment cannot enter, labor costs increase.

    Difficult access can sometimes add another $500–$1,500 or more to a project depending on what is involved.

    Permits and Local Requirements

    Permit requirements vary significantly by city.

    A straightforward driveway replacement may have different requirements than work involving:

    • The public sidewalk
    • A driveway apron
    • A curb
    • The public right-of-way
    • Drainage modifications
    • Significant grading

    Permit costs can range from relatively minor fees to several hundred dollars or more depending on the municipality and scope.

    We always recommend determining permit requirements before work begins rather than assuming they are unnecessary.

    A Real Driveway Project Where a $7,000 Job Became an $11,000 Job

    One project we worked on involved a roughly 640-square-foot two-car driveway.

    The original expectation was simple.

    Tear out the existing driveway, prepare the area, and replace it with a standard broom-finish concrete driveway.

    The initial budget was around $7,000.

    Once the existing slab was removed, however, we discovered that the material underneath was primarily loose fill dirt rather than a properly compacted base.

    It appeared to have been that way for decades.

    Pouring new concrete directly over it would have been the cheaper option in the moment, but it also would have created a significant risk of settlement and cracking later.

    We excavated deeper and installed and compacted a proper aggregate base.

    We also discovered evidence that water had been pooling against the garage slab for years. The staining made the drainage issue fairly obvious once everything was exposed.

    That portion of the project required a French drain.

    The additional base preparation and compaction added approximately $1,500, while the drainage work added another roughly $1,800–$2,200 once the pipe, gravel, excavation, and labor were included.

    The final project came in around $10,800–$11,500.

    That is a 55–60% increase from the original expectation.

    The important lesson is not that driveway projects always go over budget.

    It is that sometimes you genuinely cannot know exactly what is underneath an old driveway until the old driveway is removed.

    That is why homeowners should be cautious when someone promises an absolutely final number for unknown subsurface conditions before demolition has even started.

    We would rather explain the potential range upfront than give someone an artificially low number and surprise them with change orders later.

    Another Driveway Went From $5,500 to More Than $8,000 for a Completely Different Reason

    Not every increase comes from hidden damage.

    Another project involved a driveway of approximately 500 square feet.

    The homeowner originally planned on a basic broom-finish driveway with a budget of around $5,500.

    After the forms were installed, they were finally able to visualize how much of the front of the property the new driveway would occupy.

    They had already invested in the landscaping and exterior appearance of the home, and once they saw the layout, they decided plain gray concrete was not the look they wanted.

    They upgraded to a stamped stone pattern with a charcoal-colored finish.

    There was nothing wrong with changing the design.

    But the upgrade required:

    • Additional material
    • Specialized stamping labor
    • Coloring
    • Additional finishing work
    • Additional sealing and curing considerations

    The final project ended up around $8,200–$8,800.

    That is why we encourage homeowners to look at finish options before the project reaches the pour stage.

    Changing your mind is not a problem.

    It is simply cheaper to make those decisions on paper than on wet concrete.

    Is Decorative Concrete Worth the Extra Money?

    Sometimes absolutely.

    Other times we recommend homeowners keep the driveway simple and spend the money somewhere else.

    A paver driveway is the usual alternative to decorative concrete; see how the two compare on our pavers page.

    When We Think Decorative Concrete Is Worth It

    Decorative concrete makes the most sense when the driveway is a major part of the home’s curb appeal.

    If you have a front-facing driveway next to:

    • New landscaping
    • Updated exterior paint
    • Architectural lighting
    • A remodeled entry
    • Higher-end exterior finishes

    a plain concrete slab can sometimes feel disconnected from the rest of the property.

    Decorative concrete can help make the entire front of the home feel intentional.

    It can also make sense in higher-end neighborhoods where buyers tend to notice exterior details.

    We would not tell a homeowner that stamped concrete automatically adds back every dollar they spent when they sell. It usually does not.

    But curb appeal matters, and a finished-looking driveway can contribute to the overall impression of a home.

    Decorative concrete also makes sense when the homeowner simply loves the look and plans on staying in the property for many years.

    Not every home improvement needs to be evaluated purely on resale value.

    If you are going to see the driveway every day for the next 10 or 20 years, enjoying it has value too.

    When We Would Save the Money

    If someone is selling the property within a year or two and their only concern is financial return, we usually would not make an expensive decorative driveway the priority.

    The same applies to a driveway that is:

    • Mostly hidden
    • Located along the side of a home
    • Behind a gate
    • Primarily utilitarian

    We have seen homeowners spend thousands of extra dollars decorating a driveway that almost nobody sees.

    If the choice is between an expensive stamped pattern and fixing a roof that will need replacement soon, we would put the money toward the roof.

    A properly installed broom-finish driveway is not a bad driveway.

    Good base preparation, proper thickness, clean finishing, appropriate reinforcement, and quality concrete matter far more to longevity than whether the surface has a decorative pattern.

    Our Favorite Upgrade: Exposed Aggregate

    If a homeowner wants something more attractive than standard concrete without committing to the maintenance requirements of elaborate stamped work, exposed aggregate is often our favorite recommendation.

    The stones themselves create the visual finish.

    Unlike some stained or stamped finishes, the appearance does not depend as heavily on a topical color staying perfect.

    It tends to age naturally and still looks intentional years later.

    Stamped concrete can look beautiful, but homeowners need to be realistic about maintenance.

    Decorative concrete generally needs more consistent sealing to preserve the color and surface appearance.

    For someone who wants the upgraded look but does not want to worry as much about fading or maintaining a complex finish, exposed aggregate is often a very good middle ground.

    How Much Maintenance Does a Concrete Driveway Need?

    Standard concrete is relatively low-maintenance.

    Decorative concrete requires more attention.

    Stamped and stained surfaces commonly need resealing approximately every 2–3 years, depending on weather, exposure, traffic, and the products used.

    Without proper maintenance, decorative surfaces can fade and begin looking tired much faster than homeowners expect.

    A broom-finish driveway is much simpler.

    Occasional cleaning, addressing cracks when appropriate, watching drainage, and periodic sealing can help protect it.

    Exposed aggregate generally falls somewhere between the two. It holds its appearance well, although the textured surface may require more cleaning in shaded or damp areas.

    How Long Should a Concrete Driveway Last?

    When it is installed properly, we expect a residential concrete driveway to last approximately 25–40 years, and some last even longer.

    Longevity depends heavily on:

    • Proper excavation
    • A stable compacted base
    • Correct concrete thickness
    • Appropriate reinforcement
    • Proper PSI
    • Good drainage
    • Control joints
    • Weather during installation
    • Proper curing
    • Long-term maintenance

    If a driveway is experiencing major structural failure after only 10 or 15 years, we would start asking questions.

    Often the problem can be traced back to something that happened during installation, particularly poor base preparation, inadequate drainage, insufficient thickness, or improperly placed joints.

    How Long Before You Can Drive on New Concrete?

    Concrete may look dry long before it is fully cured.

    That distinction matters.

    A general timeline we explain to homeowners is:

    • 24–48 hours: Walking is generally okay with reasonable care.
    • 5–7 days: Light passenger vehicles are typically acceptable.
    • 28 days: Concrete has reached close to its full design strength and is better prepared for heavier loads.

    We are particularly cautious with RVs, moving trucks, work trucks, and other heavy vehicles.

    The fact that concrete looks dry does not mean the curing process is finished.

    Concrete curing is a chemical process that continues internally over several weeks.

    Will a New Concrete Driveway Crack?

    Possibly.

    And that does not automatically mean something is wrong.

    Concrete naturally shrinks as it cures.

    That is why properly designed driveways contain control joints.

    The joints are intended to give the concrete planned locations where movement and cracking can occur rather than allowing random cracks to travel across the slab.

    Cracks That Usually Do Not Concern Us

    A small, stable hairline crack that is not widening and has no vertical displacement may be primarily cosmetic.

    Hairline cracking near control joints is also not automatically evidence of structural failure.

    Cracks Homeowners Should Watch

    We become more concerned when:

    • A crack continues widening
    • One side of the crack becomes higher than the other
    • Sections of the driveway begin settling
    • Water is getting underneath the slab
    • Large cracks appear away from control joints
    • The surface begins heaving

    A simple method homeowners can use is to photograph the crack next to a ruler or coin.

    Check it again several months later.

    If it looks almost identical, it may simply be a stable cosmetic crack.

    If it is noticeably wider or one side has shifted vertically, it deserves professional attention.

    Why Do Concrete Driveways Crack Prematurely?

    From what we see in the field, the biggest causes are usually fairly predictable.

    Poor Base Preparation

    This is number one.

    If the soil or aggregate underneath the driveway is not stable and properly compacted, the slab eventually has to react when the ground moves.

    Concrete is extremely strong under compression but it does not like unsupported movement underneath it.

    Insufficient Thickness or Reinforcement

    A driveway that is too thin or improperly reinforced may not handle repeated loads or ground movement properly.

    Poorly Designed Control Joints

    Concrete will move during curing.

    Control joints help manage where that movement occurs.

    Skipping joints or spacing them improperly increases the risk of uncontrolled cracking.

    Drainage Problems

    Water can undermine the base and contribute to movement.

    In freeze-thaw climates, moisture entering cracks can freeze and expand, accelerating deterioration.

    Poor Pouring Conditions

    Extreme heat or cold can affect how concrete cures if proper precautions are not taken.

    Tree Roots

    Mature trees can create significant lifting pressure underneath a driveway.

    That possibility needs to be considered during the planning stage rather than five years after the concrete has already been poured.

    The Biggest Mistake Homeowners Make When Comparing Concrete Quotes

    The biggest mistake is comparing total price instead of total scope.

    A $6,000 quote and a $9,000 quote are not necessarily competing quotes.

    One contractor may be including:

    • Full demolition
    • Haul-away
    • Disposal fees
    • Proper excavation
    • Aggregate base
    • Compaction
    • Reinforcement
    • 4-inch concrete
    • 4,000 PSI mix
    • Drainage work
    • Permits

    The cheaper contractor may simply write:

    “Remove and replace driveway: $6,000.”

    Those are not the same project.

    The second price looks cheaper because the homeowner has no idea what is missing.

    What Should Be Included in a Concrete Driveway Quote?

    Before signing, we recommend getting important specifications in writing.

    At minimum, ask about:

    • Square footage
    • Concrete thickness
    • Concrete PSI
    • Reinforcement
    • Excavation
    • Base depth and material
    • Compaction
    • Demolition
    • Haul-away and disposal
    • Grading
    • Drainage
    • Control joints
    • Finish
    • Permits
    • Cleanup
    • Payment schedule
    • Warranty

    If the contractor gets irritated because you are asking what thickness they plan to pour or what type of base they are installing, that itself tells you something.

    These are normal questions.

    Red Flags We Would Not Ignore

    We would be very cautious about a bid if:

    • Concrete thickness is not specified.
    • PSI is not specified.
    • Reinforcement is vague.
    • There is no clear explanation of base preparation.
    • Demo is supposedly included but disposal is never mentioned.
    • Drainage is dismissed without discussion.
    • The contractor cannot provide proof of licensing and insurance.
    • There is no detailed written contract.
    • The payment schedule is heavily front-loaded.
    • The price is dramatically lower than every competing bid without a logical explanation.

    A bid that is 30% below everyone else deserves investigation.

    Sometimes a contractor legitimately has lower overhead or a different business model.

    But large price differences often mean something in the scope is different.

    The cheapest driveway is only a bargain if you are actually buying the same driveway.

    What Is the One Thing We Would Spend More Money On?

    Base preparation.

    Without hesitation.

    Not decorative stamping.

    Not a fancy color.

    Not even upgrading the PSI before dealing with what is underneath the slab.

    We would first spend money making sure the driveway has:

    • Proper excavation
    • Correct aggregate base
    • Proper compaction
    • Appropriate drainage

    The base is invisible when the driveway is complete, which is exactly why it is such an easy place for someone to cut corners.

    You can reseal a driveway later.

    You can repair some cosmetic surface problems.

    You can even resurface certain finishes.

    Fixing a failing base often means tearing the entire driveway back out.

    If spending an additional $1,000–$2,000 on proper preparation is the difference between a driveway that starts failing in eight years and one that lasts 30 years, we would spend the money underneath the concrete every time.

    Related: Concrete driveways and patios · Driveway replacement cost · Stamped concrete cost · Concrete patio cost · Pavers

    How to Get an Accurate Concrete Driveway Estimate

    The best estimate comes from someone evaluating the actual property rather than giving you a number based only on square footage.

    Before choosing a contractor, ask them to inspect:

    • Existing driveway condition
    • Soil and visible settling
    • Drainage
    • Property slope
    • Access
    • Tree roots
    • Required demolition
    • Vehicle loads
    • Desired finish
    • Permit requirements

    Then ask for both the price per square foot and the total project price in writing.

    Most importantly, make sure you understand what that price includes.

    A quality concrete driveway is not simply concrete poured on the ground.

    The finished surface may be the part you see for the next 30 years, but the preparation underneath it is what determines whether it actually lasts that long.

    If you are comparing concrete against pavers, our paver driveway and walkway service covers the base preparation that decides whether a driveway stays level.

    Driveways are often priced together with other outdoor living projects, which can lower mobilization costs.

Call Free Estimate