
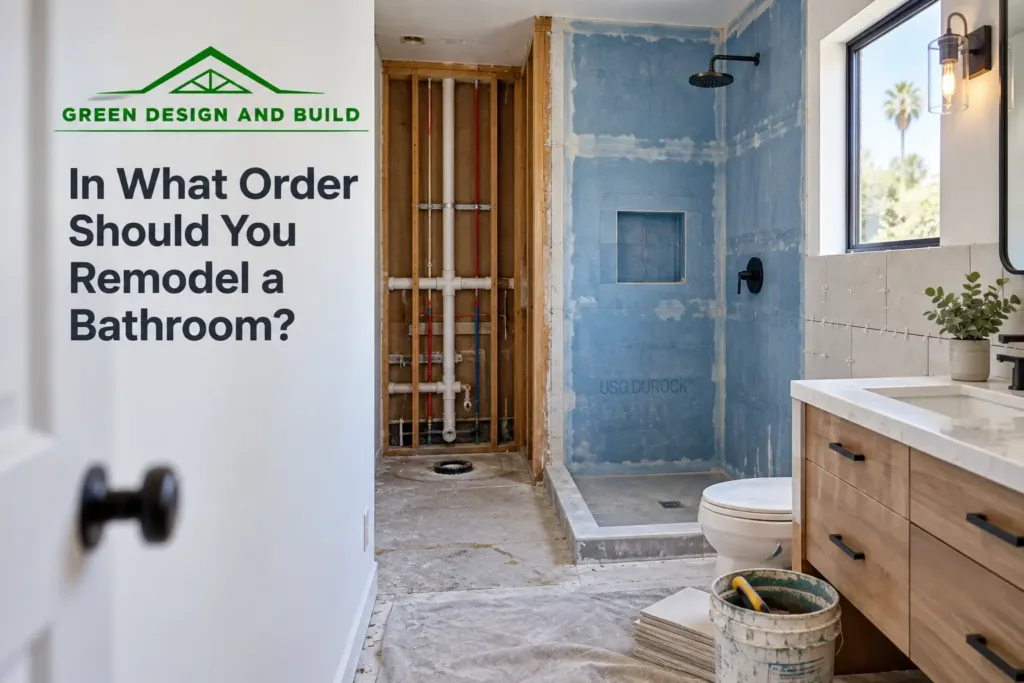
A bathroom remodel runs in a fixed order: design and selections, permit, demolition, framing and blocking, rough plumbing, rough electrical, exhaust ventilation, rough inspection, backer board, waterproofing, the shower pan water test, tile, then vanity, fixtures and glass, then final inspection. The sequence is not a matter of preference. Half of it is dictated by inspection stops, and the other half by the fact that each trade needs the one before it finished and cured. Green Design and Build is a licensed general contractor (CSLB #1110975) based in Van Nuys that builds bathrooms for homeowners across Los Angeles County, Orange County, Ventura County, western Riverside County and western San Bernardino County.
We are led by Dekel Sofer; the company has completed hundreds of projects and holds a 4.7-star rating across 146 reviews on Yelp. Code requirements below are the California state minimum and the City of Los Angeles amendments; other cities in our service area adopt the same state codes with their own amendments, so confirm the local details with your building department.
On this page
- The bathroom remodel order, step by step
- Why the order matters more than the finishes
- Do you need a permit to remodel a bathroom in Los Angeles?
- The code checkpoints inside the sequence
- Waterproofing: the step that decides whether the bathroom lasts
- Converting a tub to a shower
- Blocking for grab bars, while the walls are open
- A real bathroom remodel in Inglewood, in order
- How long a bathroom remodel takes
- Mistakes that come from working out of order
- Where we remodel bathrooms
- Bathroom remodel order FAQs
- Get a written bathroom remodel price and a sequence you can see
The bathroom remodel order, step by step
| # | Step | What has to be true before it starts |
|---|---|---|
| 1 | Design, layout and every selection | Nothing. This is where the money is made or lost |
| 2 | Permit | Layout final; drawings if walls or openings change |
| 3 | Demolition to the studs | Permit in hand; fixtures and tile ordered |
| 4 | Framing repairs and blocking | Everything is visible and dry |
| 5 | Rough plumbing: supply, drain, vent, valve | Fixture positions locked to the actual fixtures bought |
| 6 | Rough electrical | Plumbing set, so wire routes around pipe |
| 7 | Exhaust fan and duct to the outside | Fan model chosen; duct path confirmed |
| 8 | Rough inspection | All of the above complete and nothing covered |
| 9 | Insulation, drywall and cement board | Rough inspection signed off |
| 10 | Waterproofing the wet area | Backer board fastened; pre-slope in place |
| 11 | Shower pan water test | Waterproofing complete and cured |
| 12 | Tile: floor, walls, shower, niche | Pan test passed |
| 13 | Vanity, counter, toilet, trim plumbing, lighting | Tile set and grouted |
| 14 | Shower glass templated and installed | Tile finished; glass cannot be measured before |
| 15 | Final inspection, paint touch-up, punch list | Everything installed and working |
Why the order matters more than the finishes
Almost every expensive bathroom problem is a sequencing problem wearing a different costume. A vanity chosen after the plumbing is roughed in means the drain is in the wrong place for the cabinet. A freestanding tub chosen after the rough means the floor has to be opened again for the filler. A niche framed before the tile layout is drawn ends up with cut tiles on both sides. Shower glass ordered early cannot be measured, because glass is templated against the finished tile, not the drawing.
The single most useful thing a homeowner can do is finish step one completely. Every fixture, the exact tub, the exact vanity, the shower valve trim, the tile and the layout, decided and purchased or confirmed available, before demolition. Rough plumbing is set to the fixtures you actually bought, not to a generic layout, and that is why we settle selections during design rather than during construction.
Do you need a permit to remodel a bathroom in Los Angeles?
Usually yes, and the answer decides your schedule. In the City of Los Angeles, a straightforward remodel that replaces cabinets, flooring, wall finishes, tile, counters and plumbing or electrical fixtures can be pulled as a combined permit online. As soon as the work involves changes to walls or openings, or new plumbing or electrical penetrations into existing walls, the city asks for two sets of floor plans at quarter-inch scale showing the existing and proposed layouts of the bathroom and the adjacent rooms, and it goes through a Development Services Center rather than the online counter. LADBS separately lists a kitchen or bathroom remodel with no structural changes as eligible for an express permit, which is issued without plan check.
Three Los Angeles rules attach to the permit itself rather than to the design, and they surprise people. A permit valued over $500 on a house or duplex triggers water-conservation fixture requirements. A valuation over $1,000 triggers smoke detectors in each sleeping room and on each story. A valuation of $10,000 or more triggers an impact-hazard glazing retrofit that expressly includes shower doors, and, where there is gas piping, a seismic gas shut-off valve. Most full bathroom remodels clear all of these.
There is also a statewide rule worth knowing before you budget. Under Civil Code sections 1101.1 to 1101.8, a property built and available for use on or before 1 January 1994 must have all noncompliant plumbing fixtures in the building replaced as a condition of final approval when a permit is issued for alterations or improvements. Noncompliant means toilets over 1.6 gallons per flush, showerheads over 2.5 gallons per minute and interior faucets over 2.2 gallons per minute. On a 1950s Valley house with three original toilets, that is a real line item in a one-bathroom remodel.
The code checkpoints inside the sequence
These are the requirements that decide whether a rough inspection passes. They are worth knowing because they constrain the design, not just the build, and a layout drawn without them gets redrawn.
| Item | Requirement | Decided at which step |
|---|---|---|
| Toilet clearance | Not closer than 15 in from centerline to any side wall or fixture, and not less than 24 in clear in front | 1, design |
| Shower size | Not less than 1,024 sq in of finished interior area, able to contain a 30-in circle, maintained to 70 in above the drain | 1, design |
| Shower door opening | Doors swing out and leave a 22-in unobstructed egress opening | 1, design |
| Anti-scald valve | Pressure-balancing or thermostatic mixing valve, limited to 120°F | 5, rough plumbing |
| Shower drain | 2-in trap and drain for a new shower; see the retrofit exception below | 5, rough plumbing |
| Bathroom circuit | At least one dedicated 20-amp 120-volt circuit for bathroom receptacles | 6, rough electrical |
| Receptacles | GFCI protected, tamper resistant, at least one within 3 ft of the basin | 6, rough electrical |
| Tub and shower zone | No receptacle within 3 ft horizontally and 8 ft vertically of the tub rim or shower threshold; luminaires in that zone listed for damp or wet locations | 6, rough electrical |
| Lighting controls | At least one luminaire on an occupancy or vacancy sensor with automatic off; recessed cans IC-rated and airtight | 6, rough electrical |
| Ventilation | Mechanical exhaust to the outdoors in every room with a tub or shower: 50 CFM intermittent or 20 CFM continuous. A window does not substitute | 7, ventilation |
| Fan specification | ENERGY STAR compliant, ducted to terminate outside, humidity control unless part of a whole-house system | 7, ventilation |
| Wet-area surface | Nonabsorbent finish to 70 in above the drain inlet in Los Angeles | 10 and 12 |
| New fixtures | Toilet 1.28 gal/flush, showerhead 1.8 gpm, lavatory faucet 1.2 gpm | 13, trim |
Want a real number for your project?
The site visit and the itemized written estimate are free.
The ventilation line catches the most people. California requires mechanical exhaust in any room containing a bathtub or shower, and unlike the model code used in most other states there is no operable-window exception. The duct has to terminate outside the building. A fan that dumps into the attic or a soffit cavity is not compliant and, in a Los Angeles climate, is how you get mold in the roof sheathing above a shower.
Waterproofing: the step that decides whether the bathroom lasts
Tile and grout are not waterproof, and this is the step where cheap bathrooms are made. There are two legitimate systems and they are not interchangeable.
A pan liner under a mortar bed
A sheet membrane or a hot-mopped liner sits under the mortar bed, turns up at least 3 inches vertically at the walls, and drains to the weep holes of a clamping-ring drain. Water passes through the tile and the setting bed and is carried out by the liner. This system only works if there is a pre-slope beneath the liner, sloped to the drain, so the water that reaches the liner actually goes somewhere. A flat liner on a flat floor holds water permanently. It is the most common defect we find in a shower built in the 1990s.
A bonded membrane over a pre-sloped bed
A liquid or sheet membrane meeting ANSI A118.10 is applied on top of a pre-sloped mortar bed, directly under the tile, and drains to a bonding-flange drain. Water never enters the setting bed at all. This is what we use on most bathrooms now, including the Inglewood project below. The failure mode to avoid is mixing the two systems: a bonded membrane paired with a clamping-ring drain, or either system without the pre-slope, will leak eventually no matter how good the tile work is. The relevant standards are published by the Tile Council of North America.
What goes behind the tile
Water-resistant gypsum board, the green or purple board sold as a bathroom product, is not a shower material. The residential code permits it in a bathroom but not over a vapor retarder in a shower or bathtub compartment, and every California building department handout we work from calls for cement board or fiber-cement backer in the wet area. If a bid says green board in the shower, that bid is not comparable to one that says cement board and a bonded membrane.
The pan is then filled with water to the level of the rough threshold and left to stand before anything covers it. That test is a code requirement, and in some cities it is a scheduled inspection stop of its own. It is also the last cheap moment to find a problem.
Converting a tub to a shower
The received wisdom is that a tub-to-shower conversion means opening the floor or the ceiling below, because a tub drains through a 1.5-inch trap and a shower needs a 2-inch one. In California that is not always true. The plumbing code carries a retrofit allowance: for a bathtub-to-shower conversion, a 1.5-inch trap and trap arm is permitted where the shower is no larger than 36 inches wide by 60 inches long. That is exactly the footprint of a standard alcove tub, so a same-footprint conversion in that size usually keeps the existing drain, and the cost driver everyone warns about disappears. Anything larger than 36 by 60 needs the 2-inch drain. Confirm it with your building department, because this is the kind of provision cities amend.
What actually determines whether the drain can move is the trap arm limit: the distance from the trap to its vent is capped by pipe size, roughly 42 inches on 1.5-inch pipe and 60 inches on 2-inch, sloped a quarter-inch per foot. Move the drain further than that and you are adding venting, which is when the ceiling below comes down. Ask any contractor quoting a conversion where the vent is, and whether the new drain position stays inside that distance. It is the single question that separates a two-week job from a five-week one.
One caution that is judgment rather than code: if it is the only bathtub in the house, think hard before removing it. Buyers with small children look for one. We have no data to put behind that, so treat it as an opinion, not a rule.
Blocking for grab bars, while the walls are open
Accessibility requirements in the building code apply to multifamily and public buildings, not to a detached single-family house, so nothing here is mandatory for most homeowners. It is still the cheapest thing you will ever do in a bathroom. At step four, while the framing is exposed, screwing horizontal 2x blocking between the studs beside the toilet and along both shower walls costs almost nothing in materials and about an hour of labor.
The reason it matters is the load. The building code designs grab bars to resist a 250-pound concentrated load applied in any direction. Drywall anchors do not carry that, and no toggle bolt in tile and cement board does either with any confidence. If the blocking is not there, a grab bar added later means opening a finished tiled wall. Put the blocking in now whether or not anyone in the house needs a bar today, and note on the plans where it is. The same logic applies to a curbless shower: it needs the subfloor recessed between the joists, which is a decision at framing and impossible afterwards.
A real bathroom remodel in Inglewood, in order


This primary bathroom in Inglewood, completed in 2025, ran the sequence exactly as described. The room came out to the studs. With the walls open, the supply and drain lines were rerouted for the new tub position and the shower valve, which is the only moment those decisions are cheap. Drywall went up on the dry walls and cement board in the wet area, then a waterproofing membrane over the cement board before any tile. Then marble-look panels on the main walls, black textured tile in the shower, and only after all of that the freestanding tub, the double vanity with black stone counters, the sconces and the frameless glass.
The owners now have a bathroom with none of the original plumbing behind the walls. That is the argument for doing the rough work properly rather than resurfacing: you only have the walls open once. Every stage is photographed on the Inglewood primary bathroom project page, and there are two more finished bathrooms on our Irvine freestanding tub and Ontario hall bathroom project pages.
How long does a bathroom remodel take, and what sets the schedule?
Construction takes 2–3 weeks for a same-layout refresh, 3–5 weeks for a mid-range remodel and 5–8 weeks for a full reconfiguration, after 1–4 weeks of design and permitting. That timeline only means something when you know what it is made of. Six things control it, and five of them are in the sequence rather than in the labor:
- Which permit path you are on. An express or online permit can issue quickly; anything that changes walls or openings goes to plan check with drawings.
- How many inspection stops there are, and the wait between requesting an inspection and getting one. Work stops at each one, because nothing may be covered before it is approved.
- Cure and test time. The waterproofing has to cure, and the pan is filled and left standing before tile.
- Whether the drain moves. If the vent distance forces the ceiling below to be opened, that is another trade, another inspection and another repair.
- Shower glass, which cannot be templated until the tile is finished and then has to be fabricated.
- Long-lead items: stone fabrication, a specific tub, a custom vanity.
Our guide to bathroom remodel cost covers pricing by scope and the typical duration ranges we quote.
Mistakes that come from working out of order
- Demolishing before the fixtures are on site. Rough plumbing gets set to a guess, and the tub that arrives three weeks later does not match it.
- Skipping the pre-slope. The most expensive omission in the trade, and completely invisible once the tile is on.
- Green board in the shower. Cheap on the bid, and a tear-out in seven years.
- Venting the fan into the attic. Not compliant, and it moves the moisture problem rather than solving it.
- No blocking for grab bars. An hour of work at framing, or a demolished tile wall later.
- Ordering glass from the drawing. Glass is templated against finished tile. Ordering early buys nothing and risks a piece that does not fit.
- Choosing the vanity after the rough. The drain and the supply stubs end up behind a drawer bank.
- Tiling to an undecided niche. Frame and locate the niche with the tile layout drawn, so it lands on full tiles.
Where we remodel bathrooms
We build bathrooms from our Van Nuys office across the San Fernando Valley, the rest of Los Angeles County, Orange County, Ventura County, western Riverside County and western San Bernardino County. The work varies with the housing stock: 1950s and 1960s Valley houses usually mean galvanized supply lines and cast-iron drains that are worth replacing entirely while the walls are open, Orange County tracts from the 1970s and 1980s are more often a straight reconfiguration, and older Pasadena and Los Angeles houses bring lath and plaster, undersized venting and sometimes a hot-mopped pan at the end of its life. See our bathroom remodeling service and all of our service areas.
Bathroom remodel order FAQs
In what order should you remodel a bathroom?
Design and selections, permit, demolition, framing and blocking, rough plumbing, rough electrical, exhaust ventilation, rough inspection, backer board and drywall, waterproofing, the shower pan water test, tile, then vanity, fixtures and lighting, then shower glass, then final inspection and punch list. The order is set by inspection stops and by each trade needing the previous one finished, so it is not adjustable.
Does the floor or the shower tile go in first?
All tile goes in after waterproofing is complete and the shower pan has been water tested, and before the vanity, toilet and trim. Within the tile stage, walls are usually set before the floor in a shower so that the wall tile lands on the pan correctly, and the bathroom floor is generally tiled before the vanity and toilet are set so the finished floor runs under them.
When should I buy the fixtures?
Before demolition. Rough plumbing is set to the actual tub, shower valve, vanity and toilet you have chosen, and their real dimensions and rough-in requirements. Buying after the rough is the most common cause of a bathroom that has to be opened up twice.
Do I need a permit to remodel a bathroom in Los Angeles?
In most cases yes. Replacing cabinets, flooring, wall finishes, tile, counters and fixtures can be pulled as a combined permit online in the City of Los Angeles. Changing walls or openings, or making new plumbing or electrical penetrations into existing walls, requires floor plans and a full submittal. A permit also triggers Los Angeles retrofit rules at $500, $1,000 and $10,000 of valuation, and on a property built on or before 1 January 1994 it triggers replacement of all noncompliant plumbing fixtures in the building under state law.
Can I convert a tub to a shower without moving the drain?
Often, yes. The California Plumbing Code allows a 1.5-inch trap and trap arm for a bathtub-to-shower retrofit where the shower is no larger than 36 inches wide by 60 inches long, which is the footprint of a standard alcove tub. A same-size conversion in that range can usually keep the existing drain. A larger shower needs a 2-inch drain, and moving the drain beyond the trap-arm-to-vent distance means adding venting and opening the ceiling below.
Does a bathroom need an exhaust fan if it has a window?
Yes. California requires mechanical exhaust directly to the outdoors in every room containing a bathtub, shower or tub-shower combination, at 50 CFM intermittent or 20 CFM continuous. There is no operable-window exception here as there is in the model code used in many other states, and the duct must terminate outside the building rather than in the attic.
What is the minimum size for a shower in California?
Not less than 1,024 square inches of finished interior area, capable of containing a 30-inch circle, maintained to a point 70 inches above the shower drain. If a door is fitted it must swing out and leave a 22-inch unobstructed opening. A toilet needs at least 15 inches from its centerline to any side wall or fixture and 24 inches of clear space in front.
Is green board acceptable behind shower tile?
No. Water-resistant gypsum board may be used elsewhere in a bathroom but not over a vapor retarder in a shower or bathtub compartment, and California building departments call for cement board or fiber-cement backer in the wet area, with a waterproofing system over it. Tile and grout alone are not a waterproofing system.
Get a written bathroom remodel price and a sequence you can see
We will look at the existing plumbing and venting, tell you honestly whether the drain has to move, confirm the permit path for your city, and give you an itemized proposal with the stages laid out in order so you know what happens in which week. The site visit takes about two hours and the written proposal follows within 48 hours. The site visit and the estimate are free, and we reply within one business day.