Author: Dekel Sofer

  • Prefab vs. Site-Built ADU in Los Angeles: What the Brochure Price Leaves Out

    Prefab vs. Site-Built ADU in Los Angeles: What the Brochure Price Leaves Out

    A prefab ADU is not automatically cheaper than a site-built one in Los Angeles, because the advertised price is usually the price of the unit, not of a finished, permitted home on your lot. The foundation, utility trenching and connections, delivery or crane, LADBS fees, solar and yard restoration are still to come, and they are the same jobs a site builder prices in. Prefab genuinely suits some properties: a flat, open backyard with a clear route from the street and a standard floor plan. Site-built suits most of the rest: tight side yards, slopes, garage conversions, attached units, odd footprints and ADUs that must match the house. Compare the two only once every quote covers the same scope, from permit to final inspection.

    We are Green Design and Build, a licensed residential general contractor (CSLB #1110975) based in Van Nuys, building ADUs across Los Angeles, Orange, Ventura, western Riverside and western San Bernardino counties. We build ADUs on site only and do not sell or install factory units, so read this knowing which side we build on. We have tried to be fair to both, and every legal point links to its statute or agency. Prices here are budgeting ranges, not a quote. New to the term? Start with what an ADU is under California law.

    What “prefab” actually means: three different things under the law

    “Prefab” is a sales word. Behind it, California and federal law see three different products, and the label on the unit decides which code it was built to, who inspected it, and what the City still reviews.

    Factory-built housing (modular units and closed panels)

    California defines factory-built housing as a dwelling, or a building component, assembly or system, made off site in a way that its concealed parts cannot be inspected at the building site without taking it apart, then assembled on site to the California Building Standards Code. Every such unit or component sold in California must carry an insignia of approval issued by HCD, and HCD issues that insignia only through an approved quality assurance agency and only for designs that already have plan approval. Design and construction are inspected by HCD-certified third-party agencies; installation is inspected by the local building department.

    Volumetric modules, the boxes that arrive on a truck nearly finished, are the familiar version. A unit sold as “modular” can be factory-built housing or a HUD-code manufactured home, so check the tag rather than the brochure.

    Panelized ADUs

    Panelized systems ship walls, floors and roof sections as flat panels that are joined on site. The state definition turns on concealment: a closed panel, with insulation, wiring or plumbing sealed inside, has parts nobody can inspect on site, which is what the factory-built program covers. An open panel, bare framing an inspector can see in full, does not meet that test. Ask a panel supplier which kind they sell and whether the panels carry an HCD insignia.

    Manufactured homes (HUD code)

    A manufactured home is built to the federal Manufactured Home Construction and Safety Standards, 24 CFR Part 3280. It is transportable in one or more sections, is at least 8 feet wide or 40 feet long when traveling, or at least 320 square feet when set up, and is built on a permanent chassis. California uses the same tests in Health and Safety Code §18007. Each transportable section carries a HUD certification label, an aluminum plate at the taillight end, certifying it was built to the federal standards in effect on the date of manufacture.

    Under Government Code §66313(a), an accessory dwelling unit expressly includes a manufactured home as defined in §18007. So a HUD-code home can legally be your ADU. It still needs a foundation, a local permit and the same zoning compliance as any other ADU.

    Factory-built (modular, closed panel)HUD-code manufactured homeSite-built
    Built toCalifornia Building Standards Code (Title 24)Federal standards, 24 CFR Part 3280California Building Standards Code, as adopted by the City
    Proof of complianceHCD insignia of approval on the unit or componentHUD certification label on each sectionLADBS plan check and field inspections
    Who checks the factory workHCD-certified third-party agencyInspection under HUD requirementsNot applicable
    What LADBS still reviewsZoning, foundation, site-built parts, field connections and installationFoundation installation under permit, zoning and site workEverything: zoning, structure, foundation, energy, every trade
    Energy Code (Title 24, Part 6)AppliesDoes not apply; Title 25 insteadApplies
    Works as a garage conversionNoNoYes
    Design changesLimited to what the approved design allows; site changes need local approvalLimited to the manufacturer’s modelsAnything the lot and the code allow

    How a prefab ADU gets approved in Los Angeles

    Factory-built housing that bears an HCD insignia is deemed to comply with local ordinances on housing construction, and it cannot be modified during installation without the local enforcement agency’s approval. That is the real permitting advantage: LADBS does not re-check the factory-built structure.

    What the City keeps is spelled out in two places. Health and Safety Code §19993 reserves to local jurisdictions zoning and use, setbacks and yards, local fire zones, wind and snow loads, site development and property line requirements, and architectural review, with the condition that those local requirements may not vary substantially from what applies to other homes of similar size. And LADBS’s own bulletin on state-approved factory-built housing (P/BC 2017-112) splits the work like this:

    • Factory-built elements are reviewed and inspected by the state-approved third-party agency.
    • LADBS reviews the foundation plans and calculations, the zoning, any site-built elements and all other site work.
    • LADBS inspects all field construction and the connections, including connections between factory and site-built parts.
    • LADBS may not re-review plans HCD has already approved or charge plan check fees on them, so the plan check valuation is reduced to reflect the state-approved portion. Zoning and foundation review are still charged.

    On the site side, your application looks much like a site-built one: site plan, setbacks, foundation design, utility routing and the fees that go with them. The rules that decide what fits on your lot are the same either way, so run your address through our California ADU rules calculator and read the Los Angeles ADU rules before you shop for any unit. Our guide to ADU permits in Los Angeles covers the permit route itself.

    A HUD-code home follows a different path. Installing one on a foundation system requires a building permit from the local enforcement agency under Health and Safety Code §18551, foundation plans that meet state regulations or an approved alternate, and proof that you own the land (or hold a qualifying lease) and that the home is free of liens or the lienholders consent. When the certificate of occupancy issues, the agency records a document with the county recorder, the home’s certificate of title is surrendered and its registration cancelled, and the home becomes a fixture and a real property improvement.

    Does LA’s standard plan program include prefab?

    The LADBS list of approved standard plans does not say which designs are built in a factory. Two expired entries are described as using manufactured housing and as a 3D-printed home; for the rest, ask the plan owner. The two shortcuts are separate: a standard plan pre-checks drawings with LADBS, while a factory-built unit has its structure certified by the state. Our explainer on LA pre-approved ADU standard plans covers how that program works.

    What the brochure price leaves out

    A unit price is the price of the unit. Some manufacturers sell turnkey packages that include site work; others quote the unit and leave the lot to you or a contractor you hire. Either is legitimate. The trouble starts when a unit price is compared with a site builder’s all-in contract. Put these lines on every quote, prefab or site-built, before you compare totals.
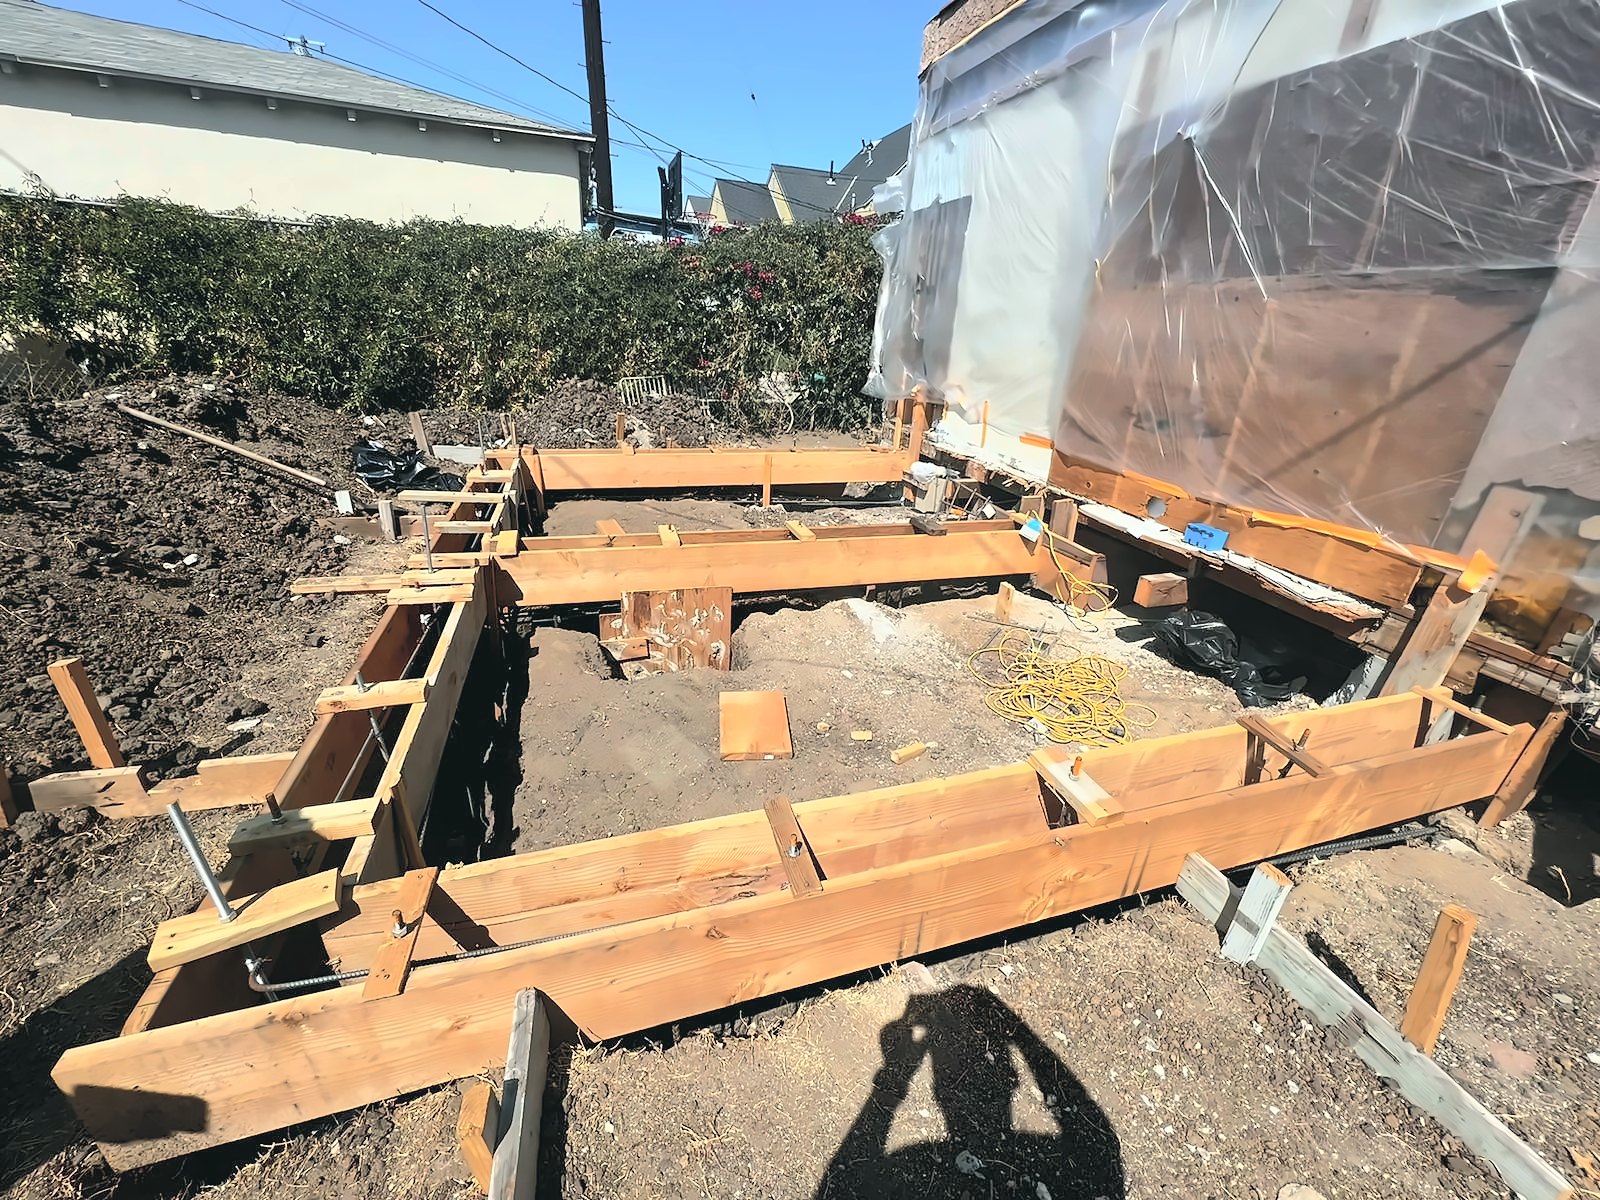
    Footing forms and rebar set in a Los Angeles backyard before the foundation pour for an ADU
    Footing forms and rebar for one of our Los Angeles ADUs. A factory unit needs the same foundation work on site.
    Line itemWhy it matters on an LA lotAsk every bidder
    Site visit, survey and soils informationSetbacks, easements, slope and soil decide where the unit can go and what foundation it needsWho pays for the survey and any soils report, and is it done before I commit to a unit?
    Local design workLADBS still needs a site plan, a foundation design and utility routing for a factory unitWho prepares the site plan and stamps the foundation design?
    Plan check and permit feesLADBS reduces plan check on state-approved parts but still charges zoning and foundation review and a permit feeAre city fees, school fees and utility fees included, or estimated, or excluded?
    FoundationEvery unit sits on one; a sloped lot can need a stepped or engineered foundationIs the foundation in this price, and designed for my actual grade?
    Trenching and utility connectionsDistance from the panel, water meter and sewer to the unit drives cost on any ADUHow many feet of trench are included, and where does each utility connect?
    Electrical panel capacityA fully loaded 100-amp panel is a sign an upgrade may be needed before another dwelling is addedHas anyone checked my panel, and is an upgrade included?
    Delivery, crane and settingModules need a clear route from the street and room to lift over the house, wires and treesAre delivery and the crane included, and who confirms the lift is possible?
    Finishing on siteSeams between modules are closed up on site, and stairs, landings, decks and ramps are built thereWhat is finished at the factory, and what is left for the site?
    SolarThe Energy Commission requires newly installed PV on a newly constructed detached ADU unless an exception appliesIs the solar system in the price?
    Yard restorationTrenching and equipment cross lawns, irrigation and pavingWhat does the yard look like when you leave?

    None of these are prefab problems; a site builder faces every one. The difference is that a turnkey site-built contract should already name them, and a unit price may not. Our guide to what an ADU costs in Los Angeles covers utility, access and slope costs in detail, and why ADU quotes vary so much between contractors explains how to line up bids that price different scopes.

    What a site-built ADU costs in Los Angeles

    We do not quote prefab manufacturers’ prices; they change, and they are theirs to publish. For site-built work, these are our published ranges for a complete, permitted ADU in Los Angeles. They are budgeting ranges, not a quote.

    Site-built ADU typeTypical Los Angeles budgetWhat usually pushes it higher
    Garage conversion$100,000–$200,000Hidden conditions in the old garage and trenching utilities to a detached garage
    Attached ADU$150,000–$300,000How much new foundation, framing, roofing, electrical and structural work it needs
    Detached new construction$180,000–$450,000 or moreSize, slope, tight access, long utility runs, retaining walls and premium finishes

    Those ranges include the site work listed above, so a factory unit price and a site-built range are not the same kind of number. A garage conversion has no factory equivalent at all; see our garage conversion cost guide, the comparison of a detached ADU vs garage conversion, and junior ADU costs in Los Angeles. For how LADBS arrives at its fees, see LADBS permit costs.

    Site access: the question that decides most LA lots

    On many Los Angeles lots the only way into the backyard is a driveway or a narrow side yard. That matters far more to a factory unit than to a framed one.

    • Modules need a drive-in route or a lift. If a truck cannot back the module into place, a crane lifts it over the house or garage, which needs a place to set up, a clear swing path and enough reach for the weight.
    • Overhead lines get in the way. Service drops and power lines crossing the yard, like those in our featured photo, limit where a crane can swing.
    • Trees and neighbors. Mature trees in the swing path, protected trees and a neighbor’s roofline all constrain a lift.
    • Panels are more forgiving. Flat panels can often be carried or lifted in smaller pieces, though large panels still need equipment.
    • Site-built goes where people can walk. Lumber, concrete and fixtures can be carried through a narrow side yard. That costs labor hours, but it rarely makes a lot unbuildable.

    If your backyard is reachable only through a narrow gate under a power line, ask a prefab supplier to confirm delivery in writing, after a site visit, before you pay a deposit.

    Timeline: where prefab saves time and where it does not

    The case for prefab speed is that the factory builds the unit while the foundation and utilities go in on site, and setting a finished unit takes far less time on your lot than framing. That is real, and it means a shorter stretch of noise for the neighbors.

    It does not shorten the work before construction: design, survey, site plan and foundation design, LADBS review of zoning and foundation, and utility coordination. Factory production also has to be scheduled, and starts only after you commit to a unit. Site-built construction runs longer on your lot, but it starts when the permit issues and does not wait on a production slot or delivery date.

    Neither route has a reliable fixed number, and we do not quote one. Our guide to how long an ADU takes walks through each phase of a site-built project.

    Design flexibility, matching the house and resale

    A factory unit is built to an approved design. Under §19981, modifying an HCD-approved unit before installation needs HCD’s approval, and modifying it during installation needs the local building department’s. Modules are also sized to travel by road, so room widths follow the shipping envelope.

    Site-built design starts from your lot. It can step down a slope, fit a narrow or irregular footprint, share a wall with the house, or match the main house’s roofline, stucco and windows. We show clients the result in a 3D design walkthrough before construction, and if you would rather start from a set layout, our ADU design concepts are starting points we build on site.

    On resale, a factory-built unit on a permanent foundation is real property, like a site-built ADU. A HUD-code home becomes a fixture and real property improvement once installed on a foundation under permit and recorded under §18551. How either is valued is a question for your appraiser and lender; see ADU financing options and ADU rental income in Los Angeles.

    Energy code, solar and fire zones

    The California Energy Commission states that factory-built homes must comply with Title 24, including the Energy Code; manufactured homes meet Title 25 instead. The same guidance says a newly constructed detached ADU must have newly installed solar PV unless an exception applies, while an attached ADU is treated as an addition with no PV requirement. Local fire zones are among the matters §19993 leaves to the city, so in a mapped fire hazard area confirm a factory unit’s materials meet local requirements before you order it.

    How to decide: prefab or site-built

    Prefab tends to fit when

    • The backyard is flat and open, with a clear truck or crane route from the street.
    • One of the manufacturer’s standard layouts works for you as built.
    • You want a detached unit, not a conversion or an attached ADU.
    • Limiting the time construction is active on your lot matters more to you than design freedom.
    • The supplier’s quote, or a contractor’s, covers foundation, utilities, delivery, permits, solar and restoration.

    Site-built tends to fit when

    • Access is only through a narrow side yard or driveway, or under power lines.
    • The lot slopes, is irregular, or has trees and easements to work around.
    • You are converting a garage, attaching to the house, or adding a junior ADU.
    • The ADU needs to match the main house or fit a footprint no catalog offers.
    • You want one contract and one licensed contractor responsible from foundation to final inspection.

    Questions to ask a prefab supplier

    1. Is this unit factory-built housing with an HCD insignia, or a HUD-code manufactured home?
    2. Exactly what does the price include, line by line, from site plan to final inspection?
    3. Will you visit my lot and confirm delivery and setting in writing before I pay a deposit?
    4. Who holds the contractor’s license for the site work, and what does the warranty cover on site versus in the factory?

    Whoever builds your foundation and connects the utilities is doing construction work, so check their license as you would ours; see verifying a contractor license in California.

    Why Green Design and Build builds ADUs on site

    We build on site because of the lots we see. Most of our ADU work is inside the City of Los Angeles, on established lots reached through a driveway or side yard, where garages are being converted, units attach to the house, and owners want the ADU to look like part of the property. Those are the jobs factory units find hardest and framed construction handles routinely.

    It also means one contract. When foundation, framing, utilities, finishes and final inspection are all ours, there is no gap between what a factory shipped and what a site crew connected. Regulated trades such as electrical and plumbing are done by licensed specialty contractors we schedule and supervise. If prefab is the better answer for your lot, we will say so at the site visit. Our Los Angeles ADU builder page and ADU construction services describe how we work.

    Prefab vs. Site-Built ADU FAQs

    Is a prefab ADU cheaper than a site-built ADU in Los Angeles?

    Not automatically. A factory unit price usually covers the unit, while a site-built contract covers the finished, permitted ADU. Foundation, utility trenching and connections, delivery and crane, city fees, solar and yard restoration apply either way. Compare only quotes that cover the same scope from permit to final inspection.

    Can a manufactured home be used as an ADU in California?

    Yes. Government Code §66313(a) says an accessory dwelling unit includes a manufactured home as defined in Health and Safety Code §18007. It still needs a local building permit for its foundation installation and must meet the same zoning rules as any other ADU on the lot.

    What is the difference between a modular ADU and a manufactured home?

    “Modular” is a sales term. Factory-built housing is built to the California Building Standards Code and carries an HCD insignia of approval. A manufactured home is built on a permanent chassis to the federal HUD standards in 24 CFR Part 3280 and carries a HUD certification label. A unit sold as modular can be either, and the label tells you which.

    Does a prefab ADU need a permit in Los Angeles?

    Yes. LADBS reviews the zoning, the foundation plans and any site-built work, and inspects the installation, field construction and connections. It does not re-review the factory-built structure HCD has approved, and it reduces plan check fees to reflect that, but zoning and foundation review are still charged.

    Are there pre-approved prefab ADU plans in Los Angeles?

    The LADBS standard plan list does not identify which designs are built in a factory. Two expired entries are described as using manufactured housing and as a 3D-printed home. A standard plan and a factory-built unit are separate shortcuts, so ask the plan owner how a listed design is built.

    Does a prefab ADU need solar in California?

    The Energy Commission says factory-built homes must meet Title 24, including the Energy Code, and that a newly constructed detached ADU needs newly installed solar PV unless an exception applies. Manufactured homes follow Title 25 and are not subject to the Energy Code. Attached ADUs are treated as additions with no PV requirement.

    Can a prefab ADU go behind a house with only side-yard access?

    Sometimes, but it depends on whether a truck or crane can reach the spot. Modules may need lifting over the house, clear of power lines and trees. Panelized systems are more flexible. Ask the supplier to confirm delivery in writing after a site visit, before you pay a deposit.

    Does Green Design and Build install prefab ADUs?

    No. We build ADUs on site only, including detached units, attached units and garage conversions. If a factory unit suits your lot better, we will tell you at the site visit. The visit and the itemized written estimate are free.

    Get a written ADU price for your lot

    We will walk your lot, check access, slope, utilities and what the city allows, and tell you whether a site-built ADU or a factory unit fits it better. You get an itemized written proposal within 48 hours of the visit. We are open 8am to 6pm every day and reply within one business day.

  • Stucco Repair in Los Angeles: Patch, Re-Coat or Re-Stucco?

    Stucco Repair in Los Angeles: Patch, Re-Coat or Re-Stucco?

    Most stucco problems on a Southern California house need one of three fixes. A patch handles a few cracks or a damaged section where the wall behind is dry and the surrounding stucco is still hard and bonded. A re-coat — a new cementitious color coat, an elastomeric coating or paint — suits stucco that is sound but faded, chalky or covered in fine hairline cracks. A full re-stucco is for walls where the stucco is loose, soft or water-damaged, or the building paper and lath behind it have failed, so the only lasting fix is to strip back to the framing and rebuild. The deciding question is rarely how the surface looks. It is whether the wall behind it is dry, and whether the stucco is still attached.

    We are Green Design and Build, a licensed residential general contractor based in Van Nuys (CSLB #1110975), working across Los Angeles, Orange, Ventura and the western parts of Riverside and San Bernardino counties. We do stucco repair and full re-stucco, often alongside exterior painting, window replacement and structural work. This guide deliberately contains no prices: stucco cost depends on what is behind the surface, and the only honest number comes from a site visit.

    Patch, re-coat or re-stucco: a quick diagnosis

    Walk the house in daylight, tap suspect areas with a screwdriver handle, and look closely at the bottom of each wall where it meets soil or paving. Then match what you find:

    What you seeUsual fixCheck first
    Fine hairline or web-like “map” cracks; the stucco sounds solid when tappedRe-coatThat no crack is wider or offset
    One or two diagonal cracks from window or door cornersPatch, then finish the whole wall panelWhether they reopen after patching
    A crack that catches a fingernail, or one side sitting proud of the otherFind the cause before patchingFoundation, framing, earthquake damage
    Hollow sound when tapped; bulges; pieces falling awayReplace the section, including lath and paperHow far the loose area extends
    Staining, white mineral deposits (efflorescence) or crumbly stucco under windows or at the baseTrace the water first; often a section or full re-stuccoWindow flashing, roof runoff, sprinklers, a buried weep screed
    Faded or chalky color, no cracksPaint or a new color coatThat the surface is clean and sound
    Repeated patches, several walls failing, or rot found during a repairFull re-stuccoFraming, termite damage, window flashing

    Two walls that look identical can have completely different problems behind them, so a contractor who quotes without tapping a wall or asking about leaks is guessing.

    How a stucco wall is built, and why it decides the repair

    Stucco is not a coating; it is a layered cement plaster system. Section R703.7 of the 2025 California Residential Code requires exterior plaster to be installed in compliance with ASTM C926, the standard for applying portland cement-based plaster, and ASTM C1063, the standard for installing the lath it is applied to. From the framing out:

    1. Framing and sheathing. Many older houses have no sheathing — the paper and wire are stretched straight across the studs. Newer houses usually have plywood or OSB.
    2. Water-resistive barrier. The building paper. Section R703.7.3 sets its performance: in dry climate zones, two separately installed layers of 10-minute Grade D paper (or an equivalent), or a single 60-minute Grade D layer separated from the stucco by a drainage or other non-absorbing layer; in marine climate zones, an added drainage space of at least 3/16 inch. The paper is what keeps water out of the house; the stucco only sheds most of it.
    3. Lath. Corrosion-resistant expanded metal, welded wire or woven wire. Section R703.7.1 requires the nails or staples to be no more than 7 inches apart along each stud.
    4. Scratch and brown coats. Section R703.7.2 requires at least three coats of plaster over metal or wire lath. Over wire lath, Table R702.1(1) sets a minimum thickness of 7/8 inch for exterior cement plaster.
    5. Finish coat. The thin top coat that gives the wall its texture and, with a cementitious color coat, its color.
    6. Weep screed. A metal or plastic strip at or below the foundation plate line. Under Section R703.7.2.1 it must sit at least 4 inches above the earth or 2 inches above paved areas and let trapped water drain to the outside.

    Two consequences matter for repair. The code sets curing intervals for three-coat work (Section R703.7.5) — at least 48 hours between the first and second coats and at least seven days before the finish coat — so a real re-stucco cannot be rushed. And everything that keeps water out is behind the plaster: a surface patch can make a wall look right while the paper behind it is still torn.

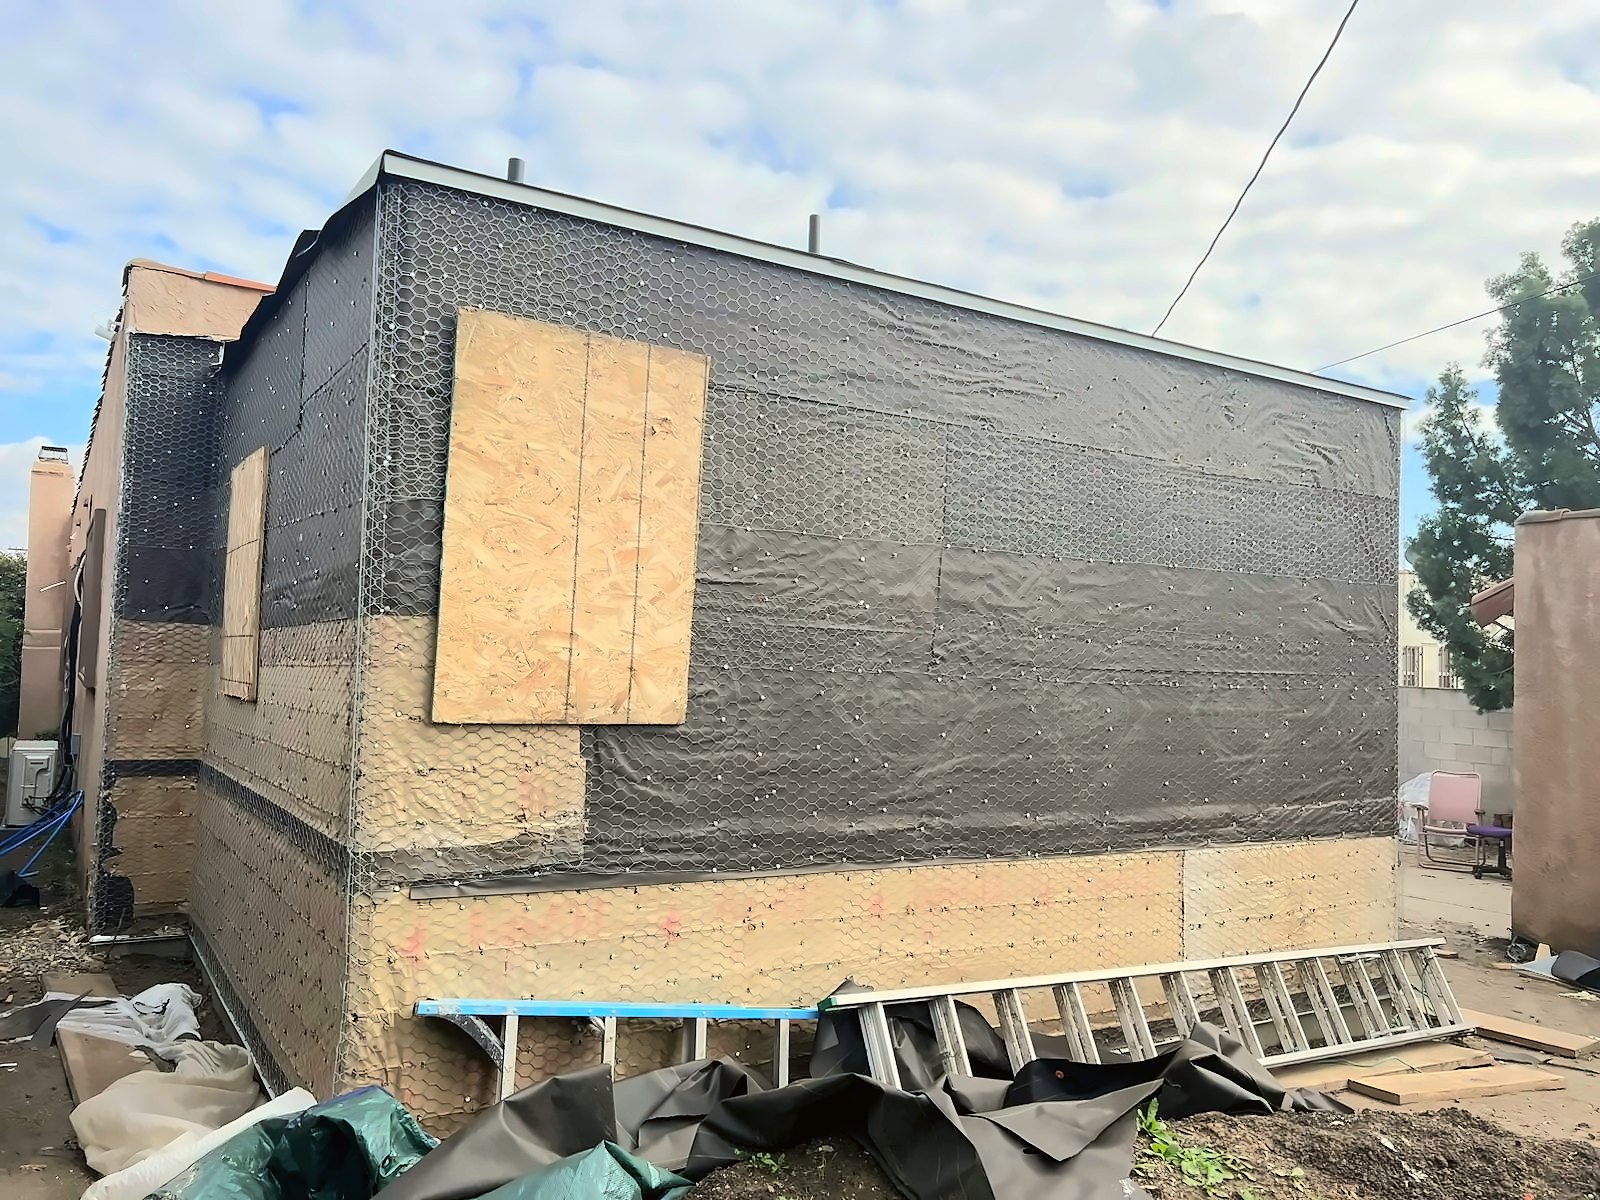
    Wood-frame wall covered in black building paper and wire stucco lath before the first plaster coat
    Building paper and wire lath on one of our attached ADU projects in Los Angeles — the layers a full re-stucco replaces and a surface patch never reaches.

    Reading stucco cracks: what is normal and what is not

    Cement plaster shrinks as it cures and moves with temperature and with the framing behind it, so some cracking is normal on almost every stucco house. What matters is the pattern, the width and whether the crack is still moving. Where structure is in question, none of this replaces an engineer.

    Hairline and map cracking

    Fine cracks in a random, web-like pattern are usually shrinkage in the plaster itself. On a wall with sound paper behind it they are mainly cosmetic — the classic case for re-coating rather than patching crack by crack.

    Diagonal cracks at window and door corners

    Openings concentrate stress, so short diagonal cracks from the corners of windows and doors are common. A single, narrow, stable corner crack is a patch. One that keeps reopening, or comes with a door or window that has started to stick, points to movement a patch will not fix.

    Wide, stepped or offset cracks

    Cracks that catch a fingernail, cracks where one side sits proud of the other, long horizontal cracks, and cracks that line up with cracks in the slab or interior drywall should be investigated before anyone patches them. Our guide to the warning signs your foundation needs repair covers what to look for indoors, and our foundation repair cost guide explains the fixes. Patching over active movement just produces a neat new crack in the same place.

    Cracks after an earthquake

    New cracking after a quake is a reason to have the cripple walls and foundation connection looked at, not only the stucco. If the house has never been retrofitted, read about seismic retrofitting and the state’s Earthquake Brace + Bolt grant program before spending money on the surface.

    Option 1: patching stucco properly

    A good stucco patch is a small re-stucco, not a smear of filler. On anything bigger than a hairline crack:

    1. Cut back to sound stucco until the edges are hard and well bonded.
    2. Inspect what is exposed. If the paper is torn or the lath rusted or loose, the opening grows until it reaches sound paper and lath on every side, and new paper is lapped shingle-fashion with the old so water still drains outward and down.
    3. Rebuild in coats, with time to cure, not in one thick pass that shrinks and cracks.
    4. Match the texture — sand finish, lace, dash or smooth trowel — by hand, ideally on a test area first.
    5. Finish the whole panel, carrying the color to a natural break such as a corner or joint rather than dabbing it over the patch.

    Step five is why so many patches show: fresh color over a patch rarely matches a wall that has had years of sun. Ready-mixed acrylic stucco patch is fine for hairline cracks and nail holes, but caulk smeared over cracks is not a repair — it collects dirt, will not hold texture and shows through paint.

    Option 2: re-coating sound stucco

    When the stucco is hard, bonded and dry but tired — faded, chalky, covered in fine cracks — re-coating gives the wall a new surface without tearing it off. The three common approaches behave differently:

    Compared onCementitious color coatExterior acrylic paintElastomeric coating
    What it isA new thin coat of cement-based finish plaster, color mixed inA standard exterior paint systemA thick, flexible coating applied much heavier than paint
    Hairline cracksFilled as part of the new finish coatBridges very little; cracks tend to show throughDesigned to span small cracks
    MoistureCement-based, with no paint film on the surfaceVaries by product; check the vapor permeability ratingTypically low vapor permeability; can hold moisture in the wall
    Best forRefreshing or re-texturing unpainted stuccoSound walls with few cracksDry walls with widespread hairline cracking

    Elastomeric is often sold as the answer to cracked stucco, and on the right wall it is a good one. The Northwest Wall and Ceiling Bureau’s technical guidance on painting stucco notes that elastomeric coatings are typically very low in vapor permeability and can trap moisture trying to leave the wall, should not be used to solve a water-intrusion or flashing problem, and can be difficult to remove or re-color later. It recommends coatings for stucco with a perm rating of 7 or higher.

    In practice: use elastomeric on a dry wall with lots of fine cracks, and never to cover a stain nobody has explained. For the painting side, see our exterior house painting cost guide and browse our exterior painting design ideas.

    Option 3: a full re-stucco

    A full re-stucco removes the old plaster, lath and paper down to the framing or sheathing and rebuilds the wall to the current code. It is the right call when:

    • Large areas sound hollow or are coming away from the wall.
    • Water has got behind the stucco and the paper has failed — staining, soft plaster, rot at the sill plate.
    • The house has been patched so often that the walls no longer read as one surface.
    • The walls are being opened anyway for new windows, an addition or a whole-home renovation.
    • There is no working weep screed, and soil or paving has built up against the wall.

    Some bids call a new layer of plaster over old stucco a “re-stucco”. Over sound, well-bonded stucco that is really a re-coat, and it can be the right job; over loose or wet stucco it only hides the problem. Ask every bidder which one they mean.

    What happens during a re-stucco

    1. Protection and access — landscaping, windows and hardscape covered; scaffolding where the wall height needs it.
    2. Tear-off of stucco, lath and paper. On a pre-1978 house with painted stucco, this falls under the EPA’s Renovation, Repair and Painting rule: paid work that disturbs paint in pre-1978 housing must be done by certified firms, and while exterior jobs of 20 square feet or less are generally exempt, demolition of painted surfaces is covered regardless of size.
    3. Framing inspection and repair. The step that changes the scope: rot at sill plates, termite damage and wet sheathing are fixed before anything new goes on.
    4. Weep screed at the foundation line, with the code’s clearances.
    5. New paper, with windows and doors flashed and lapped into it.
    6. New lath, fastened to the framing.
    7. Scratch, brown and finish coats, with the required curing time between them.
    8. Inspections and cleanup.

    If your windows are original or near the end of their life, a re-stucco is the best chance you will get to replace them: the wall is already open, and new window flanges can be flashed into new paper. Our window replacement cost guide explains the options, and our windows and doors page covers what we install.

    Stucco repair cost: what actually drives the number

    We do not publish a price range for stucco work, because a range wide enough to be honest would be too wide to be useful. Two houses with the same area of cracked stucco can end up in very different places depending on what is found behind the surface. These are the factors that move the number:

    Cost driverWhy it changes the price
    Area and number of wallsMore material and labor, and finishing whole panels for a color match adds area beyond the damage
    Wall height and accessTwo-story walls, hillside lots and tight side yards need scaffolding
    What is behind the stuccoRot, termite damage or failed sheathing must be repaired first, and cannot be priced until it is seen
    Paper and lathA surface repair keeps them; a section repair or re-stucco replaces them
    Color and texture matchingHand-matching an old texture is skilled work; an aged color rarely matches without re-coating the panel
    Windows and flashingRe-flashing or replacing windows adds scope now but avoids cutting into new stucco later
    Permit, inspections and lead-safe workA permit is required for re-stucco in the City of Los Angeles; painted pre-1978 houses need lead-safe containment

    The useful number is a written scope: which walls, which layers, what happens if rot is found, and how the finish will be matched. We price that after a site visit of about two hours and send a written proposal within 48 hours. If stucco is part of a larger project, our financing page explains how payment can be spread out.

    Do you need a permit for stucco repair in Los Angeles?

    In the City of Los Angeles it depends on the scope:

    • Painting and re-coating. LAMC Section 91.106.2 lists painting, papering and similar work as exempt from permit.
    • Small repairs. The same section exempts work valued at $2,500 or less, unless it affects structural stability or public safety, is done to comply with a Department order, or changes the use or occupancy. Our roof permit guide explains this exemption in more detail.
    • Re-stucco. LADBS lists “re-stucco for residential buildings” in its Express Permits bulletin, P/GI 2026-003 — work that needs a permit but no plan check. The bulletin also lists replacing existing siding with new stucco on single-family dwellings and duplexes.

    The inspections are what protect you: someone independent sees the paper, lath and screed before they disappear under plaster. Our guide to LADBS permit costs explains how fees are worked out. Outside the City of Los Angeles — Glendale, Burbank, Pasadena, unincorporated county areas, and the cities of Orange and Ventura counties — each building department sets its own rules.

    Houses in fire hazard areas

    For the 2025 code cycle, California moved its wildfire construction rules out of Section R337 of the Residential Code and into Title 24, Part 7, the California Wildland-Urban Interface Code. Its Section 504.5 limits exterior walls of the buildings it covers to listed methods, including noncombustible materials, one-hour fire-resistance-rated construction on the exterior side and tested assemblies. If your house is in a mapped fire hazard area, ask the building department how a re-stucco will be documented under Part 7 before work starts. We cover rebuilding after a wildfire on our fire rebuild page.

    Mistakes that make stucco problems worse

    • Burying the weep screed. Raised planters, new topsoil, pavers or a patio poured tight to the house hold water against the bottom of the wall. The code’s 4-inch clearance above soil and 2-inch clearance above paving exist so trapped water can get out.
    • Sealing the screed shut with paint, caulk or mortar packed into the drainage gap.
    • Patching without finding the water. A stain under a window is usually a flashing or runoff problem, and stains near the roofline often start at the roof edge — see our guide to roof leak repair, and check whether the roof is simply at the end of its life using how long a roof lasts in Southern California.
    • Using elastomeric or caulk to stop a leak. Both hide the symptom and can trap the moisture behind it.
    • Sprinklers aimed at the house. A wall soaked every morning stays wet at the base, and adjusting the heads costs nothing.
    • Patching a moving crack again and again. If a crack returns, the problem is not the stucco.

    Can you repair stucco yourself?

    Yes, for small things: hairline cracks, nail and screw holes, and a small ding where the paper behind is intact. Call a professional when the stucco sounds hollow, when there is staining or softness, when cracks are wide or keep returning, when the damage is more than a small patch, or when the house was built before 1978 and the stucco is painted.

    How to choose a stucco contractor

    The Contractors State License Board licenses lath and plaster specialists under the C-35 Lathing and Plastering classification. Whoever you hire, check the license first — our guide on how to verify a contractor’s license in California takes a couple of minutes — and then ask:

    1. Will you open the wall around the damage, and how is the price handled if you find rot or torn paper?
    2. Does this need a permit, and who pulls it?
    3. How will you match the texture and color, and how far will the finish coat extend?
    4. Where will the weep screed end up relative to the soil and paving?
    5. If the house is pre-1978 and painted, is your firm RRP-certified?
    6. What does the warranty cover? Ours is set out on our warranty page.

    Our questions to ask before hiring an exterior painter apply equally to the coating side of the job, and you can read what homeowners say about working with us on our reviews page — 4.7 stars across 146 Yelp reviews.

    Stucco repair FAQs

    How much does stucco repair cost?

    There is no honest single number. Cost depends on the area, wall height and access, whether the paper and lath must be replaced, what is found behind the stucco, how color and texture are matched, and whether a permit is needed. A small patch and a whole-house re-stucco are different jobs, which is why we price stucco only after a site visit.

    Can a stucco patch be made invisible?

    Close to it, if the texture is matched by hand and the color is finished across the whole wall panel to a corner or joint. A patch colored on its own almost always shows, because the wall around it has faded.

    Is elastomeric paint good for cracked stucco?

    It works well on dry walls with widespread hairline cracking, because it is designed to span small cracks. Northwest Wall and Ceiling Bureau guidance notes that elastomeric coatings are typically low in vapor permeability, can trap moisture, should not be used to fix water intrusion, and can be hard to remove or re-color later.

    How long does new stucco need to cure before painting?

    The California Residential Code requires at least 48 hours between the first and second coats of three-coat stucco and at least seven days before the finish coat. For paint, Northwest Wall and Ceiling Bureau guidance is to wait until the surface pH drops to 8 or lower, which typically takes a week to 10 days; follow the coating manufacturer’s instructions too.

    Do I need a permit to re-stucco my house in Los Angeles?

    Yes, in the City of Los Angeles. LADBS lists re-stucco for residential buildings as an express permit, so no plan check is required. Painting is exempt, and repairs valued at $2,500 or less are exempt unless they affect structural stability or public safety. Other cities set their own rules.

    How can I tell if a stucco crack is structural?

    Fine, random hairline cracks are usually shrinkage. Cracks that catch a fingernail, cracks with one side offset, long horizontal or stair-stepped cracks, and cracks that keep reopening or line up with cracks indoors suggest movement and should be investigated before anyone patches them.

    How long does a re-stucco take?

    Longer than most people expect. The code’s curing intervals alone add more than a week between the first coat and the finish coat, before tear-off, framing repairs, paper and lath, inspections and weather. The schedule for a specific house comes with the written proposal.

    Should I replace my windows when I re-stucco?

    If the windows are near the end of their life, yes. The wall around them is already open, so new windows can be flashed properly into the new paper; replacing them later usually means cutting into fresh stucco.

    Have your stucco looked at before you choose a fix

    The right repair depends on what is behind the surface, and that is something we check in person. We tap the walls, open suspect areas where needed, look at the base of each wall and the water sources above it, and give you a written scope that says whether you need a patch, a re-coat or a re-stucco, and why. Site visits take about two hours, proposals follow within 48 hours, and we reply to every inquiry within one business day. Call (800) 348-3050, 8am–6pm daily, or request a stucco repair estimate.

  • Foundation Underpinning in Los Angeles: When a House Needs It, the Methods, and the Cost

    Foundation Underpinning in Los Angeles: When a House Needs It, the Methods, and the Cost

    Foundation underpinning extends part of a house’s foundation down to soil or rock that can actually carry it, using steel piers (helical or push piers) or concrete (drilled piers or mass-concrete pours). A house needs it when a section of the foundation is still settling because the ground beneath it cannot hold the load, not when it settled years ago and has since stopped. In Los Angeles, pier underpinning typically runs $10,000 to $40,000, is designed by an engineer from a soils report, needs a building permit through plan check, and usually takes four to eight weeks of engineering and permitting followed by one to three weeks of construction.

    Green Design and Build is a licensed general contractor (CSLB #1110975) based in Van Nuys, repairing and building homes across Los Angeles, Orange and Ventura counties and western Riverside and San Bernardino counties. The company is led by Dekel Sofer, who has more than 16 years in residential construction. Every price on this page is a budgeting range, not a quote; the real number comes from a written proposal after a site visit and the engineer’s design. For everything we do below the floor, see our foundation repair and seismic retrofit services.

    What underpinning does, and what it does not do

    A conventional footing spreads the weight of a house over the soil just below it. When that soil gives way, underpinning installs new supports beside or beneath the footing, carries them down to a layer that can take the load (competent soil, or the bearing stratum) and ties the footing to them, so the load bypasses the weak ground.

    Underpinning is a narrow tool. On its own it does not:

    • Fix the water that caused the settlement. A soaking downspout or a leaking drain line keeps working on the rest of the house.
    • Close the cracks settlement already made. Finishes are repaired separately, and lifting can open new cracks.
    • Brace the house for an earthquake. Bolting the house to its foundation and bracing the cripple walls is a seismic retrofit, a different job.
    • Fix sagging floors in the middle of a raised house. Sunken interior posts and girders are a cheaper leveling repair.

    Does your house need underpinning? Active settlement versus settlement that stopped

    The deciding question is whether the foundation is still moving. A house that settled long ago and has been stable for decades needs its doors adjusted and its cracks patched, not piers. A house whose low corner is lower this year than last year may need underpinning. In a photograph, the two look identical.

    A contractor who diagnoses active settlement in fifteen minutes and quotes piers on the spot is guessing. The evidence comes from three places:

    • Change over time. Doors that started sticking this year, cracks that have widened, new gaps at the ceiling.
    • Measurement. A floor-elevation survey or crack monitors, read again after a few months, show whether the low point is getting lower.
    • Pattern. Settlement at one corner or wall points to soil giving way there. Cracks that open in late summer and close after the rains point to clay shrinking and swelling, a moisture problem first.

    Our guide to the warning signs that a foundation needs repair covers the symptoms in detail, and our overview of foundation repair options covers every fix. If the signs are ambiguous, monitoring through a wet season before committing to piers costs very little.

    When underpinning is usually the right fix

    • One section of the house is settling, and measurements show it is still dropping.
    • A soils report confirms the footing sits on uncompacted fill, a void or soft soil that cannot carry the load.
    • A hillside house has footings moving toward a descending slope.
    • A slab corner dropped after a plumbing leak washed soil out from under it, and the leak has been repaired.

    When something else is the better answer

    • Movement has stopped: cosmetic repair of cracks, doors and finishes.
    • Cracks open and close with the seasons: drainage and moisture management first.
    • Interior floors sag but the perimeter is level: house leveling and post and girder replacement.
    • The concrete itself is failing (crumbling unreinforced concrete, brick, a rotated stem wall): partial or full replacement.

    When underpinning is planned rather than a repair

    Adding a second story, or removing a load-bearing wall and landing a new beam on a single post, concentrates weight on footings sized for the original house, and the engineer may call for underpinning or new footings there. That is design, not a defect, and it is priced inside the project. Our guides to second-story addition cost, removing a load-bearing wall and room addition cost show where foundation work sits in those budgets.

    The four underpinning methods

    The engineer chooses between four methods based on the soils report, the weight of the house, the depth of the bearing layer and the room to work. A contractor who sells only one system tends to recommend it for every house.

    Helical piers

    A helical pier is a steel shaft with one or more screw-shaped plates near its tip. A hydraulic torque motor screws it into the ground, adding extension sections until it reaches the depth and installation torque the engineer specified. A bracket on the footing connects the house to the pier, and every pier produces a recorded torque reading.

    They do not rely on the weight of the house, so they suit light wood houses, and the equipment fits side yards. Cobbles and rock can stop the plates. The California Building Code requires helical piles to be installed to the embedment depth and torque criteria set by a registered design professional, without exceeding the manufacturer’s rated maximum installation torque, and requires special inspection of the installation.

    Push piers (resistance piers)

    A push pier is steel pipe driven straight down in short sections by a hydraulic ram. The ram pushes against a bracket attached to the footing, so the house itself provides the reaction force. Sections are added until the drive pressure reaches the target, which also load-tests each pier.

    That is also the limitation: a light one-story wood-frame house may lift off its footing before the pier reaches good soil. Push piers tend to suit heavier structures, and helical piers lighter ones.

    Drilled concrete piers

    A drilled pier (also called a cast-in-drilled-hole pier or caisson) is a hole bored with an auger and filled with a reinforcing-steel cage and concrete. Under an existing house they are placed beside the footing and tied to it with a new grade beam or cap. They are familiar on Los Angeles hillside lots, where supports must reach past loose surface soil.

    The trade-off is equipment and time: a drill rig needs access, concrete has to cure before it carries load, and lifting is harder than with steel piers. In exchange, nothing in the system is proprietary.

    Mass-concrete underpinning

    The oldest method: pits are dug under short, alternating lengths of the footing, filled with concrete down to firm soil, and the gap to the old footing is packed with stiff dry grout, so the house is always supported.

    It makes sense when firm soil is only a few feet down. It becomes slow and costly as depth increases, and it cannot lift a house.

    MethodHow it goes inBest fitLimitations
    Helical piersScrewed in by a hydraulic torque motor to a specified depth and torqueLight wood-frame houses, tight access, soils the plates can advance throughCobbles and rock; must be used within the system’s evaluation report
    Push (resistance) piersSteel pipe pushed down by a hydraulic ram using the house’s weight as the reactionHeavier structures; a firm layer within reachLight houses may not provide enough weight to drive the pier
    Drilled concrete piersAuger-drilled hole filled with reinforcing steel and concrete, tied to the footing with a grade beam or capHillside lots; designs that call for new grade beamsDrill-rig access, curing time, harder to lift with
    Mass-concrete underpinningPits dug under the footing in alternating sections and filled with concreteFirm soil only a few feet downSlow and costly as depth grows; no lift

    What an ICC-ES evaluation report tells you about a helical pier system

    The building code requires helical piles to be designed and manufactured to resist installation and service loads, and manufacturers back their systems with evaluation reports from ICC Evaluation Service (ICC-ES) under acceptance criteria AC358. A report states which components are covered, what they carry, how they must be installed and inspected, and what falls outside its scope.

    Three things worth knowing:

    • A report is not an endorsement. ICC-ES states that its reports are not to be construed as an endorsement of the product or a recommendation for its use. The engineer still designs your job.
    • The conditions of use matter. One report we reviewed, ESR-3074, requires installation by the manufacturer’s trained and certified installers, requires calculations and drawings by a registered design professional approved by the code official, and places soils with resistivity below 1,000 ohm-cm or a pH below 5.5 outside its scope.
    • Los Angeles has its own supplements. Some reports carry a City of Los Angeles supplement for use under the city’s Building and Residential Codes, adding conditions such as project-specific preproduction load tests and proof testing of at least 2 percent of production piles. In the city, ask which report the system is installed under and whether its LA supplement is current.

    AC358 covers helical systems. For push and drilled piers, ask how each pier’s capacity will be verified and who inspects it.

    Raised foundations and slabs: what the work looks like

    Raised foundations with a crawl space

    Many older Los Angeles houses sit on a perimeter footing and stem wall with a crawl space. Underpinning addresses the perimeter; interior posts are handled by leveling. With the crew already in the crawl space, check whether the house is bolted to its foundation; if it is not and it qualifies, the Earthquake Brace + Bolt grant can pay toward that work.

    Slab-on-grade houses

    On a slab house the piers go under the thickened slab edge. If a leaking pipe under the slab washed out the soil, it has to be repaired first, or the void keeps growing. On either type, whether to lift the house back toward level, and how far, is the engineer’s call (see the FAQs below).

    Expansive clay and underpinning in Southern California

    Many parts of Southern California have clay soils that swell when wet and shrink as they dry. The California Building Code defines expansive soil by laboratory testing; one of its tests is an expansion index greater than 20 under ASTM D4829 (CBC Section 1803.5.3), and in areas likely to have expansive soil the building official must require soil tests. For houses, California Residential Code Section R403.1.8 sends foundations on expansive soil to the design rules in CBC Section 1808.6.

    Those rules matter for underpinning because a pier in clay is pushed and pulled by the soil around it. CBC Section 1808.6.1 requires foundations that extend into or penetrate expansive soil to be designed to prevent uplift of the structure, and to resist the forces from the soil’s volume changes or be isolated from it. In practice the engineer has to account for swelling clay gripping the upper part of the pier, not only the house pressing down on it.

    The bigger lesson: on clay, moisture control comes first. Steady irrigation, downspouts that discharge away from the house and grading that falls away from the foundation reduce the moisture swing that makes clay move. Underpinning is for a corner or wall that has moved further than the framing can tolerate.

    Engineering, soils reports and permits in Los Angeles

    Underpinning is structural work, so in the City of Los Angeles it needs a building permit, with plans approved first. LADBS states that building plans for a structural alteration must be filed and approved by the department as a Building Plan Check before any permit is issued. The Los Angeles Municipal Code requires a permit to alter or repair a building (Section 91.106.1.1), and its exemption for minor work valued at $2,500 or less does not apply when the work impacts the structural stability of a building (Section 91.106.2). Where a structural design is required, the computations must be signed by, or carry the stamp of, an engineer or architect licensed by the State of California (Section 91.106.3.3.2).

    What that means for your project:

    • A soils (geotechnical) report. Under CBC Section 1803.1, investigations that involve in-situ or laboratory testing or engineering calculations are conducted by a registered design professional. The report sets the depth to competent soil and the design values. On hillside lots in the City of Los Angeles, the LADBS Grading Division reviews the report, as our foundation services page explains.
    • A structural design setting the method, pier locations and spacing, and the depth, torque or pressure each pier must reach.
    • Plan check and permit fees. Our guide to LADBS permit costs shows how they are calculated.
    • Inspection. CBC Section 1810.4.12 requires special inspection for helical piles, in addition to the city’s own building inspections.

    Burbank, Glendale, Pasadena, Santa Monica, Long Beach and the cities of Orange, Ventura, Riverside and San Bernardino counties run their own building departments. They all work from the California Building Code, but submittal requirements differ, so confirm what your department wants before the engineer finalizes drawings.

    The underpinning process, step by step

    1. Diagnosis. Map floor elevations, photograph cracks, trace the water, and confirm the house is still moving.
    2. Fix the cause. Repair leaks and correct drainage before or alongside the piers.
    3. Soils investigation. Borings or test pits establish how deep competent soil is.
    4. Engineering. Method, pier count, spacing and installation criteria, with stamped calculations.
    5. Plan check and permit. The building department reviews the drawings and issues the permit.
    6. Utilities and excavation. Underground lines are marked and a pit is dug at each pier.
    7. Pier installation. Brackets mounted, piers installed, torque or pressure logged under inspection.
    8. Lift or lock off. The house is raised slowly if the design calls for it, then locked to the piers.
    9. Backfill and final inspection. Pits are backfilled and the permit is finaled.
    10. Finish repairs. Doors re-hung, cracks patched and painted, drainage completed.

    How long underpinning takes

    StageTypical time in Los Angeles
    Monitoring (only when it is unclear whether the house is still moving)Several months, ideally through a wet season
    Soils report, engineered design and permit4–8 weeks
    Construction1–3 weeks

    Hillside lots, plan-check corrections and wet weather stretch these numbers. Most of the calendar goes to getting the diagnosis and design right, which is the part not to rush.

    What underpinning costs in Los Angeles

    Pier underpinning in Los Angeles typically costs $10,000 to $40,000, including labor, materials and the permit. That is a budgeting range, not a quote. The number of piers matters more than the size of the house: a single settling corner needs far fewer piers than a long wall that is dropping along its length. The rest of the price comes from the depth to competent soil, the method and how easy the access is, the soils report and engineering, whether the house is lifted, and the walks, patios and planting that have to come out and go back at each pier.

    Because underpinning is often confused with cheaper repairs, here is how it compares with the other foundation work we publish ranges for:

    RepairTypical Los Angeles budgeting rangeWhen it is the right answer
    Crack injection$500–$3,000 per areaStable cracks, movement has stopped
    Drainage correction$3,000–$15,000Water against the foundation; seasonal clay movement
    House leveling and pier-and-beam repair$5,000–$25,000Sagging interior posts and girders in a raised house
    Underpinning with piers$10,000–$40,000Active settlement of a footing on soil that cannot carry it
    Partial or full foundation replacement$30,000–$100,000+Crumbling, unreinforced or rotated foundations

    These are typical Los Angeles budgeting ranges, not a price list or a quote. Our foundation repair cost guide breaks each one down. If a failing retaining wall below the house is part of the problem, it is priced separately; see retaining wall cost. To spread the cost, our financing options page explains the programs we offer.

    Questions to ask before you sign an underpinning contract

    • What is the diagnosis, and what evidence shows the house is still moving?
    • Is there a soils report, and who is the engineer of record?
    • Which method, how many piers, at what spacing, and to what depth, torque or drive pressure?
    • For helical piers, which ICC-ES report number, and does it have a current City of Los Angeles supplement if the house is in the city?
    • Is the permit included, and who arranges the special inspection? And what is being done about drainage?
    • Will the house be lifted, by how much, and what happens if the target cannot be reached safely?
    • Who repairs doors, windows, cracks, concrete and planting afterward, and is that in the price?
    • What does the written warranty cover, and does it come from the installer, the manufacturer or both?

    Before signing, verify the contractor’s license with the CSLB, and read our guide to how contractors get paid in California, which covers the legal limit on down payments and how progress payments should track the work. If you want to see the kind of foundation work we document, our Woodland Hills whole-home rebuild shows new footings formed and reinforced before the pour.

    Foundation Underpinning FAQs

    What is foundation underpinning?

    Foundation underpinning is structural work that extends an existing footing down to deeper soil or rock that can carry the house, using helical piers, push piers, drilled concrete piers or mass-concrete pours. The footing is tied to the new supports so its load bypasses the weak soil that allowed it to settle.

    How much does foundation underpinning cost in Los Angeles?

    Pier underpinning in Los Angeles typically costs $10,000 to $40,000, including labor, materials and the permit. This is a budgeting range, not a quote; the number of piers, the depth to competent soil, access, engineering and any lifting move a job within that range.

    Are helical piers or push piers better?

    Neither is better in general. Helical piers are screwed in and do not depend on the weight of the house, so they often suit light wood-frame homes and tight access. Push piers are driven using the house’s weight as the reaction, so they tend to suit heavier structures. The engineer chooses from the soils report and the loads.

    Do I need a permit and an engineer for underpinning in Los Angeles?

    Yes. Underpinning alters the structure, so the City of Los Angeles requires a building permit with plans approved through plan check, and the $2,500 minor-work exemption does not apply to work that affects structural stability. Structural calculations must be signed or stamped by a California-licensed engineer or architect, and the design is normally based on a soils report.

    How do I know if my foundation is still settling?

    Look for change over time: doors that recently started sticking, cracks that have widened, new gaps at ceilings or trim. The reliable test is measurement, a floor-elevation survey or crack monitors read again after a few months. Settlement that stopped years ago needs cosmetic repair, not underpinning.

    Can underpinning lift my house back to level?

    Sometimes, partly. Steel piers can raise a settled section, but how far is the engineer’s decision, and full recovery is not guaranteed because old framing and finishes may not tolerate it. Many jobs stop further movement and recover only part of the drop, so get the lift target in writing.

    Does underpinning fix expansive soil problems?

    Not by itself. Clay that swells and shrinks is driven by moisture, so drainage and steady watering come first. Where a corner has moved too far, piers can be designed for expansive soil under CBC Section 1808.6, which requires foundations penetrating expansive soil to resist uplift and the forces from soil volume change.

    Is underpinning the same as a seismic retrofit?

    No. Underpinning supports a footing that is settling. A seismic retrofit bolts the house to its foundation and braces the cripple walls so it stays put in an earthquake. They solve different problems, though both can be done during the same visit to the crawl space.

    Sources

    Code requirements change and vary by jurisdiction; confirm current requirements with your building department. Price ranges are our own. Last reviewed 10 October 2026.

    Find out whether your house actually needs underpinning

    We crawl the sub-area or survey the slab, photograph what we find and tell you if you are looking at a drainage fix, a leveling job, underpinning or nothing structural at all, before we write a number down. Through March 31, 2027 we are also offering a free roof and foundation inspection with a written report and photos. We work across the cities on our service areas page, or you can contact our team to describe your house.

  • Repair or Replace Your Deck? How to Tell, and Composite vs. Wood for the New One

    Repair or Replace Your Deck? How to Tell, and Composite vs. Wood for the New One

    Repair a deck when the problem is on the surface: a few split or cupped boards, popped nails, a loose stair tread or a worn finish, with a solid frame underneath. Replace it when the structure is failing: a soft or unflashed ledger where the deck meets the house, rot in the joists and beams, posts or footings that have shifted, or a guard that moves when you lean on it. The quick test is to ask what is failing, the boards you walk on or the wood that holds them up. If it is the structure, the deck needs replacing, and the next decision is composite or wood. In Southern California that comes down to upkeep, heat underfoot and, in a fire hazard severity zone, what the code allows.

    We are Green Design and Build, a licensed residential general contractor based in Van Nuys (CSLB #1110975), working across Los Angeles, Orange, Ventura and the western edges of Riverside and San Bernardino counties. One thing to know up front: we build new decks, and we do not take deck repair jobs. If your deck only needs a repair, this guide will say so, and a good carpenter is the right call. If it needs replacing, that is the work we do. There is no price list here, because the cost of a deck depends on its size, height, footings and materials, and the only honest number comes from a site visit.

    Repair or replace: the short answer by symptom

    Notice the pattern: everything in the repair rows is on top of the deck, and everything in the replace rows is underneath it or where it meets the house.

    What you seeWhat it usually meansUsual answer
    A few split, cupped or splintering boardsSurface wear; the frame may be fineRepair: replace the boards
    Popped nails or screws, squeaksFasteners loosening as the wood dries and movesRepair: refasten with exterior-rated screws
    Gray, dry, checked surfaceThe finish has worn offRepair: clean, sand and re-seal
    A loose stair tread or handrailA local connection problemRepair, if the stair stringers are sound
    Soft wood at the ledger, or staining on the wall below itWater has been getting behind the ledgerUsually replace
    Joists or beams a screwdriver sinks intoRot in the structureReplace, unless it is one isolated spot
    Leaning posts, or a deck that has dropped or tiltedPost or footing failureUsually replace
    A guard that flexes or rocks when pushedWeak post attachmentRebuild the guard at minimum; often the whole deck
    A deck over 30 inches with no guard, or a ledger hung on stone veneerBuilt to rules that do not meet today’s codeReplace

    How to check your own deck in about 30 minutes

    You need a flashlight and a long flat-blade screwdriver. Work from the bottom up. If any section bounces, sags or moves underfoot, keep people off it until it has been looked at.

    1. The ledger. The board bolted to the house that carries one side of the deck. Look for flashing over its top edge, staining on the wall below, and soft wood. Push the screwdriver into the ledger and the joist ends beside it; sound wood resists, rotted wood lets the tip sink in.
    2. Hangers and bolts. Rust streaks, corroded hangers, missing nails or bolts that have backed out mean the connections are no longer doing their job.
    3. Beams and posts. Probe the bottom of each post, where water sits and rot starts, and check that each post is still plumb.
    4. Footings. A post on a precast block set on bare dirt, a tipped footing, or soil washed away from one is a structural problem.
    5. The guard. Push firmly outward on the top rail at each post. If it moves noticeably, it will not hold someone who falls against it.
    6. The stairs. Check the stringers where they meet the ground; that end rots first.
    7. Only then, the surface. If the frame passed every check, a board-by-board repair or a resurface is a reasonable plan.

    Five signs a deck is past repair

    Any one of these can justify a deck replacement; two or more almost always do.

    1. The ledger is rotted, or was never flashed

    The ledger is the one connection holding a whole side of an attached deck to the house, and when it fails the deck can pull away from the wall. Water is what kills it: rain runs down the wall, gets behind an unflashed ledger, and rots the ledger and the house rim joist behind it. Replacing a ledger means taking the joists off it, which is most of the way to a rebuild, and on a stucco house the stucco has to be cut back so new flashing can be lapped in.

    2. Rot has spread into the joists and beams

    One soft joist end under a downspout can be sistered. Soft spots in several joists, or in the beam, mean the frame has been wet for years. Sistering joist after joist still leaves the old hangers, fasteners and ledger in place.

    3. Posts or footings have moved

    A corner that has dropped, leaning posts or an out-of-level frame mean the deck’s foundation has failed, often posts on precast blocks, posts buried in soil, or footings on creeping slopes. Re-footing means shoring the frame while new footings go in, often with an engineer on a hillside, and it is rarely worth doing under an old frame.

    4. The guard moves when you lean on it

    A wobbly guard fails at the exact moment someone relies on it. Guard posts are only as strong as their connection to the rim and joists, and on older decks that is often a few fasteners through wood that has since split or rotted. A new top rail does not fix it; the posts need rebuilding, and if the rim is soft, the deck goes with them.

    5. It was built without a permit, or to rules that no longer apply

    A raised deck with a low or gappy guard, a ledger bolted through stone veneer, or no lateral connection to the house would not pass inspection today, and unpermitted work can surface when you sell. When each fix is a rebuild of that part, a new deck built to current code with a permit on file is the cleaner answer.

    When a repair is the right call, and who should do it

    If the frame passed every check, do not let anyone sell you a new deck. Replacing worn boards, refastening, swapping a stair tread, re-sealing or tightening a handrail are carpentry jobs. That is not work we take on, and we would rather say so than quote a deck replacement you do not need.

    Two rules are worth knowing before you hire someone. California’s minor-work exemption lets an unlicensed person take a job only if it is under the $1,000 limit and needs no permit; anything bigger, or anything needing a permit, requires a contractor licensed by the Contractors State License Board, and it takes two minutes to verify a contractor’s California license. And in the City of Los Angeles, work valued at $2,500 or less is exempt from a permit, but not work that impacts structural stability or affects public safety, which is where a ledger, beam or guard repair usually lands. Our guide to hiring a contractor without getting scammed covers the rest.

    What the code requires when a deck is rebuilt in California

    A replacement deck has to meet the current California Residential Code, in effect since January 1, 2026, not the rules the old deck was built under. Two parts of it shape most of the design.

    Guards

    Under Section R321, a guard is required wherever an open-sided walking surface is more than 30 inches above the floor or grade below, measured at any point within 36 inches horizontally of the edge. Required guards must be at least 42 inches tall, with openings that will not pass a 4-inch sphere; along the open side of stairs the guard can be 34 inches, measured from the line of the stair nosings.

    The ledger and its flashing

    Section R507.9 sets out how an attached deck hangs on the house:

    • The ledger is at least a 2×8 of pressure-preservative-treated or naturally decay-resistant wood, and it may not be supported on stone or masonry veneer.
    • Flashing goes over the ledger on a wood-framed wall, at least 2 inches up the wall and at least 4 inches out past the ledger face (or a quarter inch down it), with the house’s water-resistive barrier lapped over it. The exception is a ledger held a quarter inch off the wall covering so water can drain behind it.
    • The deck is tied to the house against lateral loads. One prescribed detail uses at least two hold-down devices rated for 1,500 pounds each, within 24 inches of each end of the deck; the alternative uses four rated for 750 pounds.

    Where the house wall is in doubt, a freestanding deck on its own posts and beam avoids bolting through the wall at all. It costs more in footings, and on some houses it is simply the better design.

    Do you need a permit to replace a deck in Los Angeles?

    It depends on the deck’s height and your city, and the City of Los Angeles rule differs from the state model rule most other cities use.

    City of Los Angeles. LAMC Section 91.106.2 exempts platforms “not more than 30 inches (762 mm) above grade and not over any basement or story below” from a building permit. It says nothing about size or attachment, so a low deck in the city is exempt on height alone, and anything higher needs a permit. The same section says an exemption is not permission to build anything that breaks the code or other city law.

    Most other cities. Section R105.2 of the 2025 California Residential Code exempts a deck only when it is 200 square feet or less, no more than 30 inches above grade at any point, not attached to the house, and not serving the required exit door. An attached deck, even a low one, does not qualify. Cities adopt these administrative rules locally and can amend them, so confirm with your building department.

    WhereA deck is exempt from a building permit whenPractical result
    City of Los Angeles (LAMC 91.106.2)Not more than 30 in above grade and not over a basement or story belowLow decks exempt on height alone; over 30 in needs a permit
    Cities using CRC R105.2 as written200 sq ft or less, 30 in or less above grade at any point, detached, and not serving the required exit doorAttached decks and larger low decks need a permit
    AnywhereAn exemption never waives the construction rulesA deck over 30 in needs a 42 in guard, permit or not

    The numbers line up: at 30 inches or below, neither the guard requirement nor, in Los Angeles, the permit applies. Go higher and both arrive together. For what permits cost in the city, see our breakdown of LADBS permit costs.

    Rebuilding a deck in a fire hazard severity zone

    In a Fire Hazard Severity Zone or wildland-urban interface area, the wildfire rules that used to sit in Section R337 of the residential code now live in Chapter 5 of the 2025 California Wildland-Urban Interface Code (Title 24, Part 7). Section 504.7.3 covers decks, porches, balconies and stairs:

    • The walking surface must be an approved material. The options include products meeting the code’s criteria when tested to ASTM E2632 and ASTM E2726, ignition-resistant building materials, fire-retardant-treated wood labeled for exterior use, and noncombustible materials, among others listed.
    • Deck-to-wall flashing is specified: at least 6 inches of metal flashing, applied vertically on the exterior of the wall, at every deck-to-wall intersection.

    So the decking has to be chosen against that list, not on looks alone, and two of the options only work when the wall covering beside the deck is itself noncombustible or ignition-resistant. Check your address on the state Fire Hazard Severity Zone map, and ask the manufacturer for documentation showing which option in Section 504.7.3.2 a board meets. If you are rebuilding after a fire, our fire rebuild page covers the wider process.

    Composite vs. wood for the new deck

    For a deck replacement in Southern California, the choice is usually redwood or cedar against composite, on a pressure-treated frame either way. Neither is wrong; it depends on how much upkeep you will really do, which way the deck faces, and whether you are in a fire zone.

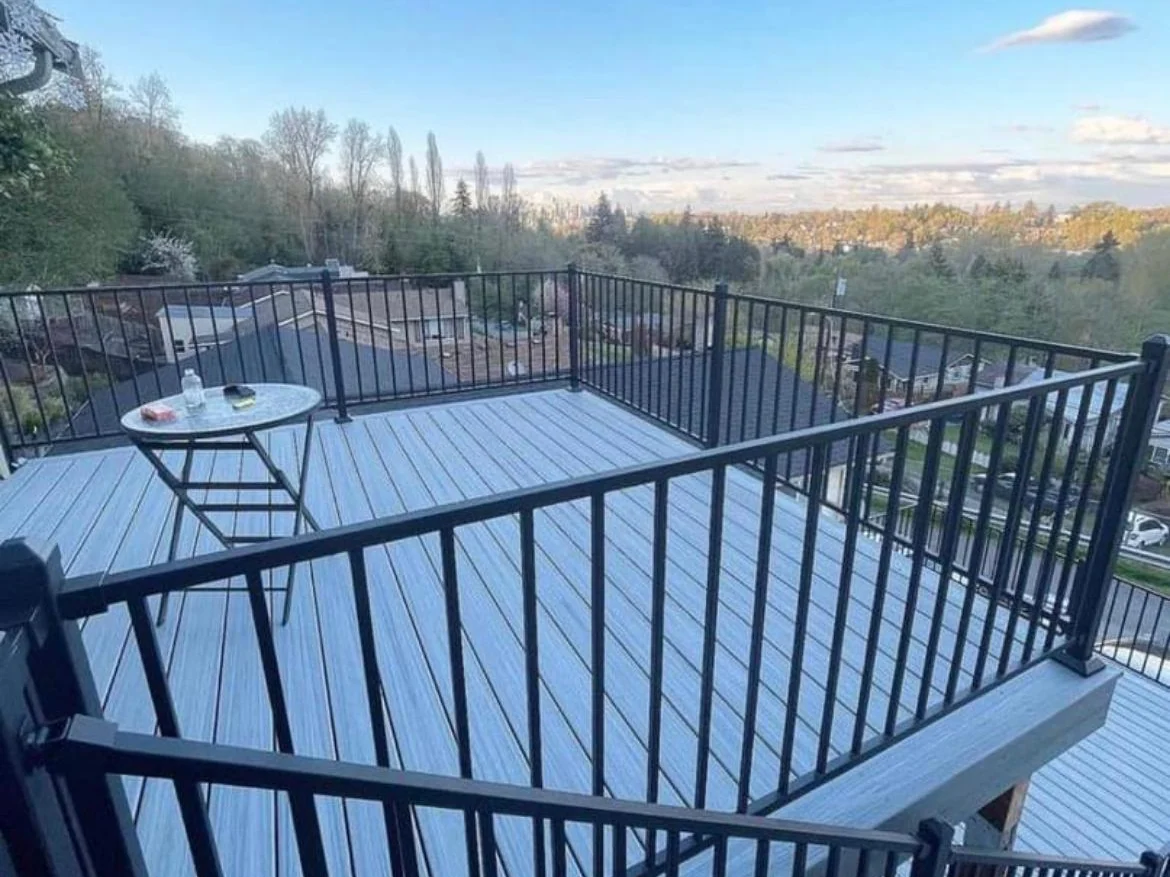
    Elevated composite deck with black metal railing and an open view, built by Green Design and Build
    An elevated composite deck with a black metal guard, built by Green Design and Build. At this height the guard and footings matter as much as the boards.
    FactorRedwood or cedarComposite
    UpkeepRegular cleaning and re-sealing to hold its colorWashing; no sanding or staining
    Left aloneWeathers to gray; the surface checks and splintersKeeps a consistent color
    Feel and lookReal wood grain, cooler underfoot, can be refinishedUniform manufactured grain; dark colors get hot in full sun
    Up-front costLowerHigher
    Code labelingStandard lumber rulesASTM D7032 label with allowable load and span
    Fire hazard severity zonesOnly if it meets one of the WUI Code decking optionsOnly if the specific product meets one of those options
    WarrantyDepends on the supplierManufacturer limited warranty; terms vary by product line

    Where wood still wins

    Redwood looks and feels like a deck should, costs less, stays cooler on bare feet, and can be sanded and refinished. On a shaded deck, or for an owner who does not mind the upkeep, it is a sound choice. On an exposed south- or west-facing deck inland, sealing on schedule is what keeps it looking new.

    Where composite wins

    Composite suits owners who will not reseal on schedule and decks that get heavy use. It costs more up front. Trex, for example, describes its decking and railing limited residential warranties as ranging from 25 to 50 years; read the warranty for the exact line you buy, because terms differ between products. On a sunny deck, pick a lighter color.

    What does not change: the frame

    Composite boards do not make the structure last longer. The joists, beams and posts are still wood, and the ledger, flashing and footings decide a deck’s life far more than the decking does. The same logic applies overhead: our guide to patio cover materials and their pros and cons covers the equivalent trade-offs for shade.

    What drives the cost of a deck replacement

    We do not publish a deck price, because two decks of the same size can differ more in what is under them than in what you walk on. These are the items that move the number:

    • Height above grade. Above 30 inches you add a guard, longer posts, bracing and, in Los Angeles, a permit; on a hillside, engineered footings.
    • Size and shape. More square footage, corners, angles and levels.
    • Footings. How many, how deep, and the soil and slope.
    • The house connection. A ledger on stucco means cutting back and re-flashing the stucco; freestanding trades that for more footings.
    • Decking material. Redwood, composite, or a WUI-compliant product.
    • Guards. Wood, aluminum, steel, cable or glass, and how many linear feet.
    • Stairs and landings.
    • Demolition and disposal of the old deck, plus repair to the wall or rim joist behind the old ledger.
    • Permit, plans and engineering, where needed.
    • Access. A narrow side yard means carrying everything by hand.

    Those are what we measure on a site visit, which takes about two hours. You then get a written proposal within 48 hours with demolition, footings, framing, decking, guards, stairs and permits listed separately. For a larger project, see our financing options, and our guide to contractor payment schedules in California explains how deposits and progress payments should work.

    What a deck replacement looks like, step by step

    1. Site visit: measure the deck and grade, probe the old ledger and posts, check the house wall, drainage and access.
    2. Design: layout, height, stairs, guard, decking, and ledger or freestanding.
    3. Permit: drawings and, where needed, engineering, if the deck is not exempt.
    4. Demolition: the old deck is removed and hauled away, and any rot in the wall or rim joist behind the old ledger is repaired.
    5. Footings: dug and poured to the approved plan, inspected where the permit requires.
    6. Framing: posts, beams, joists, the flashed ledger and lateral connections.
    7. Finish: decking, guards and stairs, then the final inspection and a walk-through with you.

    Planning the deck as part of the backyard

    A deck replacement is a good moment to rethink the yard, because footings, gas lines and conduit are cheaper to plan before the new frame goes in. Most of our service area is slab-on-grade, so a deck earns its place on a slope or beside a raised-foundation house with a door well above the yard. On a flat lot, a paver patio or concrete patio at grade is often simpler, and on a slope a deck may work alongside retaining walls.

    For shade, compare what a pergola costs with what a patio cover costs, or see our patio covers. For cooking outside, read what an outdoor kitchen costs in Los Angeles, and for the whole yard, our guide to backyard remodel costs. See how we build outdoor kitchens, decks and pergolas, browse outdoor living design ideas, look at a finished Encino backyard with a pool, spa and outdoor kitchen, or start from our outdoor living page.

    Deck Replacement FAQs

    How do I know if my deck needs to be replaced or just repaired?

    If the problem is in the boards, fasteners or finish and the ledger, joists, beams, posts and footings are solid, repair it. If the ledger is soft or unflashed, rot has reached the joists or beams, posts or footings have moved, or the guard flexes when pushed, the structure is failing and replacement is usually the safer and better-value answer.

    Can I replace just the deck boards and keep the old frame?

    Yes, if the frame is sound and its joist spacing suits the new boards. Composite boards carry a labeled maximum span under ASTM D7032, so an old frame may need extra joists. Have the ledger, footings and fasteners checked first; new boards on a failing frame means paying for the surface twice.

    Do I need a permit to replace a deck in Los Angeles?

    In the City of Los Angeles, LAMC 91.106.2 exempts platforms not more than 30 inches above grade and not over a basement or story below; anything higher needs a building permit. Most other cities follow California Residential Code Section R105.2, which exempts a deck only if it is 200 square feet or less, no more than 30 inches above grade, detached and not serving the required exit door.

    How high can a deck be before it needs a railing in California?

    The California Residential Code requires a guard where a walking surface is more than 30 inches above the grade or floor below, measured within 36 inches horizontally of the edge. The guard must be at least 42 inches high with openings that will not pass a 4-inch sphere; along stairs it can be 34 inches from the line of the nosings.

    Is composite decking better than wood in Southern California?

    It depends on upkeep and sun. Composite is washed rather than re-sealed and keeps its color, but costs more up front and dark colors get hot in full sun. Redwood costs less and stays cooler underfoot, but an exposed deck needs regular sealing to keep from graying and checking. Either way the frame underneath is wood.

    Can I use composite decking in a fire hazard severity zone?

    Only if the specific product qualifies. Section 504.7.3 of the 2025 California Wildland-Urban Interface Code limits deck walking surfaces to listed options, including materials tested to ASTM E2632 and E2726, ignition-resistant materials, exterior fire-retardant-treated wood and noncombustible materials. Ask the manufacturer which option a board meets before you buy.

    Does Green Design and Build repair decks?

    No. We build new decks, including full replacements of decks that have failed, but we do not take repair jobs. For new boards, refastening or a stair fix, hire a carpenter; in California, a job over the $1,000 minor-work limit, or any job that needs a permit, requires a CSLB-licensed contractor.

    How much does it cost to replace a deck?

    We do not publish a deck price, because the cost depends mostly on what is under the boards: height, size, footings, decking and guard materials, stairs, demolition and the permit. After a site visit of about two hours, you get a written proposal within 48 hours with each item listed separately.

    Replacing a deck? Start with a site visit

    If your deck shows any of the structural signs above, we will look at it, tell you plainly whether it needs replacing, and design a new one around your yard, your house and your local code. If it only needs a repair, we will say that too. We reply within one business day, 8am to 6pm every day.

  • Knob-and-Tube Wiring in Los Angeles Homes: Is It Safe, and When Should You Rewire?

    Knob-and-Tube Wiring in Los Angeles Homes: Is It Safe, and When Should You Rewire?

    Knob-and-tube wiring that is intact, untouched and lightly loaded is not an emergency, but it is not a system you should plan to keep. It has no ground wire, its rubber-and-cloth insulation has spent its whole life drying out above ceilings and under floors, and in many houses that still have it, decades of add-ons and amateur splices have been hung off the original runs. California’s electrical code no longer allows it to be installed new, restricts burying it in insulation, and requires a permit for any repair or extension. The practical answer for most owners: have a licensed electrician evaluate it now, keep loads and insulation away from it until then, and replace it — ideally at the same time as any remodel that opens walls or ceilings.

    We are Green Design and Build, a licensed residential general contractor based in Van Nuys (CSLB #1110975), working across Los Angeles, Orange, Ventura and the western edges of Riverside and San Bernardino counties. Electrical work on our projects is done by licensed C-10 electrical contractors we schedule and supervise, usually as part of a kitchen, bathroom, addition or whole-home renovation in Los Angeles. This guide deliberately has no price list: the cost of replacing old wiring depends on the house far more than on the wire, so we explain what moves the number and give you the number itself after a site visit.

    What knob-and-tube wiring is, and how to tell if you have it

    Knob-and-tube (often written K&T) is one of the oldest wiring methods still found in American houses. Instead of a single cable carrying several wires in one jacket, it runs the hot and neutral conductors as two separate wires, usually several inches apart. Porcelain knobs nailed to joists and studs hold the wires off the wood; porcelain tubes carry them through framing members; and where a wire enters a box or crosses another wire, it is often sleeved in a flexible woven tube called loom. The conductors are copper wrapped in rubber and a cloth braid, and because the two wires are separated and surrounded by air, the system sheds heat into the open space around it — which is exactly why insulation and knob-and-tube do not mix.

    Where to look in a Los Angeles house

    • The attic. With a flashlight, look along the ceiling joists for pairs of single wires stretched between white porcelain knobs.
    • The crawlspace. Many older LA houses sit on raised wood floors. Under the floor you may see the same paired wires running through porcelain tubes in the floor joists.
    • The panel. A screw-in fuse panel does not prove you have knob-and-tube, but it is a strong hint that the original wiring was never fully replaced.
    • The outlets. Two-prong receptacles throughout the house are a clue, not proof. Some later cable systems also lacked a ground wire, and some K&T houses had their outlets swapped for three-prong ones without a ground ever being added.

    A house can show modern cable in the attic and still have live knob-and-tube inside the walls, because earlier owners often replaced only what was easy to reach. Only an electrician tracing circuits from the panel can tell you how much is still energized.

    Demolition and rough electrical — kitchen remodel in Sherman Oaks, CA
    Walls opened and new electrical boxes in place on a Sherman Oaks kitchen remodel — the cheapest moment to retire old wiring.

    Is knob-and-tube wiring safe?

    Short answer: the original design was sound for the loads it was built for. The danger comes from what has happened to it since — age, alteration, overloading and insulation — and from what it cannot do, which is provide a ground or work with modern protective devices. An intact, original run carrying a few lights is a lower risk than a spliced, overfused run feeding a space heater in a bedroom.

    These are the conditions that decide how urgent replacement is:

    ConditionWhy it mattersWhat the electrician looks for
    Brittle or missing insulationThe rubber and cloth covering dries and cracks with age and heat, leaving bare copper near wood.Insulation that flakes when touched; exposed copper at knobs and tubes
    Amateur splices and add-onsLater owners often tapped new outlets or lights into old runs with taped splices outside any box.Splices not in junction boxes; modern cable spliced onto K&T
    OverfusingA bigger fuse stops the blowing by letting the wire carry more current than it was sized for, so the wire heats instead.Fuse sizes larger than the wire can safely carry
    Buried in insulationK&T is designed to cool in open air. Blown-in or batt insulation packed around it traps heat.Insulation in contact with or covering the conductors in attics and wall cavities
    No groundThere is no path for fault current from appliance cases and metal fixtures, and surge protectors cannot do their job without a ground.Two-prong outlets, or three-prong outlets with no ground behind them
    Not enough circuitsA system laid out for lighting and a few outlets now feeds microwaves, hair dryers and air conditioners.Extension cords everywhere, fuses that blow, lights that dim when something switches on

    Warning signs that mean “call an electrician this week”

    • A burning or hot-plastic smell near outlets, switches or the ceiling, with no obvious source
    • Outlets or switch plates that are warm to the touch, discolored or scorched
    • Fuses that blow repeatedly, or anyone having installed a larger fuse “to stop it blowing”
    • Buzzing, crackling or flickering on an old circuit

    Until it has been evaluated, keep high-wattage appliances such as space heaters and window air conditioners off old circuits, do not let anyone blow insulation into the attic, and never replace a fuse with a larger one.

    What California’s electrical code says about knob-and-tube

    The California Electrical Code (Title 24, Part 3) is the National Electrical Code with California amendments. Its 2025 edition took effect on January 1, 2026, according to the California Building Standards Commission. Concealed knob-and-tube is covered in Article 394, and three points matter to homeowners:

    1. New installations are not allowed. As the City of Menlo Park’s building division summarizes it, new knob-and-tube is no longer permitted except by special permission of the building official. Article 394 limits it to extending existing installations. Existing knob-and-tube in service is not automatically illegal; the code does not order you to tear it out.
    2. Any work on it needs a permit. Repairs, alterations or extensions of an existing knob-and-tube system require permits and inspections.
    3. It may not be buried in insulation — with one California exception. Section 394.12(5) prohibits concealed knob-and-tube in hollow spaces of walls, ceilings and attics where loose, rolled or foamed-in-place insulation envelops the conductors.

    The California exception for insulating over knob-and-tube

    California amended Section 394.12 so that an older house with live knob-and-tube can still be insulated, but only if every condition is met. As quoted in the City of Berkeley’s knob-and-tube safety report form, which cites the 2025 code:

    • The wiring is surveyed by an electrical contractor licensed by the State of California, who certifies it is in good condition with no evidence of deterioration, improper overcurrent protection, or improper connections and splices. Repairs found necessary need permits and inspections.
    • The certification is filed with the building department, with a copy to the owner.
    • Accessible areas where insulation surrounds the wiring are posted with a caution notice in English and Spanish.
    • The insulation is noncombustible as defined in the California Building Code, and contains no electrically conductive material.
    • The building department may still require permits and inspections for the insulation itself.

    In practice, owners planning an attic insulation upgrade often find it simpler to rewire the attic runs first: the survey, the certification and the noncombustible-only rule add cost and limit choices, and you still own the old wiring afterward.

    Knob-and-tube and homeowners insurance

    There is no California law that says an insurer must, or must not, cover a house with knob-and-tube wiring. Each carrier sets its own underwriting rules, and they differ: an insurer may ask about wiring type and age on the application, ask for an electrician’s evaluation, or attach conditions such as proof of replacement. A policy you already have may come up for review at renewal or after an inspection. Because the answer depends entirely on your carrier, the only reliable approach is to ask directly.

    Questions worth putting to your agent or broker, in writing:

    • Do you write or renew policies on homes with any active knob-and-tube wiring?
    • Would a licensed electrician’s evaluation letter satisfy underwriting? What must it say?
    • If I commit to replacing it, how long do I have, and what proof do you need — the finaled permit, an invoice, an electrician’s letter?

    If you are buying, ask before you remove your inspection contingency. A finaled electrical permit for the rewire is the cleanest evidence you can hand an insurer later.

    Two-prong outlets: the GFCI stopgap and its limits

    Swapping a two-prong outlet for a three-prong one without adding a ground is a hazard, because it tells every plug that a ground exists when it does not. The electrical code allows a different fix: an ungrounded receptacle can be replaced with a GFCI receptacle, or with a receptacle protected by an upstream GFCI device, as long as it is marked “No Equipment Ground” (and, where protection comes from an upstream device, “GFCI Protected”). The North Carolina Office of State Fire Marshal’s interpretation of NEC 406.4(D)(2) sets out those marking requirements clearly; the same section appears in the model code California adopts.

    What that buys you, and what it does not:

    • It adds shock protection at that outlet and anything downstream of it, which is a real improvement in a kitchen, bathroom or laundry.
    • It does not create a ground. Surge protectors and equipment that expects a ground still lack one.
    • It does nothing for the wiring itself — brittle insulation, bad splices, overfusing and buried runs are all still there.

    Treat GFCI protection as a sensible interim step, done by a licensed electrician, while you plan replacement — not as the replacement.

    Your options, compared

    OptionWhat it involvesWhen it makes senseThe catch
    Evaluate and monitorA licensed electrician traces circuits, checks insulation, splices and fuse sizes, and fixes immediate hazards under permitOriginal, intact runs on light loads, while you plan and budget for replacementA holding pattern, not a solution. May not satisfy your insurer.
    GFCI protection on ungrounded outletsGFCI receptacles or breakers, outlets marked “No Equipment Ground”Interim shock protection, especially in wet areasNo ground, no change to the wiring’s condition
    Partial replacementNew circuits for the rooms being remodeled, old runs in those areas disconnectedA kitchen, bath or addition is opening walls anywayThe rest of the house still has K&T. Be clear with your insurer about what remains.
    Full rewireEvery old circuit replaced with grounded cable, usually with new boxes and devices, often alongside a panel upgradeInsurance pressure, a sale or purchase, an attic insulation project, or evidence of damageThe most disruption; plaster walls need careful access and patching

    When should you rewire?

    Rewire when any of these is true. Several are moments when walls, ceilings or the attic are already open, which is when replacement costs and disrupts least.

    • You are remodeling. A kitchen remodel or a bathroom remodel is rewired as part of the job anyway, and extending it into neighboring rooms while walls are open is far cheaper than coming back later.
    • You are opening up the structure. Removing a load-bearing wall or a seismic retrofit in the crawlspace puts trades exactly where the old wiring runs.
    • You are adding load. An EV charger, a heat pump, an induction range or an addition can trigger an electrical panel upgrade, and a new panel feeding old wiring leaves the weakest part of the system in place.
    • You want to insulate the attic (see the code section above).
    • Your insurer is asking and has set a deadline.
    • The evaluation found damage — brittle insulation, overfusing, rodent damage or a tangle of amateur splices.

    What rewiring an old house involves

    Rewiring an occupied house is mostly a problem of access: getting new wire from the panel to every outlet, switch and light without tearing the house apart. A typical sequence:

    1. Evaluation. The electrician traces each circuit, maps what is still knob-and-tube, checks the panel and service, and looks at attic and crawlspace access.
    2. Scope. You decide where outlets go, which rooms need their own circuits and whether lighting changes now. Plan for future loads rather than replacing circuit-for-circuit.
    3. Permit. In the City of Los Angeles, LADBS lists “rewiring or adding devices to existing electrical circuits” as express-permit work in its information bulletin P/GI 2026-003, meaning no plan check is needed for non-engineered residential wiring. Cities outside LA, and unincorporated county areas, have their own building departments and procedures. Our guide to LADBS permit costs explains how fees are worked out.
    4. Fishing the new wire. With a usable attic above and a crawlspace below, much of the new cable can be fished through walls from those spaces through small access openings.
    5. Disconnecting the old system. Old circuits are de-energized and disconnected at the panel. Accessible runs in the attic and crawlspace are often removed; runs sealed inside finished walls are usually left in place, dead.
    6. Rough inspection. The inspector checks the new wiring before access openings are closed.
    7. Patching and final inspection. Openings are repaired, devices go in, and the permit is finaled. Keep the record; your insurer and your eventual buyer will want it.

    Plaster walls are the hidden variable

    Many of the older houses that still have knob-and-tube also have lath-and-plaster walls. Plaster cracks if it is cut carelessly, is harder to patch invisibly than drywall, and in older homes the paint on it may contain lead, so ask how dust will be contained. A careful crew plans access holes where they are easiest to patch — inside closets, behind baseboards, at the top of walls near the ceiling line — rather than wherever is quickest.

    What drives the cost of rewiring a house

    We do not publish a rewiring price, because two homes of the same size can differ widely depending on access, walls and what else is happening in the project. These are the factors that set the number:

    FactorHow it moves the cost
    House size and number of circuitsMore rooms, outlets, switches and fixtures mean more wire, more boxes and more labor. Adding circuits the old system never had adds to all three.
    Attic and crawlspace accessA walkable attic and a crawlspace with good clearance let most wire be fished from above and below. Low attics, no crawlspace, slab floors or a second story mean more openings in finished walls.
    Plaster versus drywallPlaster takes longer to open, and more skill to patch so it does not show.
    Patching and paintingWhether repairs stop at patched and primed, or include full repainting of affected rooms, changes the finish scope considerably.
    Panel and serviceIf the existing panel is a fuse panel or too small for the new circuits, a panel upgrade, and sometimes utility coordination, becomes part of the project.
    Permit and inspectionsPermit fees depend on the scope of work and the jurisdiction. Inspections also set the schedule, because walls cannot be closed until the rough inspection passes.
    Combined with a remodelWhen walls are already open for a kitchen, bath or renovation, much of the access and patching cost disappears into work you were doing anyway.

    The honest number comes from a site visit that sees your attic, crawlspace, panel and walls. For a larger project, our whole-home renovation cost guide shows how electrical work fits into a full renovation budget, and our financing options page covers ways to spread the cost.

    Rewiring alongside a bigger project

    Knob-and-tube is very often found during other work, which is the most efficient time to deal with it:

    • Kitchens and baths. The old circuits in a fully remodeled room go regardless; extending the rewire into adjacent rooms while the crew is there is the cheap upgrade.
    • Additions. A room addition adds load and often requires a larger panel; extending old knob-and-tube to serve new rooms makes no sense, so the plan should address the house as a whole.
    • Garage conversions and ADUs. A garage conversion or a new unit from an ADU builder in Los Angeles often means a panel upgrade or subpanel at the main house, which is a natural point to reassess its wiring.
    • Fire and water damage. When a house is opened up for fire damage repair and rebuilding, any surviving knob-and-tube in the affected areas should be replaced, not reconnected.

    Our electrical services page covers the electrical work we coordinate on residential projects.

    Who should do the work, and what to ask them

    Electrical work in California is a licensed trade. The Contractors State License Board defines the C-10 Electrical Contractor classification as the license for placing, installing or connecting electrical wiring and equipment. On a stand-alone rewire you may hire one directly; as part of a remodel, a general contractor typically schedules and supervises the electrician alongside the other trades. Either way, verify the contractor’s license on the CSLB website before you sign anything.

    Questions that separate careful contractors from fast ones:

    • Who pulls the permit, and is it in the contract?
    • How will you get wire to each room — where will the access openings be, and who patches them?
    • What happens to the old wiring: removed, or disconnected and left in place?
    • Is the panel adequate for the new circuits, and if not, is the upgrade in this price?
    • Will you give me a written letter at the end confirming what was replaced, for my insurer?

    Knob-and-tube wiring FAQs

    Is knob-and-tube wiring illegal in California?

    No. Existing knob-and-tube that is in service is not illegal, and the California Electrical Code does not order owners to remove it. New installations are not allowed except by special permission, any repair or extension needs a permit and inspection, and it may not be enveloped in insulation unless California’s certification exception in Section 394.12 is met.

    Can I buy or sell a house with knob-and-tube wiring?

    Yes. Buyers should have a licensed electrician evaluate the wiring and call their insurance agent during the inspection period, because the insurance answer can affect the deal. Sellers who have replaced it should keep the finaled permit to show buyers.

    Will homeowners insurance cover a house with knob-and-tube?

    It depends on the carrier. There is no statewide rule in California; each insurer sets its own underwriting standards. Carriers differ in what they ask for, from a simple disclosure to an electrician’s evaluation or proof of replacement. Ask your agent in writing before you buy or before your renewal.

    Can I add insulation to an attic that has knob-and-tube wiring?

    Only under California’s exception to Section 394.12: a licensed electrical contractor certifies the wiring as sound, the certification is filed with the building department, caution notices are posted in English and Spanish, and the insulation is noncombustible with no conductive material.

    Can I just replace two-prong outlets with three-prong outlets?

    Not without adding a ground wire. A three-prong outlet with no ground behind it is a hazard. The code-compliant alternative is a GFCI receptacle, or GFCI protection upstream, with the outlet marked “No Equipment Ground”. That adds shock protection but does not create a ground or fix the wiring.

    Does rewiring a house mean opening every wall?

    No. In a house with a usable attic and crawlspace, electricians fish much of the new cable through the walls from above and below, using small access openings that are patched afterward. Two-story homes, slab floors and plaster walls need more openings and more careful patching.

    Do I need to move out while the house is rewired?

    Often not, for a rewire on its own. Expect circuits to be off while crews work, some dust from access openings, and rooms cleared in sequence. As part of a larger renovation, the renovation decides whether you can stay.

    How long does it take to rewire a house?

    It depends on the size of the house, the access and the inspection schedule. In the City of Los Angeles a residential rewire generally qualifies for an express permit with no plan check, so the permit is rarely the bottleneck. Expect a written schedule with the proposal.

    Talk to us about old wiring in your house

    If your inspection report says “knob-and-tube”, your insurer is asking questions, or you are planning a remodel in an older house, we can look at the whole picture — what is still live, what your panel can carry, and how to sequence the work so walls are opened once. A site visit takes about two hours, we reply within one business day, and written proposals follow within 48 hours. You can read what homeowners say in our client reviews, learn more about Green Design and Build, or contact us to schedule a site visit.

  • Walk-In Shower With a Seat: Is It Worth It, and What Does It Cost?

    Walk-In Shower With a Seat: Is It Worth It, and What Does It Cost?

    Yes, and in most Los Angeles bathrooms it is the single cheapest thing you can add to a shower that you will still be glad of in twenty years. A built-in seat costs almost nothing as a line item once the shower is already being framed, waterproofed and tiled — the money is in the shower, not the bench. What it does cost you is floor area, and that is where seats go wrong. California requires a shower compartment to hold a minimum finished interior of 1,024 square inches and to encompass a 30-inch circle, and a permanent bench sits inside that footprint, not outside it. A seat belongs in the drawing from the first sketch, at 17 to 19 inches high and 15 to 16 inches deep, sloped to the drain, on a wall that can carry it. Retrofitted into a shower already sized to the minimum, it either shrinks the shower below code or ends up too shallow to sit on.

    We are Green Design and Build, a licensed residential general contractor based in Van Nuys (CSLB #1110975), working across Los Angeles, Orange, Ventura and the western edges of Riverside and San Bernardino counties. We build tiled showers with benches most weeks of the year. The figures below are budgeting ranges, not a quote — the price of your shower depends on your room, your foundation and your tile, and the only honest number comes from a site visit.

    The five kinds of shower seat, and who each one suits

    "Shower seat" covers five quite different things. They are not interchangeable, and picking the wrong one is the most common regret we hear about.

    TypeWhat it isBest forThe catch
    Full-width tiled benchA framed bench, usually 15–16 in deep, running wall to wall at one end of the showerLarger showers; anyone who wants to sit properly, shave, or transfer sideways from a wheelchairEats the most floor area. Needs the shower designed around it.
    Corner tiled benchA triangular or L-shaped bench in one cornerStandard 36 × 60 in showers where a full bench would not fitThe usable seat is smaller than it looks; the point of the triangle is unusable.
    Floating (cantilevered) benchA tiled bench with no legs, carried entirely by framing in the wallSmall showers — the open floor underneath keeps the room reading larger and makes the floor easier to cleanEntirely dependent on the wall framing. Cannot be added later to a finished wall.
    Fold-down seatA hinged teak or phenolic seat mounted to the wall, folded flat when not in useSmall showers, and households where only one person needs to sitNeeds solid blocking behind the tile. Whether a plan checker counts it against your required floor area is a question for your building department.
    Free-standing teak stoolA movable bench or stool, bought rather than builtAnyone wanting to try sitting before committing; renters; showers already finishedMoves underfoot when wet. No permanent support to lean on.

    If you are still deciding on the shower itself rather than the seat, start with our guide to walk-in and doorless shower sizes, layouts and rules, which covers the compartment dimensions, curbless construction and glass in more depth than this page does.

    The dimensions that actually work

    There is no building code in California that tells you how big a shower seat in a private house must be. The numbers everyone quotes come from the federal accessibility standards, which govern public buildings and commercial facilities — not your house. That is worth saying plainly, because a lot of remodeling advice implies the ADA applies to single-family homes. It does not.

    What those standards are genuinely good for is as a benchmark. They were dimensioned around people who need to sit, and they are the closest thing the industry has to a tested set of figures. From the U.S. Access Board’s guidance on bathing rooms:

    ElementFederal accessibility benchmark
    Seat height17 to 19 in, measured to the bathroom finish floor
    Rectangular seat depth15 to 16 in from the seat wall
    Rectangular seat lengthExtends to within 3 in of the compartment entry
    L-shaped seatRear edge 1½ in from the wall; front edge 14 to 15 in from the wall; the L-end 22 to 23 in from the main seat wall
    Transfer shower compartment36 × 36 in, an absolute dimension rather than a minimum
    Standard roll-in compartment60 in wide minimum × 30 in deep minimum
    Threshold½ in maximum, beveled above ¼ in
    Grab bars33 to 36 in above the floor, 1½ in clear of the wall
    Structural strength250 lb applied at any point on the bar, fastener, mounting device or supporting structure

    Two of these matter more than the rest in an ordinary remodel. Seat height is the one people get wrong by building to the height of a dining chair — a shower seat at 17 to 19 inches is deliberately a little low, because you have to be able to get back up off it with wet feet. And depth: below about 15 inches a bench stops being somewhere to sit and becomes somewhere to put a leg while shaving. Both are perfectly legitimate purposes. Decide which one you are building before the framing goes in, because they are different benches.

    A bench takes floor area that the code counts

    This is the constraint that catches people, and almost nothing written about shower seats mentions it.

    Under the California Plumbing Code, a shower compartment must have a minimum finished interior area of 1,024 square inches and must be capable of encompassing a 30-inch circle (California Plumbing Code section 408.7 in the 2025 edition; numbered 408.6 in earlier editions). Orange County Public Works states it in exactly those terms in its residential bathroom remodel handout, and every plan checker in Southern California applies the same rule.

    A permanent bench is built inside that compartment. It is not bonus space bolted to the outside. So on a common 36 × 60 inch shower — 2,160 square inches — a 16-inch-deep bench across the 36-inch end removes 576 square inches, leaving 1,584. That still clears 1,024, but the 30-inch circle is now the binding test, and in a 36-inch-wide compartment with a 16-inch bench you have 44 inches of clear length left, which holds the circle comfortably. Shrink the shower to 32 inches wide and the same bench no longer works.

    The practical rule: draw the bench and the 30-inch circle on the same plan before you order anything. If your shower is already at or near the minimum, a full-depth bench means enlarging the compartment, and enlarging the compartment usually means moving a wall — which is a different project with a different price. A fold-down seat is the usual way out of that corner, though whether your plan checker treats a folding seat as an encroachment on the required area is a question to put to your building department rather than to the internet; the answer is not uniform.

    Where a bench can physically go

    A tiled bench is a small piece of construction, not a fitting. Three things decide where it can sit:

    1. Framing. A floating bench transfers everything it carries into the studs. That means blocking installed before the substrate goes on, sized for an adult sitting down hard rather than lowering themselves gently. Once the wall is closed and tiled, a cantilevered bench is no longer an option.
    2. The wet wall. Benches want to be away from the showerhead, so you sit down dry and reach the spray rather than sitting under it. In a 60-inch shower that usually means the bench at one end and the valve at the other.
    3. The door swing and the glass. A bench under a hinged door is a shin injury waiting to happen, and frameless panels need a clean, plumb line to land on. Benches and glass have to be coordinated at the design stage; the glass is measured after tiling and cannot adapt to a surprise.

    Waterproofing the bench is the whole ballgame

    Benches leak more often than shower floors do, for a simple reason: a bench is a horizontal surface with corners, seams and fasteners in the wettest part of the room. Get this right and a bench is permanent. Get it wrong and it is a planter for mold inside the wall.

    Three requirements, taken from manufacturer installation documentation rather than from habit. Schluter’s shower system installation handbook is explicit on all three:

    • The top has to slope to the drain. The handbook’s wording is that all horizontal surfaces — benches, curbs, window sills, shelves — must be sloped toward the shower drain. Note what it does not do: publish a slope rate for a bench top. It publishes one for the shower floor (¼ inch per 12 inches of mortar bed) and none for benches. Anyone who quotes you a bench slope figure is quoting a shop habit, not a specification. What matters is that water runs off rather than sitting.
    • The waterproofing runs across it, unbroken. Not up to the bench and restarting on the other side — across, with preformed corners at the inside and outside angles where a folded sheet cannot lie flat.
    • Every seam and every fastener penetration gets treated. The handbook calls for banding with a 2-inch overlap. Each screw through a bench substrate is a hole through your waterproofing.

    One more that is not in any manual: mix systems at your peril. A bench built from one manufacturer’s board, banded with another’s tape and bonded with a third’s membrane is not warranted by any of them. Ask which system your shower is being built in, and ask that every component inside the wet area belongs to it.

    Materials: what to sit on

    Bench surfaceHow it behavesMaintenance
    Tile matching the wallsVisually quietest — the bench disappears into the showerGrout joints on a horizontal wet surface; sealing and occasional regrouting
    Single slab of stone or quartzNo grout joints at all on the seat itself; the usual upgradeNatural stone needs sealing; quartz does not. One joint at the wall to maintain
    Large-format porcelain slabStone look, no sealing, no joints across the seatLowest of the three. Fabrication has to be right — big pieces are unforgiving
    Teak on a tiled baseWarm to sit on, which matters more than people expectNeeds to dry between uses; oiling once or twice a year

    The temperature point is underrated. Tile and stone at 6am in a Valley house in January are cold, and a seat you flinch from is a seat you stop using. A slab bench with a teak insert, or simply a teak bath mat kept on the bench, solves it for very little money.

    You can see large-format tile, linear drains and a tiled bench and niche in the same room on our Diamond Bar bathroom remodels project page, and more tile and glass detailing across our West Hollywood bathroom and Inglewood primary bathroom.

    What a walk-in shower with a seat costs in Los Angeles

    Direct answer: the seat is not what you are paying for. A tiled bench inside a shower that is already being demolished, framed, waterproofed and tiled adds framing, a little substrate, a little more waterproofing and a few more square feet of tile. It does not appear as a meaningful line on an estimate, and we do not price it as one. What you are paying for is the shower, and the shower lands in one of three tiers.

    ScopeTypical Los Angeles rangeWhat the bench looks like at this level
    Basic refresh — prefab pan and surround dropped into the existing footprint, drain left in place$8,000–$18,000A molded seat in the prefab unit, or a fold-down seat on blocking. No tiled bench.
    Mid-range — tiled, waterproofed shower, frameless glass, new exhaust, some layout change$18,000–$40,000A tiled corner or full-width bench, designed in. The normal case.
    High-end — curbless, fully tiled, drain relocated, heated floor, stone$40,000–$80,000+A floating slab-topped bench, coordinated with a linear drain and frameless glass.

    These are the same ranges we publish in our bathroom remodel cost guide and our tub-to-shower conversion cost guide, because a shower with a seat is not a separate category of job. The line items that actually move the number:

    Line itemTypical rangeWhy it moves
    Prefab shower pan$500–$2,500Size, material and whether it is a stock footprint
    Relocating the drain — raised foundation$2,500–$6,000Access from below; how far the trap has to move
    Relocating the drain — slab$5,000–$12,000+Cutting, trenching and re-pouring concrete
    Frameless glass$1,000–$3,000Panel count, height, hardware finish
    Tile$12–$25 per sq ft installedTile size and layout; large-format costs more to set flat

    Adding a bench to a shower you were not otherwise rebuilding is a different proposition, and usually a poor one. You cannot bond a bench onto finished tile and call it waterproof; doing it properly means opening the wall, which means retiling, which means you are doing the shower anyway. If the shower is sound and you simply need somewhere to sit, buy a teak stool and spend the money elsewhere. Budgeting ranges throughout, not quotes — and financing options are available if the timing is awkward.

    The aging-in-place case, with the actual numbers

    Most articles on this topic gesture at safety. Here is what the federal data says. Analyzing a year of U.S. emergency-department records for people aged 15 and over, CDC researchers counted an estimated 234,094 nonfatal bathroom injuries. Falls caused 81.1% of them, and 68.3% happened in or around the tub or shower — by a wide margin the most dangerous place in the room. The injury rate climbed from 58.8 per 100,000 among 15- to 24-year-olds to 515.3 per 100,000 among people aged 85 and older. The study drew on 2008 data and remains the standard national count; the full report is published in CDC’s MMWR. The shower is only one room, though: for entries, doorways, kitchens, lighting and a ground-floor bedroom, see our aging-in-place remodeling checklist for the whole house.

    What follows from that, practically:

    • A seat is only half of it. The risk is in transitions — stepping in, standing up, turning around. A seat plus a grab bar plus a handheld on a slide bar addresses the transitions; a seat alone addresses one of them.
    • Put blocking in for grab bars now, even if you do not want bars yet. Plywood backing across the shower walls during framing costs almost nothing and means a bar can be fitted anywhere, any time, without opening tile. This is the single highest-value thing you can do in a bathroom remodel you may want to age in.
    • Towel bars are not grab bars. A grab bar and its fixings are designed for a 250 lb load applied in any direction. A towel bar is designed for a towel.
    • Slip resistance is a tile decision. A small-format floor tile with more grout joints gives more grip than a polished large-format one. The bench matters here too — a polished stone seat is slippery when soapy.

    Will Medicare or insurance pay for it?

    No, and it is worth knowing before you plan around it. Medicare’s national coverage determination for durable medical equipment — the CMS DME Reference List — lists these items individually and denies each one:

    • Bathtub seats — denied as a "comfort or convenience item; hygienic equipment; not primarily medical in nature"
    • Bathtub lifts — denied as a "convenience item; not primarily medical in nature"
    • Grab bars — denied as a "self-help device; not primarily medical in nature"
    • Raised toilet seats — denied as a "convenience item; hygienic equipment"

    A built-in shower bench, being part of the building rather than equipment at all, is further outside the definition still. Original Medicare does not pay for home modifications. Some Medicare Advantage plans and some state or veterans’ programs do offer home-safety benefits, and those vary by plan, by year and by county — check your own plan documents rather than a contractor’s website, including ours. We are contractors, not benefits advisors, and we will not tell you a job is covered.

    Common mistakes we get called in to fix

    • The bench that was decided on after framing. Added once the walls were closed, so it sits on legs rather than floating, and the shower floor is now awkward to clean around.
    • A flat bench top. Water pools, sits in the grout joints, and the front edge of the seat discolors within a year. No slope, no drainage, no exceptions.
    • A bench where the shower needed the floor. A full-depth bench in a compartment already at the minimum leaves a shower you shuffle sideways in.
    • The niche directly above the bench. Convenient, and it means the two most penetrated details in the shower stack vertically in the same plane of waterproofing. It can be done properly; it frequently is not.
    • Fold-down seat into tile and nothing else. Anchors in tile and backer board with no blocking behind them. It holds, until the day it matters.
    • Bench built, exhaust fan left alone. More tiled surface and more standing water in the same room, moved by the same undersized fan. See the ventilation section of our walk-in shower guide.

    Permits, and what a plan checker looks at

    The bench itself is not what triggers a permit — the shower is. Rebuilding a shower involves plumbing, waterproofing and usually electrical, and in Los Angeles that is permitted work. Because the bench changes the compartment’s clear floor area, it is one of the things a plan checker will measure, which is a further reason to have it on the drawing rather than adding it on site.

    We cover the process, the inspections and what the city actually asks for in our guide to bathroom remodel permits in Los Angeles. The sequencing — demolition, rough plumbing, inspection, waterproofing, tile, glass — is set out in the order of a bathroom remodel, and the bench is built during the framing and waterproofing stages, well before anything looks like a bathroom.

    What to ask before you sign

    1. Show me the shower on a plan with the bench drawn and the 30-inch circle marked.
    2. What height and depth is the bench, and is it built for sitting or for a raised leg?
    3. Which waterproofing system is the shower built in, and does every component inside the wet area belong to it?
    4. How is the bench top sloped, and where does that water go?
    5. Is the bench floating or supported, and what blocking is going into the wall?
    6. Are you putting plywood backing in for future grab bars while the walls are open?
    7. Is the glass measured after tiling, and who is responsible if it does not fit around the bench?
    8. What is the tile allowance, stated in dollars per square foot rather than as a grade?

    Ask for the license number and check it on the California Contractors State License Board site. Ours is CSLB #1110975. More about how we work is on our about page, and our customer reviews are public.

    Where we build walk-in showers with seats

    We work across Los Angeles County, Orange County, Ventura County and the western parts of Riverside and San Bernardino counties, on residential projects only. Locally that includes Van Nuys, Sherman Oaks and Woodland Hills, and the wider bathroom remodeling service covers the rest. Recent work is on our projects page — including the Ontario hall bathroom and an Irvine bathroom built around a freestanding tub — and tile and fixture combinations we have used are collected in our bathroom design ideas.

    Much of the San Fernando Valley housing stock we work on is 1950s to 1970s, on raised foundations with original cast-iron waste lines. That matters for a bench project in one specific way: raised-foundation access makes relocating a drain markedly cheaper than cutting a slab, which widens what is affordable when the shower has to grow to fit a seat.

    Walk-in shower with seat FAQs

    How much does a walk-in shower with a seat cost?

    In Los Angeles, $18,000 to $40,000 for a mid-range tiled, waterproofed walk-in shower with frameless glass and a built-in bench. A basic prefab shower with a molded or fold-down seat can land in the $8,000 to $18,000 refresh tier, and a curbless, fully tiled shower with a relocated drain and a slab-topped floating bench runs $40,000 to $80,000 or more. The seat itself is not a separate line item of any size — the shower is what you are buying. These are budgeting ranges, not quotes.

    Will Medicare pay for a walk-in shower or a shower seat?

    No. The CMS durable medical equipment reference list denies bathtub seats as a comfort, convenience and hygienic item not primarily medical in nature, and denies grab bars as a self-help device on the same grounds. Original Medicare does not cover home modifications at all, and a built-in bench is part of the building rather than equipment. Some Medicare Advantage plans and some veterans’ or state programs offer home-safety benefits, but these vary by plan and county — check your own plan documents.

    Is a seat in a shower a good idea?

    In a shower large enough to take one without dropping below the required floor area, yes. It costs very little inside a shower you are already building, it is useful daily for shaving and washing feet, and it is the difference between a bathroom you can stay in and one you cannot as mobility changes. In a compartment already at the code minimum it is a poor trade — you lose usable standing room for a seat you may rarely use. Size decides it, not preference.

    How high should a shower seat be?

    17 to 19 inches above the finished shower floor. That is the federal accessibility benchmark for public buildings, measured to the bathroom finish floor, and it works well in a house. It is deliberately a little lower than a dining chair, because you have to be able to stand back up from it with wet feet. Build to the finished height, remembering that tile and setting bed add to whatever the framing measures.

    How deep should a shower bench be?

    15 to 16 inches from the seat wall if it is meant for sitting — the accessibility benchmark for a rectangular seat. Below about 15 inches you have a ledge rather than a seat: fine for resting a leg while shaving, uncomfortable to sit on properly. Decide which one you want before framing, because the two are different benches and the shallower one is chosen by accident far more often than on purpose.

    Does a built-in bench make my shower too small for code?

    It can. California requires a shower compartment to have a minimum finished interior area of 1,024 square inches and to encompass a 30-inch circle, and a permanent bench sits inside that area rather than outside it. A 16-inch bench across the end of a 36 by 60 inch shower still clears both tests; the same bench in a smaller compartment may not. Have the bench and the 30-inch circle drawn on the plan before anything is ordered, and confirm the treatment of a fold-down seat with your building department.

    Can you add a bench to an existing shower without retiling?

    Not a built-in one, properly. A tiled bench has to be tied into continuous waterproofing, which means opening the wall and the floor junction, which means retiling. A bench bonded onto finished tile has no waterproofing continuity and will eventually put water behind the wall. The two honest options for a shower you are not rebuilding are a fold-down seat anchored into blocking — which still means opening tile to add blocking if none exists — or a free-standing teak stool.

    Teak bench or built-in tiled bench — which is better?

    Different jobs. A built-in tiled or slab bench is permanent, carries weight, can be leaned on and adds to the room’s value; it has to be designed in from the start and cannot be undone cheaply. A teak stool costs a fraction, needs no construction, suits a finished shower and can be removed — but it moves underfoot when wet and gives nothing to steady yourself on. If the shower is being rebuilt, build the bench. If it is not, buy the stool.

    Get a shower designed around a seat, not one with a seat squeezed in

    The difference between a bench that gets used every day and one that quietly makes the shower worse is decided on paper, before the first tile is ordered. We measure the room, draw the compartment with the bench and the required clear area on it, and give you a written scope you can compare against anyone else’s. Site visits take about two hours and proposals follow within 48 hours.

  • Do I Need a Permit to Build an ADU in Los Angeles?

    Do I Need a Permit to Build an ADU in Los Angeles?

    Yes. If you are building a legal accessory dwelling unit in the City of Los Angeles, you should expect to go through a permitting and plan-review process before construction begins.

    That includes new detached ADUs, attached ADUs, additions that create an ADU, and garage conversions.

    But after working with homeowners on ADU and residential construction projects, we have found that “Do I need a permit?” is usually the wrong question.

    The permit itself is only one part of the process.

    What homeowners are really asking is:

    What do we have to do before we can legally start building, how long will it take, and what is it going to cost?

    That is where most of the surprises happen.

    The Los Angeles Department of Building and Safety (LADBS) requires building permits for new construction, additions, structural alterations, changes of use and other qualifying work. LADBS also has a specific ADU program covering accessory dwelling units, junior ADUs and applicable development standards in the City of Los Angeles. DBS City of Los Angeles

    This article focuses primarily on properties inside the City of Los Angeles. If your property is in another incorporated city or an unincorporated part of Los Angeles County, a different permitting agency may have jurisdiction.

    The Biggest ADU Permit Misunderstanding We See

    One of the most common misunderstandings is that homeowners think a permit is a single document they simply pay for and receive.

    Someone calls and asks:

    “Do we need a permit?”

    The answer is generally yes, but what they are actually signing up for is a pre-construction and approval process.

    Before LADBS can issue a permit on a typical ADU project, there may be surveying, architectural plans, engineering, energy calculations, utility planning and other property-specific work to complete.

    LADBS describes its general building permit process as submitting plans, receiving plan-check corrections when necessary, correcting the plans, having the corrections verified and then receiving the permit before construction begins. DBS City of Los Angeles

    That distinction matters because homeowners sometimes budget for the construction and a permit fee but overlook months of work and thousands of dollars that can come before the permit is issued.

    Does a Small ADU Still Need a Permit?

    Yes.

    A small ADU does not become permit-exempt simply because of its size.

    If you are creating an actual dwelling with living space, a kitchen, electrical, plumbing and a bathroom, you are not talking about the same thing as a simple accessory structure.

    There can be exemptions for certain minor construction work or accessory improvements under Los Angeles building rules, but those exemptions should never be confused with permission to build an unpermitted dwelling.

    Our rule with homeowners is simple:

    If people will be living in it, do not assume it is exempt. Verify the permitting path before spending money on construction.

    Does a Garage Conversion Need a Permit in Los Angeles?

    Yes.

    This is another question we hear constantly.

    Homeowners sometimes assume:

    “The garage is already there, so we are really just remodeling the inside.”

    From a permitting standpoint, converting a garage into a legal dwelling is much more significant than finishing a room.

    You are changing the use of the space and creating a residential unit. Depending on the condition of the existing structure, that can involve:

    • Insulation
    • Electrical work
    • Plumbing
    • Heating and cooling
    • Egress requirements
    • Fire separation
    • Windows and doors
    • Structural work
    • Foundation or slab corrections
    • Energy-code requirements

    LADBS specifically addresses ADUs created from existing structures and has separate guidance for permitted and previously unpermitted buildings. DBS City of Los Angeles

    The good news is that a garage conversion can sometimes be one of the most cost-effective ways to create an ADU because the basic structure already exists.

    The important part is determining what condition that structure is actually in before assuming the conversion will be simple.

    What Happens Before You Apply for an ADU Permit?

    This is the part homeowners tend to underestimate.

    For a typical detached ADU, the pre-construction process may include:

    • Property and zoning research
    • Boundary or topographic survey
    • Architectural or design plans
    • Structural engineering
    • Title 24 energy calculations
    • Soils or geotechnical analysis where required
    • Utility planning
    • Sewer evaluation
    • Electrical service evaluation
    • Plan submission
    • Plan-check corrections
    • Resubmittal and approval
    • Permit issuance

    Not every property requires every item on that list.

    A flat lot with straightforward access and modern utilities can be very different from a hillside property with an older home, retaining walls, easements and a 100-amp electrical panel.

    That is why we prefer to evaluate the property before a homeowner becomes attached to a specific floor plan.

    We Start With the Property, Not the ADU Floor Plan

    Before we visit a Los Angeles property, one of the first places we look is ZIMAS, the City of Los Angeles Zone Information and Map Access System.

    ZIMAS provides property-specific zoning and planning information and can show zoning designations, planning cases, building-permit information and various overlays affecting a parcel. Los Angeles City Planning specifically recommends using ZIMAS to understand zoning and additional planning controls that can apply to an individual property. City Planning Department

    Before we start talking seriously about the finishes or kitchen layout, we want to know what the lot is telling us.

    We generally look at:

    • Slope and grading. Is the backyard actually flat? Even what looks like a modest slope can affect foundations, retaining walls, grading and geotechnical requirements.
    • Existing structures and permit history. We look for additions, converted garages, sheds and other improvements that may not match the property’s records.
    • Setbacks and usable building area. Property lines and existing structures determine where the ADU can realistically fit.
    • Garage placement. An existing detached garage may be a great conversion candidate, or it may occupy the best location for a new ADU.
    • Construction access. A narrow side yard with no alley access may mean materials have to be hand-carried or lifted into the yard.
    • Sewer location. We want to know where the existing lateral likely runs and whether its condition should be investigated.
    • Water, gas and electrical service. Distance creates trenching costs, and older electrical systems may require upgrades.
    • Easements and overhead utilities. An easement or power line through the proposed building area can completely change the layout.
    • Trees. Protected or significant trees can affect what and where you can build.
    • Fire-zone conditions. Certain properties may face additional building-material, access or safety requirements.
    • Parking and transportation conditions. State law limits when local agencies can require ADU parking and provides several exemptions, including certain properties near public transit. CalHousing
    • Drainage and flood conditions. A new structure changes how water moves across a property, so drainage cannot be an afterthought.

    Our biggest red flag is usually hillside and soil conditions.

    A flat backyard and a steep backyard may look equally buildable in online listing photos.

    They are not.

    A hillside project may involve deeper foundations, retaining walls, geotechnical work, grading review and additional fire-safety considerations. Those requirements can substantially change both the budget and the timeline.

    An easement or previously unpermitted construction discovered late can have a similar effect.

    How Far Does an ADU Need to Be From the Property Line?

    California ADU law generally limits required side and rear setbacks for qualifying attached and detached ADUs to no more than four feet.

    The California Department of Housing and Community Development’s current ADU Handbook also explains that local lot-coverage or floor-area rules generally cannot be used to prevent at least an 800-square-foot ADU that meets four-foot side and rear setbacks, subject to the applicable state standards. CalHousing

    That does not mean every Los Angeles backyard automatically has a perfect four-foot rectangle available for an ADU.

    You still have to account for the actual property lines, existing structures, safety requirements, utilities, easements and property-specific conditions.

    This is one reason a survey is so valuable early in the process.

    A Real ADU Example From the San Fernando Valley

    One project illustrates why we spend so much time talking about pre-construction.

    A homeowner in the San Fernando Valley contacted us about building what she initially described as a backyard “granny flat” for her aging mother.

    The concept evolved into a detached, single-story, approximately 600-square-foot, one-bedroom, one-bath ADU behind an older 1950s home.

    Her original expectation was fairly common.

    She thought we would choose a design, obtain a permit and break ground in approximately three months.

    She had also assumed that because the ADU would be detached, the condition of the existing house would not have much impact on the project.

    That turned out not to be the case.

    The First Surprise Was the Survey

    The survey showed that the existing garage sat very close to the rear property line.

    That changed the usable area of the backyard and affected the proposed relationship between the existing structures and the ADU.

    We ultimately had to move the proposed footprint approximately five feet and revise the plans.

    This is exactly why we would rather discover a problem on paper than after excavation begins.

    Then Came Plan-Check Corrections

    LADBS returned comments requesting clarification on structural details, energy calculations and the site plan.

    Homeowners sometimes see a correction notice and assume something has gone terribly wrong.

    Usually, that is not the case.

    Corrections and resubmittals are a normal part of plan review. The City itself describes plan check as a process in which plans may be reviewed, corrections issued, corrections made by the applicant and the revised plans checked again before permit issuance. DBS City of Los Angeles

    In our experience, one or two rounds of corrections on a residential project are not automatically a red flag.

    The Existing House Created Two More Costs

    The ADU needed sewer service, and the existing home’s sewer lateral was aging.

    Before relying on it for another dwelling, we needed a camera inspection, and the condition of the line meant a partial repair or replacement had to be considered.

    Then we looked at the electrical service.

    The older house had a smaller electrical panel that was not ideal for the additional planned load, so an electrical service upgrade became part of the discussion.

    Neither problem was technically “inside the ADU.”

    Both affected the ADU budget.

    That is one of the most important lessons we can give homeowners:

    When you add a second dwelling to an older property, you are connecting a new building to old infrastructure.

    The existing property matters.

    How Long Does an ADU Permit Take in Los Angeles?

    California law generally requires a permitting agency to approve or deny a completed ADU application within 60 days.

    The California Department of Housing and Community Development also explains that agencies have specific requirements for determining whether an application is complete and that applicant-requested delays can toll the review period. CalHousing

    That does not mean you should expect to call a contractor today and have a construction permit 60 days from now.

    The state review period is only one piece of the overall timeline.

    Before a complete application is ready for review, you may spend weeks or months on:

    • Surveying
    • Design
    • Engineering
    • Title 24 calculations
    • Soils work
    • Utility research
    • Preparing the submission package

    Our San Fernando Valley example took approximately:

    • 2 to 3 months for survey, design and engineering
    • 2 to 3 months for plan review, revisions and corrections
    • Approximately 5 to 6 months from the initial conversation to permit issuance

    That is an illustrative project timeline, not a promise for every ADU.

    The lesson we gave that homeowner is one we continue to use:

    Treat the beginning of the project as discovery, not construction.

    Can Pre-Approved ADU Plans Make the Permit Faster?

    Potentially.

    LADBS offers an Approved Standard Plans Program for new detached ADUs. The plans have already been reviewed for certain building, residential and green-code requirements, which can reduce some plan-check time.

    However, LADBS still has to review site-specific conditions such as zoning and foundation requirements. The City’s pre-approved ADU plans are also intended for new detached structures, not simply as a plug-and-play solution for every garage conversion or attached ADU. DBS City of Los Angeles

    For the right lot, a standard plan can be worth exploring.

    For a complicated lot, custom design may make more sense.

    How Much Should You Budget Before ADU Construction Starts?

    This is where homeowners are often surprised.

    Based on the types of projects and proposals we encounter in Los Angeles, we tell homeowners that a typical flat-lot ADU may require roughly $20,000 to $45,000 in pre-construction costs before physical construction begins.

    A more complicated or hillside property can reach $50,000 to $90,000 or more before construction.

    Those are planning ballparks from our experience, not City fee schedules or guaranteed pricing.

    A rough pre-construction budget might include:

    • Boundary or topographic survey: approximately $1,500 to $4,000
    • Architectural or design plans: approximately $8,000 to $25,000
    • Structural engineering: approximately $3,000 to $8,000
    • Title 24 calculations: approximately $800 to $2,500
    • Soils or geotechnical report: approximately $2,500 to $7,000 on a typical lot and potentially $7,000 to $15,000+ on more complicated hillside projects
    • LADBS plan-check and permit-related costs: potentially several thousand dollars depending on scope and valuation
    • Sewer camera inspection: approximately $300 to $600
    • Sewer repairs or replacement, if necessary: potentially $5,000 to $20,000
    • Electrical panel or service upgrade, if required: approximately $3,000 to $8,000
    • Utility trenching: potentially $5,000 to $15,000+, depending heavily on distance and site conditions

    Other costs can include arborist reports, demolition, MEP design, grading work, permit-expediting assistance, financing expenses and utility-related charges.

    The number we emphasize most is not any individual line item.

    It is the 10% to 15% contingency.

    Older homes hide things.

    Underground utilities hide things.

    Soil hides things.

    We would rather see a homeowner carry a contingency they never need than build a financial plan that requires every unknown condition to go perfectly.

    What ADU Cost Surprises Homeowners the Most?

    Utilities.

    Most homeowners expect to pay an architect and permit fees.

    They are much less prepared to hear that the existing property’s sewer lateral may need thousands of dollars in work or that an older electrical service needs to be upgraded.

    The second surprise is usually design and engineering.

    Homeowners sometimes refer to all of it as “the plans,” but those plans may involve multiple disciplines and professionals.

    That is why we recommend asking for a pre-construction budget in writing and specifically including a category for unknown existing conditions.

    If someone tells you pre-construction costs should be minimal without first understanding your property, ask how they arrived at that conclusion.

    Are ADUs Exempt From Impact Fees?

    Some are.

    Under current California ADU law, ADUs with 750 square feet or less of interior livable space are exempt from certain impact fees. For ADUs larger than 750 square feet, qualifying impact fees generally must be assessed proportionately in relation to the primary dwelling. CalHousing

    School fees are treated differently.

    The California HCD ADU Handbook states that school districts may impose school impact fees on ADUs with more than 500 square feet of interior livable space, while smaller units are not subject to those school impact fees. CalHousing

    Fee schedules and project conditions change, so we never recommend building an ADU budget around an internet estimate alone. Verify current fees for the specific project before committing to the overall budget.

    California Made ADUs Easier, but That Does Not Mean Automatic Approval

    This is another misconception we hear.

    California has passed numerous laws intended to make ADUs easier to build and to prevent local jurisdictions from creating unreasonable barriers.

    That is good news for homeowners.

    It does not mean:

    “State law says we can build an ADU, so nothing else matters.”

    Your project still needs compliant plans.

    Depending on the project, you may still be dealing with building-code requirements, setbacks, height limits, structural engineering, energy requirements, fire safety, utility connections and property-specific constraints.

    We usually explain it this way:

    The law is increasingly on the homeowner’s side, but the plans still have to be right.

    What Happens If You Build an ADU Without a Permit?

    When someone asks whether they should simply build first and “deal with the permit later,” our answer is:

    You are not eliminating the problem. You are moving the problem into the future when it may be much more expensive to fix.

    LADBS warns that construction that does not comply with applicable requirements can be penalized or stopped, and permitting and inspections are part of the City’s process for establishing code compliance. DBS City of Los Angeles

    Possible consequences of unpermitted work can include:

    • A stop-work order
    • Code-enforcement action
    • Additional fees
    • Having to prepare plans after construction
    • Opening completed walls so concealed work can be inspected
    • Correcting electrical, plumbing, structural or fire-safety work
    • Rebuilding portions that do not comply
    • Complications when selling or refinancing the property
    • Insurance or claims complications depending on the circumstances and policy
    • Problems legally renting or valuing the space

    Construction inspections are not just paperwork.

    LADBS explains that permitted construction is inspected at multiple stages—including foundation, framing, electrical, plumbing and other work—before the work is covered and the next stage proceeds. DBS City of Los Angeles

    When someone builds the entire unit first, an inspector cannot see what is behind the finished drywall.

    That is why legalization can sometimes mean opening finished construction back up.

    What If You Already Have an Unpermitted ADU?

    Do not automatically assume the only option is demolition.

    California has created additional pathways for certain older unpermitted ADUs.

    Current state law provides significant protections for qualifying unpermitted ADUs built before January 1, 2020. HCD explains that local agencies generally cannot deny permits for those older units solely because of certain building-code or ADU-law violations, although health-and-safety conditions can still require correction and affect approval. CalHousing

    LADBS also publishes a current Los Angeles information bulletin specifically addressing streamlined permitting of unpermitted ADUs and JADUs under AB 2533. DBS City of Los Angeles

    That does not mean every existing conversion is automatically legalizable.

    It means it is worth investigating before assuming the worst. Our step-by-step guide to legalizing an unpermitted ADU or garage conversion under AB 2533 walks through the LADBS process, the checklist and the fees.

    Our preference is to understand:

    • When the conversion was built
    • Whether any permits exist
    • Where it sits on the property
    • How it was constructed
    • Whether there are obvious health or safety issues
    • What would be required to bring it into compliance

    Coming forward with a plan is usually better than waiting for a complaint or discovering the problem during a sale.

    Are ADU Inspections a Bad Thing?

    We do not think so.

    Homeowners understandably become frustrated when inspections affect construction scheduling.

    But think about what is eventually going to be hidden behind the walls:

    • Structural connections
    • Framing
    • Electrical wiring
    • Plumbing
    • Waterproofing
    • Insulation

    Once the drywall and finishes go up, you may never see those systems again.

    A required inspection provides another set of eyes before that work disappears.

    For a structure that may be occupied by your parents, children, tenants or future buyers for decades, that is not where we recommend taking shortcuts.

    Our Advice Before You Build an ADU in Los Angeles

    Do not start with Pinterest.

    Do not start with cabinet colors.

    And do not start by asking someone how cheaply they can build a 600-square-foot ADU.

    Start with the property.

    Before committing to a design, understand:

    • Your zoning
    • Property lines
    • Existing permits
    • Setbacks
    • Slope and soil
    • Utility locations
    • Sewer condition
    • Electrical capacity
    • Easements
    • Access
    • Trees
    • Fire-zone conditions
    • Realistic pre-construction costs

    An hour spent understanding the lot early can save months of redesign and thousands of dollars later.

    We also recommend carrying a contingency of approximately 10% to 15% for unknown existing conditions, especially when adding an ADU to an older Los Angeles home.

    The permit itself should not be what scares homeowners.

    The bigger risk is going into the process without knowing what lies between an idea and an approved set of plans.

    So, Do You Need a Permit to Build an ADU in Los Angeles?

    Yes.

    For a legal, habitable ADU in the City of Los Angeles, expect a permitting process.

    But the better way to think about it is this:

    You are not simply applying for permission to build a small house. You are proving that the proposed dwelling works safely and legally on your specific property.

    For some homeowners, that process is relatively straightforward.

    For others, the survey discovers a setback problem, the sewer needs work, the electrical panel needs an upgrade or the backyard is more complicated than it appeared.

    Those discoveries are not a failure of the process.

    Finding them before construction is exactly what the process is supposed to accomplish.

    At Green Design & Build, we would rather help a homeowner understand those conditions at the beginning than give them an unrealistic timeline or budget just to get a project started.

    If you are considering an ADU in Los Angeles, start by understanding your lot, your existing home and your realistic pre-construction budget. Once those pieces make sense, the design and construction decisions become much easier.

    Official Sources and Additional ADU Resources

    • Los Angeles Department of Building and Safety — Accessory Dwelling Units: City of Los Angeles ADU rules, information bulletins and approved standard plans. LADBS Accessory Dwelling Unit Resources
    • California Department of Housing and Community Development — ADU Handbook: Current guidance on California ADU law, permitting timelines, setbacks, fees, parking and legalization of older ADUs. California HCD ADU Handbook
    • Los Angeles City Planning — ZIMAS: Property-specific zoning, overlays, planning information and related records. Los Angeles Zoning Search and ZIMAS
    • LADBS — Building Permits: Information about projects requiring permits and plan review in the City of Los Angeles. LADBS Building Permits

    ADU laws, fees, building codes and local procedures change. Property-specific conditions also matter. Verify current requirements with LADBS, Los Angeles City Planning and the appropriate licensed professionals before relying on any estimate or beginning construction.

  • Home Addition Ideas for a Los Angeles House, and What Each One Costs

    Home Addition Ideas for a Los Angeles House, and What Each One Costs

    The best home addition idea for your house is whichever one your lot still has floor area left for. In the City of Los Angeles, an R1 lot is capped at a Residential Floor Area of 45% of the lot size, so a 6,000 square foot lot supports about 2,700 square feet of house in total — and if you are already at 2,300, your addition is roughly 400 square feet no matter how good the idea is. Within that ceiling, the additions most Los Angeles homeowners actually build are a bedroom or office bump-out at $75,000 to $150,000, a primary suite with a bathroom at $130,000 to $250,000, a family room or kitchen expansion at $110,000 to $230,000, a partial second story at $200,000 to $350,000, and a full second story at $350,000 to $650,000 or more. A detached ADU in the backyard runs $180,000 to $450,000+ and often gets approved where an addition cannot.

    Green Design and Build is a licensed, bonded and insured general contractor (CSLB #1110975) based in Van Nuys, led by Dekel Sofer. We design, engineer, permit and build additions for homeowners across Los Angeles County, Orange County, Ventura County, western Riverside County and western San Bernardino County. The figures below are budgeting ranges, not a quote — the only way to get a real number is to walk the house.

    Start with the constraint, not the idea

    Most addition projects go wrong in the first conversation, because the homeowner starts with a picture and the picture ignores three numbers that are already fixed. Before you fall in love with a plan, find out what your lot allows.

    Floor area. In the City of Los Angeles, LAMC Section 12.08 C.5 limits Residential Floor Area on an R1 lot outside a Hillside Area or the Coastal Zone to 45% of the lot area — a floor area ratio of 0.45, counting the house and its accessory buildings together. This is the invisible ceiling, and it is the number that most often kills a second story. Subtract what you already have from 45% of your lot size and you have your budget in square feet.

    Setbacks. The same section requires a front yard of 20% of the lot depth, capped at 20 feet, though where the developed lots on your block have front yards within ten feet of each other and make up 40% or more of the frontage, the requirement becomes the average of those front yards instead. The rear yard is 15 feet. Side yards are 5 feet on each side, reduced to 10% of lot width but never below 3 feet on a lot under 50 feet wide.

    Height and massing. Here is the detail almost nobody knows, and it is the single most useful thing on this page: the 5-foot side yard applies to a main building not more than two stories in height. The extra foot per story only starts above the second story. A two-story addition in R1 does not owe wider side yards than a single-story one. What it does owe is articulation — any part of the building with a side wall over 14 feet tall running more than 45 feet continuously needs an offset at least 5 feet deep and 10 feet long. There is also an encroachment plane that starts 20 feet above the lower of existing or finished grade along the required front and side setbacks, which is what quietly shaves the corners off a boxy second story.

    Pull your parcel up on ZIMAS before you sketch anything. A specific plan, an HPOZ or a subdivision condition overrides the base zone — Section 12.08 C.2 says so explicitly — and outside the City of Los Angeles your own city’s numbers govern.

    Build out: additions at ground level

    Ground-floor additions are the cheapest way to add real square footage, because the existing structure carries nothing new. They cost you yard instead.

    1. A bedroom or home office bump-out

    200 to 350 square feet, $75,000 to $150,000. The workhorse addition. It turns a two-bedroom into a three-bedroom, which is the single biggest jump in how a house appraises and how it shows. Put it where it can borrow an existing wall and stay clear of the main sewer line and the electrical service, and the cost stays at the bottom of the range.

    The catch is circulation. A bedroom reached by walking through another bedroom is not a bedroom anyone wants, and a hallway eats 40 to 60 square feet you pay for at the same rate as the room.

    2. A primary suite with its own bathroom

    350 to 500 square feet, $130,000 to $250,000. This is the addition where the bathroom drives the price. New drainage, new venting and a new hot water load mean that where the bathroom lands relative to the existing plumbing stack can move the number substantially. Back-to-back with an existing bathroom is the cheapest configuration by a wide margin.

    If you are also redoing the bathroom you already have, do both under one permit. Our guide to the right order to remodel a bathroom covers the sequencing, and the walk-in shower guide covers the drainage decisions.

    3. A family room or kitchen expansion

    300 to 500 square feet, $110,000 to $230,000. Pushing the back of the house into the yard to get one large living space is what most 1950s and 1960s Valley houses are asking for, because they were built with small separate rooms and a kitchen closed off from everything.

    This is the addition where the roof decides whether the result looks deliberate or bolted on. A low-slope shed roof tacked onto a hipped roof reads as an afterthought from the street forever. Matching or deliberately contrasting the existing roof form costs a few thousand dollars in framing and is the difference between an addition that adds value and one that only adds space. Our room addition design ideas go further on rooflines and where the new work meets the old. If the kitchen itself is being rebuilt, see what a kitchen remodel costs.

    Build up: second-story additions

    Building up keeps the yard and costs more per square foot, because the existing house becomes the foundation for a new one.

    4. A partial second story

    400 to 600 square feet, $200,000 to $350,000. One or two rooms over part of the house — usually a primary suite over the garage or over the back half. Cheaper than a full second story and far less disruptive, because part of the house stays habitable and the new load lands on a smaller footprint that may only need selective foundation work.

    5. A full second story

    800 to 1,200 square feet, $350,000 to $650,000 or more. Effectively a second house on top of the first, and the honest version of the conversation starts with the fact that you will move out for most of it. The roof comes off, so it is weather-dependent in a way nothing else on this list is.

    What drives the price is what is underneath. The existing foundation and walls were sized to carry a roof, not a floor with people and furniture on it, so expect new footings, shear walls and a load path engineered from the new ridge to the soil. On a 1950s house with a raised foundation and no shear panels, that structural work is much of the reason a second story costs roughly $100 to $150 more per square foot than a ground-floor addition. Our second-story addition cost guide breaks the per-square-foot figures down, and foundation work explains what gets found when a house that age is opened up. If the house has an unbraced cripple wall, a seismic retrofit is often folded into the same permit.

    Build separate: the ADU route

    An accessory dwelling unit is not an addition, and that is exactly why it is on this list. State law gives ADUs approval protections an addition does not get, so on a tight lot the ADU is frequently the only thing that can be built at all. If you are weighing the two directly, we wrote a full comparison: ADU vs. room addition.

    6. Converting the garage

    $100,000 to $200,000. The walls, slab and roof already exist, which is why this is the cheapest path to a full separate unit. The slab usually needs work — garage slabs are thinner than habitable-space slabs and often slope to the door — and you are adding insulation, a ceiling, plumbing and compliant egress.

    The rule that surprises people: you do not have to replace the parking. Government Code Section 66314(d)(11) says that when a garage, carport or parking space is demolished or converted in conjunction with building an ADU, the local agency shall not require those off-street spaces to be replaced. See garage conversions and what a garage conversion costs.

    7. A detached unit in the backyard

    $180,000 to $450,000+, depending on size — roughly $180,000 to $260,000 at 500 square feet, $225,000 to $350,000 at 700 to 800 square feet, and $300,000 to $450,000+ at around 1,000 square feet. New foundation, new everything, and a separate structure that can be rented, which an addition cannot.

    The state floors are what make this work on a small lot. Under Government Code Section 66321, a city may not set a maximum below 850 square feet of interior livable space, or below 1,000 square feet for an ADU with more than one bedroom, and may not apply standards that prevent an 800 square foot ADU with four-foot side and rear setbacks or block a detached ADU at 16 feet in height. The 1,200 square foot figure people quote as a limit is not a statewide maximum. It is the state default cap for a detached ADU where a city has no compliant ordinance (Government Code Section 66314(d)(5)), which a local ordinance may raise, and it is also the cap the City of Los Angeles applies to detached ADUs under LAMC Section 12.22 A.33. Start with what an ADU is, then the ADU rules and the ADU rules calculator. If the plan is to rent it, ADU rental income in Los Angeles has the current numbers.

    Build nothing: space you already own

    8. A junior ADU inside the existing walls

    $60,000 to $150,000. Government Code Section 66313(d) defines a junior ADU as no more than 500 square feet of interior livable space contained entirely within a single-family residence. No new foundation, no new roof, no floor area added — so it does not touch your 0.45 ceiling at all, which is why a JADU is sometimes the only option on a lot that is already built out. Details in junior ADU cost in Los Angeles.

    9. Opening up what is already there

    Not every space problem is a square-footage problem. A 1,600 square foot house chopped into seven small rooms feels smaller than a 1,300 square foot house with one good living space. Taking out one wall costs a fraction of an addition and sometimes solves the actual complaint — see removing a load-bearing wall for what is involved when it is structural. If the house needs more, whole-home renovation cost is the right comparison.

    10. Reworking the yard instead

    In Southern California, covered outdoor living substitutes for indoor square footage for eight or nine months of the year, at a fraction of the cost per square foot and without consuming floor area. A covered patio, an outdoor kitchen and proper lighting can absorb the entertaining that the family room addition was meant to serve. Backyard remodel cost has the ranges. For a household that mainly wants somewhere to put twelve people, this is sometimes the right answer.

    Home addition cost comparison

    Ground-floor additions in Los Angeles run about $300 to $500 per square foot all-in; second stories run $400 to $650. These are budgeting ranges for a permitted, engineered, finished project — not a quote.

    IdeaTypical sizeTypical Los Angeles rangeAdds rentable unitUses floor area
    Bedroom or home office, ground floor200–350 sq ft$75,000–$150,000NoYes
    Primary suite with bathroom, ground floor350–500 sq ft$130,000–$250,000NoYes
    Family room or kitchen expansion, ground floor300–500 sq ft$110,000–$230,000NoYes
    Partial second story400–600 sq ft$200,000–$350,000NoYes
    Full second story800–1,200 sq ft$350,000–$650,000+NoYes
    Garage conversion to an ADUExisting footprint$100,000–$200,000YesUsually already counted
    Detached ADU500–1,000 sq ft$180,000–$450,000+YesYes
    Junior ADU inside the houseUp to 500 sq ft$60,000–$150,000YesNo

    Full breakdowns, including what the all-in number does and does not include, are in room addition cost in Los Angeles. If the budget is the obstacle rather than the design, financing covers the options homeowners actually use.

    Hillside lots follow a different rulebook

    If your parcel is in a mapped Hillside Area, the 45% figure above does not apply to you. LADBS’s own correction sheet for the Baseline Hillside Ordinance states that it applies to new construction, an addition or a major remodel on a lot in the R1, R1H, RS, RE or RA zones designated as Hillside Area, under LAMC Section 12.21 C.10. Floor area is set by a slope-based table rather than a single ratio, with a floor of 800 square feet or the table percentage, whichever is greater; height is measured as an envelope from hillside grade; the front yard becomes the prevailing setback with a 40-foot maximum and 5-foot minimum; and grading is capped before discretionary review at 1,000 cubic yards of cut and fill plus 10% of the lot size.

    In practice a hillside addition needs its floor area calculated from the actual slope of your lot before anyone can tell you what fits, and it usually needs a soils report. Do not budget one off a flat-lot number.

    Permits, energy compliance, and the part nobody budgets for

    An addition needs a building permit. The exemption people cite does exist — LAMC Section 91.106.2 exempts work valued at $2,500 or less — but it comes with four carve-outs, and it is disqualified where the work affects structural stability, affects public safety, is done to comply with a Department order, or changes the use or occupancy. An addition fails that test on both counts: it exceeds the valuation and it is structural. There is no square-footage threshold anywhere in the LA code that lets an addition skip a permit, and the widely repeated $500 figure is simply not what the code says.

    Beyond the permit itself, every addition needs Title 24 energy compliance documented. California’s 2025 Building Energy Efficiency Standards took effect on 1 January 2026, and additions are documented on the Energy Commission’s CF1R-ADD certificate of compliance forms under Section 150.2(a), with a prescriptive form for additions of 1,000 square feet or less and a performance path where the prescriptive requirements are not met. Only the new construction has to meet those requirements, not the whole house.

    Budget for architectural drawings and structural engineering, plan check and permit fees that scale with the permit valuation, the Title 24 report, and a soils report on hillside lots or wherever the plan checker asks for one. A ground-floor or second-story addition typically runs 9 to 14 months from first drawing to final inspection: 6 to 10 weeks of design and engineering for a ground-floor addition or 8 to 12 weeks for a second story, 2 to 4 months in plan check, then 4 to 7 months of construction on the ground floor or 5 to 7 months for a second story. An ADU is different — under Government Code Section 66317, the city must approve or deny a complete ADU application within 60 days of deeming it complete, and must tell you in writing within 15 business days whether it is complete. See how long an ADU takes.

    How to choose

    1. Do you want rental income, or more house? Rental income means an ADU or JADU. More house means an addition. Nothing else in the decision matters as much as this.
    2. How much floor area is left? 45% of lot area minus what you have, on a flat R1 lot. If the answer is under 200 square feet, you are looking at a JADU or a wall removal, not an addition.
    3. Is the yard worth more than the room? A 300 square foot addition on a 5,000 square foot lot is a meaningful bite out of the usable yard. That is the trade a second story exists to avoid.
    4. Can the existing structure carry a floor? If yes, building up is on the table. If the foundation needs replacing anyway, building up gets cheaper relative to building out.
    5. Can you move out? A full second story effectively requires it. A ground-floor addition usually does not.
    6. Is the lot in a Hillside Area, HPOZ, specific plan or the Coastal Zone? If so, get the applicable standards before you design anything.

    Mistakes that cost the most

    • Designing before checking floor area. Paying an architect to draw something the zoning code will not allow is the most common waste of money in this entire category.
    • Forgetting what the addition does to the rooms it covers. Building across the back of the house can turn a bright kitchen into an interior room with no natural light. Check every window the addition will block, and treat the roofline as an early decision rather than a detail.
    • Undersizing the systems. Adding 400 square feet to a house with a 20-year-old furnace and a 100-amp panel usually means upgrading both. Not optional, and not cheap.
    • Comparing quotes that are not the same scope. A bid including engineering, Title 24 and permit fees looks worse than one that excludes them. Our guide to hiring a general contractor without getting scammed covers what to check line by line.

    Home Addition Ideas FAQs

    What is the cheapest way to add space to a house?

    Using space you already have. A junior ADU carved out of the existing house runs $60,000 to $150,000 and adds no floor area. Among additions that add square footage, a ground-floor bedroom bump-out at $75,000 to $150,000 is the least expensive, and a garage conversion at $100,000 to $200,000 is the cheapest route to a fully separate unit because the shell already exists.

    How much does it cost to add 1,000 square feet to a house in Los Angeles?

    At $300 to $500 per square foot for a ground-floor addition, about $300,000 to $500,000. As a second story at $400 to $650 per square foot, roughly $400,000 to $650,000. These are budgeting ranges for permitted, engineered and finished work, and the spread within them is driven mostly by foundation condition, how many bathrooms are involved and whether the lot is hillside.

    Is it cheaper to build up or out?

    Out, per square foot — $300 to $500 against $400 to $650 for a second story. Building up costs more because the existing foundation and walls were sized to carry a roof rather than an occupied floor, so new footings, shear walls and an engineered load path are usually required. Building up wins when the yard is small, or when the foundation needs replacing anyway and that money is going to be spent either way.

    How big an addition can I build on my lot?

    On a flat R1 lot in the City of Los Angeles, take 45% of the lot area and subtract the Residential Floor Area you already have — LAMC Section 12.08 C.5 sets that 0.45 ratio across all buildings on the lot, accessory buildings included. Then check that what remains fits inside a 20-foot front yard, 15-foot rear yard and 5-foot side yards. Hillside and Coastal Zone lots follow different standards.

    Do I need a permit for a home addition in Los Angeles?

    Yes. LAMC Section 91.106.2 exempts work valued at $2,500 or less, and that exemption does not apply where the work affects structural stability or public safety — an addition exceeds the valuation and is structural, so it fails on both counts. There is no square-footage threshold in the LA code that exempts an addition, and the $500 figure repeated on many contractor sites is not what the code says.

    Does a two-story addition need bigger side yards than a single-story one?

    In R1 in the City of Los Angeles, no. LAMC Section 12.08 C.2 requires a 5-foot side yard for a main building not more than two stories in height, adding one foot for each story above the second — so a two-story addition owes the same 5 feet as a single-story one. What it does owe is massing articulation: a side wall over 14 feet tall running more than 45 feet continuously needs an offset at least 5 feet deep and 10 feet long.

    Should I build an addition or an ADU?

    Build an addition if you want the space connected to your house for your own household. Build an ADU if you want a separate unit you can rent or use independently — an addition cannot be rented as its own dwelling. The ADU also has a procedural advantage: state law requires ministerial approval within 60 days of a complete application and sets size and setback floors a city cannot go below, so on a tight lot an ADU is often approvable where an addition is not.

    How long does a home addition take in Los Angeles?

    Typically 9 to 14 months from the first drawing to final inspection, for either a ground-floor or a second-story addition. A ground-floor addition takes 6 to 10 weeks for design, structural engineering and Title 24, 2 to 4 months in plan check and 4 to 7 months of construction; a second story takes 8 to 12 weeks of design, the same 2 to 4 months in plan check and 5 to 7 months of construction. Plan check is the least predictable stage, which is why getting the drawings right the first time matters more than pushing the schedule.

    Find out what your lot will actually allow

    The fastest way to narrow this list from ten ideas to one is to have someone check your parcel’s zoning, floor area and existing structure before anything gets drawn. We do that as a site visit, usually about two hours, and come back with what fits, what it will cost and what the sequence looks like. We serve Los Angeles, Orange, Ventura, western Riverside and western San Bernardino counties — see service areas — and our room additions page covers how we work. You can also see a ground-floor addition end to end, framing and stucco stages included, on the Montebello room addition project page and under projects.

    Sources

    • Los Angeles Municipal Code Section 12.08 (R1 One-Family Zone) — yards, lot area, maximum Residential Floor Area and massing
    • Los Angeles Municipal Code Section 91.106 (Permits) — permit requirement and the $2,500 valuation exemption
    • LADBS, Baseline Hillside Ordinance correction sheet (Ordinance No. 184,802), LAMC Section 12.21 C.10
    • California Government Code Sections 66313, 66314, 66317 and 66321 (accessory dwelling units)
    • California Energy Commission, 2025 Building Energy Efficiency Standards and CF1R-ADD compliance forms, Title 24 Part 6 Section 150.2(a)
    • City of Los Angeles Zone Information and Map Access System (ZIMAS)
  • Fence Installation Cost in Southern California

    Fence Installation Cost in Southern California

    Most residential fences in Southern California land between $35 and $110 per linear foot installed, depending on material. A 150-foot redwood privacy fence therefore runs roughly $5,250 to $10,500, and the same run in block wall is a different order of project at $130 to $240 a foot. Gates are priced separately and are where budgets quietly expand — a matching walk gate is $350 to $1,200, and a driveway gate starts around $2,500.

    Green Design and Build is a licensed residential general contractor, CSLB #1110975, in Van Nuys, building fences and block walls across Los Angeles, Orange, Ventura and the western Inland Empire. The ranges below are the same ones we publish on our fencing page — budgeting ranges for planning, not a quote, because posts in decomposed granite and posts in rock are not the same job.

    Fence cost per linear foot by material

    These assume reasonable access and posts in normal soil. Slopes, rock, tree roots and a long carry from the street all push toward the upper end or beyond it.

    Fence type (6 ft unless noted)Installed range, per linear foot
    Chain link, galvanized, 4–6 ft$18–$35
    Wood privacy, redwood or cedar, dog-ear$35–$70
    Board-on-board, redwood or cedar$45–$80
    Horizontal modern, redwood or cedar$55–$95
    Vinyl privacy, tongue-and-groove$60–$110
    Ornamental iron or aluminum, 4–6 ft$50–$100
    Block wall, 6 ft, footing, rebar, stucco finish$130–$240
    Removal and haul-away of an old fence$3–$7
    Walk gate, matching material$350–$1,200 each
    Driveway gate, iron or wood, manual$2,500–$7,000
    Driveway gate automation, motor, circuit, safety devices$2,500–$7,000 added

    Two things to do with that table before you use it. Measure the actual run rather than the property line you think you have, and count the gates. In our experience the gates and the demolition are what separate a homeowner’s mental estimate from the real number.

    What changes the price

    • What has to come out first. Removal and disposal runs $3 to $7 a foot. Concrete-set posts from an old chain link fence are slower to extract than people expect.
    • Soil and slope. Rock, heavy clay and tree roots slow post holes. A sloped run means either stepping the fence or raking it, and stepping costs more in labor and materials.
    • Access. If materials have to be carried through the house or round a narrow side yard, that is real time. Machine access to the back of a property can cut a day off.
    • Height. A 6-foot fence is not 50 percent more than a 4-foot one — the posts get longer and are set deeper, and on block the footing grows.
    • Gates. A good gate is a small piece of engineering: hinges, hardware, a post that will not sag under it. Cheap gates are the first thing to fail on any fence.
    • Corners, ends and returns. A run with six corners costs more than a straight run of the same length.
    • Finish on block. Stucco, cap, color and pilasters all move the number, as does whether the wall retains any soil — which changes it from a fence into a structure.

    How tall can a fence be in Los Angeles?

    LADBS states that in most residential areas fences are limited to 3 feet 6 inches in the front yard and 6 feet in the side and rear yards, and that depending on lot size and location the side and rear limit may be increased to 8 feet. That is a zoning limit, set by the Los Angeles Municipal Code.

    There is an exception worth knowing about if you are in an area with a burglary problem. The City designates Fence Height Districts under Municipal Code Section 13.10, where a front-yard fence may reach six feet, but only on strict terms: open wrought iron, with any solid portion — including vegetation — not exceeding three and a half feet, vertical members no more than five-eighths of an inch thick spaced at least four inches apart, an 18-inch landscaped setback from the property line, a five-by-five-foot cut corner at driveways and a ten-by-ten-foot visibility triangle on corner lots. Driveway gates must be open wrought iron and must slide or open inward. The districts are not available in Hillside Areas, Coastal Zones, HPOZs or Specific Plan Areas.

    Outside the City of Los Angeles the numbers differ. Check with the jurisdiction that actually has authority over your address rather than the nearest big city.

    Does a fence need a permit?

    This is where most advice online is wrong for Los Angeles, because it conflates two separate regimes. Zoning decides how tall your fence may be. Building permits are a different question with different thresholds.

    Los Angeles Municipal Code Section 91.106.2 lists work exempt from a building permit. Item 13 reads: “Masonry or concrete fences not over 3-1/2 feet high, and other fences, other than swimming pool barriers, not over 10 feet high.”

    Read that carefully, because three things follow:

    • A wood or vinyl fence at the zoning height limit generally does not need a building permit — the exemption runs to 10 feet for non-masonry fences. What stops you building it taller is zoning, not the permit counter.
    • Masonry and concrete are different. The exemption stops at 3 feet 6 inches, so a 6-foot block wall is permitted work. LADBS does publish guidelines for certain masonry fence walls built without a permit, but they are prescriptive and specific — the wall must not exceed 6 feet, with pilasters at maximum 6-foot centers and no more than 3 feet 6 inches of solid masonry between them, the rest being open ironwork, wood or another lightweight material.
    • Swimming pool barriers are expressly carved out and are never covered by the exemption.

    Retaining walls follow their own rule: exempt only when not over 4 feet measured from the bottom of the footing to the top of the wall, and not exempt at any height if the wall supports a surcharge or sloping earth. If your “fence” is holding back a slope, it is a structure and it needs engineering — see our retaining wall cost guide.

    When a permit is required, it is often straightforward. LADBS lists on its express permit schedule, which means no plan check, both concrete block freestanding masonry fence walls in residential zones up to 6 feet above grade, and free-standing non-masonry fences serving as swimming pool barriers. Our breakdown of LADBS permit costs covers how fees are calculated.

    Sources: Los Angeles Municipal Code section 91.106, Permits (section 91.106.2, including the fence exemption quoted above); LADBS Information Bulletin P/GI 2026-003, Express Permits (the express permit schedule); Contractors State License Board, home improvement contracts (the written contract requirement for home improvement work).

    Pool fences have their own rules

    If the fence encloses a pool, the Swimming Pool Safety Act governs and the specification is exact. The barrier must be a minimum of 60 inches high. Gates must open away from the pool and be self-closing with a self-latching device placed no lower than 60 inches above the ground. Maximum vertical clearance from the ground to the bottom of the barrier is two inches, gaps must not pass a four-inch sphere, and surfaces must be free of handholds that would help a child climb.

    One point that catches people out on remodels: for permits issued for a new pool or a spa remodel at a single-family home, California now requires two of seven drowning prevention safety features, not one. An enclosure meeting the standard is one of the seven; others include approved safety covers, alarms and self-closing doors. If you are fencing an existing pool as part of a wider backyard project, get this settled at design stage rather than at final inspection.

    Who pays when the fence is shared?

    California’s Good Neighbor Fence Act, Civil Code Section 841, creates a presumption that adjoining landowners share equally in the reasonable costs of construction, maintenance or necessary replacement of a fence dividing their properties. Presumption is the operative word — it is rebuttable, not a right to send your neighbor half an invoice.

    The statute requires 30 days’ prior written notice to each affected adjoining landowner before incurring costs, and the notice must contain specified content: notification of the presumption of equal responsibility, a description of the problem facing the shared fence, the proposed solution, the estimated cost, the proposed cost-sharing approach and the proposed timeline.

    A neighbor can overcome the presumption by showing, on a preponderance of the evidence, that equal responsibility would be unjust — for example that the financial burden is substantially disproportionate to the benefit they receive, that the cost exceeds the difference the fence makes to their property value, or that it would impose undue hardship. In practice the notice does most of the work: it converts an awkward conversation into a documented proposal, and it is the single cheapest thing you can do to avoid a dispute. We are not lawyers, and a fence dispute with real money in it deserves one.

    Which material makes sense here

    MaterialBest forTrade-off
    Redwood or cedar privacyThe default for most LA backyards; warm, replaceable board by boardNeeds sealing to hold color in this sun; boards cup and check over time
    Horizontal modernContemporary houses and street-facing runsCosts more, and shows sloppy carpentry instantly — long boards need straight posts
    VinylLow maintenance, consistent appearanceHigher upfront; color choice limited; damaged sections replace as a unit
    Ornamental iron or aluminumPool enclosures, visibility, front yards under the 42-inch ruleNo privacy; iron needs a finish maintained against rust
    Block wallSound, permanence, retaining a small grade changeSeveral times the cost, and it becomes a structure with footings, rebar and inspections
    Chain linkUtility runs, side yards, temporaryDoes nothing for the look of the property

    The climate argument matters more than people expect. Ultraviolet exposure here is hard on finishes and on softwood, and a fence in full southern sun ages faster than the same fence on a shaded north boundary. If you are choosing between sealing a wood fence every few years and paying more upfront for vinyl or iron, that maintenance cycle is the real comparison, not the day-one price.

    Choosing a fence contractor

    One licensing point worth knowing, because it decides who can legally build what. The Contractors State License Board’s C-13 Fencing classification covers constructing, erecting, altering or repairing fences, corrals, runs, railings, guard rails and gates — and it expressly excludes masonry walls. So a fencing specialist is the right trade for wood, vinyl and iron, while a block wall belongs with a masonry contractor or a general building contractor.

    • Verify the license and the classification on the CSLB register before signing — how to do that.
    • Get it in writing. CSLB requires a written contract for home improvement work over $500.
    • Watch the deposit. The cap is $1,000 or 10 percent of the contract price, whichever is less. Our payment schedule guide sets out how the rest should be staged.
    • Ask what the quote assumes about the old fence — removal and disposal is a real line item, not a courtesy.
    • Ask about post setting. Depth, concrete, and whether posts are pressure-treated or metal-post systems. This is the part you cannot inspect later and the part that decides whether the fence is standing in fifteen years.
    • Confirm who locates the property line. A fence in the wrong place is an expensive mistake, and a survey is cheap by comparison.

    Fence Installation Cost FAQs

    How much does a 100-foot fence cost?

    Using our published per-foot ranges, a 100-foot run comes to roughly $3,500 to $7,000 in redwood or cedar privacy fencing, $6,000 to $11,000 in vinyl, and $13,000 to $24,000 as a 6-foot block wall with footing, rebar and stucco finish. Add removal of the old fence at $3 to $7 a foot, and add gates separately.

    Is vinyl or wood cheaper?

    Wood is cheaper to install — $35 to $70 a linear foot for a redwood or cedar privacy fence against $60 to $110 for vinyl. Vinyl costs less to keep. Which wins depends on how long you plan to own the house and whether you will actually reseal a wood fence on schedule. Most people intend to and do not.

    Do I need a permit for a 6-foot wood fence in Los Angeles?

    Generally not a building permit. LA exempts non-masonry fences up to 10 feet from the building permit requirement, with swimming pool barriers carved out. But zoning still limits height, and in most residential areas that means 6 feet at the side and rear and 3 feet 6 inches in the front yard. The two rules are separate and both apply.

    Why does a block wall cost so much more?

    Because it is a structure rather than a fence. The price includes excavation, a footing, rebar, grouted cells, a finish, and inspections at the stages where the work becomes invisible. It is also permitted work above 3 feet 6 inches, unlike wood. The trade-off is permanence, sound attenuation and no maintenance cycle.

    Can I make my neighbor pay half?

    California law presumes equal responsibility for a shared boundary fence, but it is a rebuttable presumption, not an automatic entitlement. You must give 30 days’ prior written notice describing the problem, the proposed solution, the estimated cost, the cost-sharing proposal and the timeline. A neighbor can rebut it by showing equal shares would be unjust in the circumstances.

    How tall can a pool fence be, and does it need a gate latch?

    A pool barrier must be at least 60 inches high, with no more than two inches of clearance at the ground and no gaps that pass a four-inch sphere. Gates must open away from the pool and be self-closing with a self-latching device at least 60 inches above the ground. For new pools and spa remodels, two of seven drowning prevention features are now required.

    How long does a fence installation take?

    A straightforward residential wood or vinyl fence is usually a few days on site once materials are on hand, split across demolition, setting posts, letting concrete cure, and hanging panels and gates. Block walls take considerably longer because of footing, grout and inspection sequencing.

    Can a fence be built on a slope?

    Yes, either stepped, where panels stay level and step down in sections, or raked, where rails follow the grade. Stepping suits panelized materials such as vinyl; raking suits board-by-board wood. Both cost more than the same run on flat ground. If the fence also has to hold back soil, it stops being a fence and becomes a retaining structure.

    Get a fence price for your property

    A fence quote is only as good as the walk of the line. We measure the actual run, look at the soil and the slope, count the gates, check what has to come out, and confirm whether anything is retaining. You get a written scope and a number afterwards, typically after a site visit of about two hours.

    Green Design and Build is a licensed residential general contractor, CSLB #1110975, in Van Nuys, reachable 8am to 6pm daily with a reply within one business day. See our fencing service, our customer reviews and our completed projects.

  • How Long Does a Roof Last in Southern California?

    How Long Does a Roof Last in Southern California?

    A roof in Southern California typically lasts 20 to 25 years if it is composition shingle, 40 to 60 years or more if it is metal, and — for tile — effectively as long as the house, provided the underlayment beneath the tile is replaced every couple of decades. The number on your warranty is a different thing entirely, and confusing the two is the most expensive mistake homeowners make here.

    Green Design and Build is a licensed residential general contractor, CSLB #1110975, in Van Nuys, working across Los Angeles, Orange, Ventura and the western Inland Empire. The figures below are drawn from manufacturers’ own documents, from NIST and Lawrence Berkeley National Laboratory, and from published field studies, with the source named each time. Where the industry genuinely does not publish a number, we say so rather than inventing one.

    Roof life by material

    CoveringService lifeSource and type of figure
    Composition (asphalt) shingle~20 yearsNAHB study of home component life expectancy — observed estimate. ARMA advises a roof over 20 years old is “a prime candidate for reroofing”
    Clay tile70 years, and over 100 in some assessmentsNIST materials assessment (70 years); US Department of Energy Building America guidance (can exceed 100)
    Concrete tileVery long, but no authoritative number publishedManufacturers warrant it as “lifetime”; we found no independent quantified study. Treat claims of a specific figure with caution
    Standing seam metal“In excess of 60 years”Metal Construction Association service life assessment — field inspection of roofs aged 20 to 35 years plus laboratory corrosion analysis
    Tile underlayment10 to 15 years in NIST’s assessment; longer with modern productsNIST. This is the component that usually ends the roof’s service life, not the tile
    Wood shake30 to 40 yearsCedar Shake & Shingle Bureau — but see the Los Angeles ban below
    Low-slope membranes (BUR, modified bitumen)Roughly 14 to 18 years in published field studiesTwo field studies of roofs installed 1975–1996, reported through the National Research Council of Canada. Materials have changed since
    TPONo published field dataWarranties run up to 35 years. The product is too young and has been reformulated too often for observed service life figures to exist

    One material is off the table regardless of how long it lasts. Los Angeles Municipal Code Section 91.1505.1, as amended effective 31 December 2025, states that no wood shake or wood shingle roof covering is permitted anywhere in the City. If you have one, replacement means changing material — see our guide to roofing permits in Los Angeles.

    Your warranty is not your roof’s lifespan

    This is the single most useful thing on this page, so it gets stated bluntly. A shingle warranty is a commercial promise about defects, on terms set by a marketing department. It is not an engineering estimate of how long the roof will keep water out.

    The National Roofing Contractors Association says so directly: “Consumers of asphalt shingle products should be aware the shift to lifetime warranties is a marketing decision and not technologically based,” adding that “there is no industry standard for warranty length” and that documented in-place performance is the primary indicator of a roof system’s service life.

    Three things worth understanding before you rely on one:

    • “Lifetime” means your ownership, not the roof’s life. GAF defines it as “as long as you, the original owner(s)…own the property where the shingles are installed.” CertainTeed uses near-identical wording. Sell the house and the clock changes.
    • The valuable part is short. Non-prorated periods are typically 5 to 10 years. After that, coverage declines on a schedule. One stone-coated steel “lifetime” warranty pays full replacement cost for the first 20 years, then prorates monthly, and from year 41 covers 20 percent of materials only.
    • The part that fails is often excluded. Tile warranties cover the tile. One major concrete tile warranty expressly excludes “failure of other materials used as components of the roof or structure” — which is to say the underlayment, the thing that actually leaks. A clay tile manufacturer’s 75-year warranty excludes fasteners and all labor and tear-off costs.

    Why roofs age faster here

    Heat and ultraviolet light, mostly — and the mechanism is measurable rather than anecdotal. Research from Lawrence Berkeley National Laboratory on the weathering of roofing materials reports that a dark roof in full sun sits roughly 34 to 50 degrees Celsius above ambient air temperature, and that the rate of thermal oxidation approximately doubles for every 10-degree rise. In plain terms: a roof surface that runs 34 to 50 degrees Celsius hotter than the air is aging several times faster than the calendar suggests.

    That study also explains the role of the granules on a composition shingle. They are not decoration — they absorb ultraviolet light so the asphalt underneath does not have to. As granules are lost, more UV reaches the asphalt, which hardens and embrittles, which loosens more granules. It is a feedback loop, and it is why a shingle roof can look acceptable for fifteen years and then deteriorate quickly.

    Low-slope sections and standing water

    Flat and low-slope areas are common on Valley houses and on additions built onto older bungalows. The Asphalt Roofing Manufacturers Association defines ponding water as water remaining on a roof 48 hours or longer, and notes it can cause accelerated erosion and deterioration of the membrane surface leading to failure of the roof system. A dry climate is not protection: debris and dust block drains here the way leaves do elsewhere, and a roof that drains poorly in February is a roof aging faster all year.

    Santa Ana winds

    Research from Scripps Institution of Oceanography describes Santa Ana events as episodic downslope offshore flows running roughly October to April, peaking in December and January, with surface humidity dropping into single digits. We will not claim a specific reduction in roof life from them, because we could not find a study establishing one. What we can say is that manufacturers warrant products to stated wind speeds — commonly 110 to 130 miles per hour for shingles installed with the specified fastening pattern — and that fastening pattern is exactly what gets shortcut on a cheap installation.

    Fire zones

    If your property sits in a Very High Fire Hazard Severity Zone, Los Angeles Municipal Code Section 91.7207.4 requires a fire-retardant roof assembly meeting the Class A standard, and wood shakes and shingles are not permitted. The City’s wildland-urban interface checklist also carries requirements for valley flashing, enclosed eaves, noncombustible gutters with debris protection, and vent mesh between one-sixteenth and one-eighth of an inch. If you are re-roofing in a fire zone, those details belong in the scope from the start rather than appearing as change orders. The rest of the house matters as much as the roof; our guide to wildfire home hardening covers vents, eaves, windows, decks, fences and the five-foot ember-resistant zone.

    How to tell your roof is near the end

    These are the indicators used in professional roof inspection practice, by covering type:

    • Composition shingle: missing, cracked or loose shingles; missing or corroded fasteners; loss of surface granules. Granules collecting at the bottom of downspouts is the early warning most people miss.
    • Tile: missing, cracked or loose tiles; corroded fasteners; spalling, flaking or erosion. Remember that intact tile over failed underlayment looks perfect from the street.
    • Metal: missing or loose fasteners; panels with holes, cracks, severe deformation or severe corrosion.
    • Single-ply membrane: holes or cuts, ridges, open seams, crazing, erosion, or the reinforcing scrim showing through. Membrane stretching or tightening at edges and seams signals embrittlement.
    • Built-up and modified bitumen: punctures, cracks, open seams, blisters, missing granules, alligatored surfaces.

    Add one behavioral indicator that is worth more than any of the visual ones: a third leak in three years, in three different places. Individual leaks are events. A pattern is a system at the end of its life. Our guide to roof leak repair goes through how to tell which one you have.

    What actually extends roof life

    • Keep water moving. Clear gutters, valleys and drains before the rainy season. Most premature failures we see started as drainage that stopped working.
    • Specify the underlayment properly on a tile roof. The NRCA guidance is that a heavier, more durable underlayment should be used beneath more durable coverings such as tile or slate. Pairing a 50-year tile with the cheapest permitted underlayment guarantees a lift and relay sooner than necessary.
    • Ventilate the attic. Heat trapped under the deck accelerates everything described above, and poor ventilation also produces condensation that gets mistaken for leaks.
    • Stay off the roof. Especially tile. Foot traffic cracks tiles and the damage is not visible from the ground.
    • Look at it after storms and after any trade has been up there. Solar installers, antenna fitters and HVAC technicians all create penetrations and all leave.
    • Fix small things while they are small. A failed pipe boot is cheap. The sheathing it rotted is not.

    When to start planning a replacement

    Start planning at about 80 percent of expected life, not at the first leak. For a composition roof in this climate that means somewhere around year 16 to 18. Planning early is worth real money: you gather quotes in summer instead of during a January storm, you can sequence the roof alongside other work such as solar, a whole-home renovation or an ADU, and you avoid the premium that comes with urgency.

    Our published cost ranges by roof type and complexity are set out in the roof replacement cost guide, and you can see completed work at our Newport Beach and Buena Park roof replacements. When it is time, see how we handle roof replacement and repair as your general contractor.

    Roof Lifespan FAQs

    How long does a shingle roof last in Southern California?

    Plan on about 20 years. That matches the NAHB life-expectancy study for asphalt, and the Asphalt Roofing Manufacturers Association treats a residential roof over 20 years old as a prime candidate for reroofing. Our heat and UV exposure works against the upper end of any national range, so a roof that might reach 25 years in a mild climate often does not here.

    Does a 50-year shingle really last 50 years?

    No. That number describes a warranty, not a service life, and the National Roofing Contractors Association is explicit that lifetime warranty terms were a marketing decision rather than a technical one. Read the non-prorated period — often 5 to 10 years — and check whether “lifetime” is defined as the length of your ownership, which it usually is.

    How long does a tile roof last?

    The tile itself is the long-lived part — NIST puts clay tile at around 70 years and the Department of Energy notes clay can exceed 100. The limiting component is the underlayment beneath it, which NIST assesses at 10 to 15 years, with better modern products doing considerably more. That is why a tile roof is normally lifted and relaid rather than replaced.

    Is a metal roof worth it for the extra life?

    On service life the evidence is strong. The Metal Construction Association’s field assessment of standing seam roofs concluded that a roof built today with best practices can be expected to last in excess of 60 years, with the sealant rather than the panel coating usually deciding the end point. Whether the cost difference makes sense depends on how long you intend to own the house.

    Can I just add a layer instead of tearing off?

    In the City of Los Angeles it depends on what is already up there. The City uses its own Table 1512.1 rather than the state default. A tile roof cannot be covered with anything. A metal roof can only take metal. Asphalt shingle has several options, some with a minimum slope. Confirm your combination with LADBS before ordering materials.

    Will a cool roof requirement apply when I replace mine?

    If more than 50 percent of the roof is being replaced, yes. In Los Angeles climate zones, a steep-sloped roof must meet 0.20 aged solar reflectance, 0.75 thermal emittance, or SRI 16; low-sloped roofs face considerably higher figures. A tile lift and relay is expressly exempt from cool roof compliance on the LADBS express permit list.

    Does a new roof help with insurance?

    It can affect what a carrier will offer or renew, particularly in fire zones, but terms vary and we will not generalize. Ask your carrier what they want to see and get the answer before the work starts. What helps in every case is documentation: the permit, the final inspection or signed re-roofing certificate, and the material specification.

    My roof is 18 years old and has never leaked. Do I need to do anything?

    Get it looked at, and start budgeting. A roof at 18 years with no leaks is a roof approaching the end of a normal service life in good order, which is the best possible position to replace from — on your timetable, with competitive quotes, and without water damage to repair at the same time.

    Find out where your roof actually stands

    Age alone does not settle it. What settles it is condition: granule loss, fastener corrosion, the state of the flashings, whether the underlayment under your tile has anything left. We inspect, tell you how long we think you have, and put it in writing — including when the answer is that your roof is fine and you should spend the money elsewhere.

    Green Design and Build is a licensed residential general contractor, CSLB #1110975, in Van Nuys, reachable 8am to 6pm daily with a reply within one business day. See our customer reviews, our design-build process, or our financing options.

Call Free Estimate