
Author: Dekel Sofer

  • Do You Need a Permit to Remodel a Kitchen in Los Angeles?

    Do You Need a Permit to Remodel a Kitchen in Los Angeles?

    Yes, if the kitchen remodel touches plumbing, electrical circuits, gas, a wall, a window or the range-hood duct; no, if it is limited to paint, cabinets in the same place, countertops, backsplash and floor coverings. In the City of Los Angeles a kitchen remodel with no structural changes is an express permit issued over the counter without plan check, while removing a wall or enlarging a window sends the plans to the Los Angeles Department of Building and Safety (LADBS) for review. Green Design and Build is a licensed general contractor (CSLB #1110975) based in Van Nuys that pulls the permits and schedules the inspections on every kitchen we build, serving homeowners across Los Angeles County, Orange County, Ventura County, western Riverside County and western San Bernardino County (Ontario, Rancho Cucamonga and neighboring cities).

    We are led by Dekel Sofer. The company has completed hundreds of projects and holds a 4.7-star rating across 146 reviews on Yelp.

    On this page

    What needs a permit and what does not (City of Los Angeles)

    The Los Angeles Building Code exempts “painting, papering and similar work” and “cases, counters and partitions, not over 5 feet 9 inches high” from a building permit (LAMC section 91.106.2), and the same code says a building permit does not relieve the owner of permits required under any other code, which is where plumbing, electrical and mechanical work come in. Los Angeles County’s exempt list for unincorporated areas says it more plainly: “painting, papering, tiling, carpeting, cabinets, counter tops, and similar finish work” need no building permit, but “separate plumbing, electrical, and mechanical permits may still be required.”

    Kitchen work Permit in the City of Los Angeles? Path
    Paint, wallpaper, backsplash tile No —
    Cabinets replaced in the same location, refacing No building permit —
    Countertops No —
    Flooring (tile, LVP, hardwood) No building permit —
    Faucet, sink or dishwasher swapped in the same spot Yes, plumbing (express) Express permit, no plan check
    Light fixture swapped in the same box No: LAMC section 93.0202 exempts like-kind fixture replacement in a single-family dwelling —
    New circuits: counter receptacles, dishwasher, disposal, microwave, range Yes, electrical (express, no structural change) Express permit
    Panel upgrade (100 to 200 amps) Yes, electrical (express up to 400 amps in an existing residence) Express permit, plus utility coordination
    Moving the sink, dishwasher or refrigerator water line; new drain or vent Yes, plumbing Express permit, with the combined remodel permit
    New or extended gas line to a range or cooktop Yes, plumbing (gas) Express permit, pressure test at inspection
    New range hood ducted through the roof or wall Yes, mechanical Express permit
    Kitchen remodel, layout changes, no structural change Yes, combined building/electrical/plumbing/mechanical Express permit, no plan check
    Removing or opening a wall, adding a beam Yes, building Plan check (counter plan check for a single-family alteration)
    Enlarging a window or door opening Yes, building Plan check; same-size change-out is express

    The line that matters is between “no structural changes” and everything else. LADBS Information Bulletin P/GI 2026-003, effective January 1, 2026, lists “Kitchen/bathroom remodel for residential buildings (no structural changes)” as an express building permit, along with “Replacing plumbing fixtures,” “Adding plumbing fixtures,” “Low pressure gas piping systems with up to 10 outlets,” electrical work up to 400 amps in an existing residence, and exhaust fans up to 2,000 cfm. Take out a wall or cut a bigger window and none of that applies.

    Two practical notes. A faucet swapped for a faucet is technically a plumbing fixture replacement and the city issues an express permit for it; most homeowners do not pull one for a faucet alone, but once the job includes anything else on the list the combined permit covers it. And cabinets need no building permit, but the outlets, under-cabinet lighting and hood that come with new cabinets almost always do, so a cabinet-only remodel that stays permit-free is rarer than it sounds. Our kitchen remodeling page describes what each tier of remodel includes.

    Express permit or plan check?

    LADBS has three doors. An express permit is issued online or at a Development Services Center counter (the online e-permit excludes new plumbing or wiring that penetrates an existing wall), usually the same day and at most about a week, for the work in the bulletin above; no drawings are reviewed, and the inspector checks the work against code in the field. Counter plan check is a same-day review at the Metro, Van Nuys, West LA, South LA or San Pedro office for “small and medium size projects that can be reviewed in approximately 45 to 60 minutes,” and LADBS lists “alteration to a single family dwelling or duplex” as eligible, which is where most kitchen wall removals with an engineered beam land. Regular plan check is for larger and more complex projects; LADBS says plans are returned “within weeks depending on workload,” and paying 50 percent more than the plan check fee expedites the review.

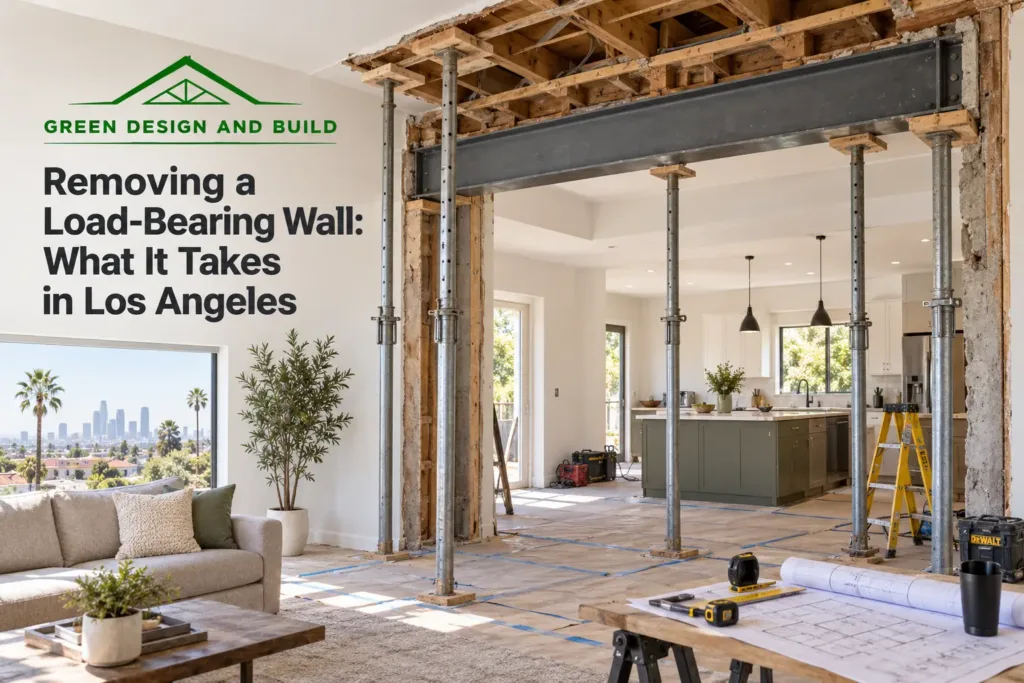
    For a kitchen: same-layout remodel, express, about a week at most; wall removal with a beam, an engineer’s drawings and calculations plus counter plan check, one to a few weeks depending on corrections; wall removal in a two-story or hillside house or a Historic Preservation Overlay Zone, expect regular plan check and, in an HPOZ, Office of Historic Resources sign-off first. Our guide to removing a load-bearing wall covers both the engineering and the budget.

    The inspection sequence

    Anything that gets covered up needs an inspection before it is covered, and every permit ends in a final. On a typical Los Angeles kitchen:

    1. Demolition and framing. If a wall came out or a beam went in, the inspector sees the beam, posts, hangers, hold-downs and any new footing before drywall. Footings are inspected before concrete is poured.
    2. Rough plumbing, electrical and mechanical. New drain, vent and water lines under pressure test, gas piping under an air test, every new circuit in its box, and the hood duct run, all with the walls open.
    3. Insulation and drywall. Opened exterior walls get insulation checked; some inspectors want to see drywall nailing before tape.
    4. Final. Fixtures set, GFCI and AFCI protection working, two 20-amp small-appliance circuits serving the counters with no point along the counter more than 24 inches from a receptacle, hood ducted outside with metal duct, high-efficacy lighting, water-conserving fixtures in place, and the retrofit items below done.

    Pasadena’s kitchen handout, which follows the same state codes, says it in one line: “a minimum of two inspections are required for kitchen remodels,” rough and final. We schedule them; nobody closes a wall before the rough inspection is signed.

    The retrofit items that ride along with a Los Angeles permit

    A kitchen permit in the City of Los Angeles pulls in requirements that have nothing to do with the kitchen. Under LAMC section 122.03, any permit over $500 on a house or duplex requires water-conserving fixtures throughout the house, and California Civil Code section 1101.4 separately requires any alteration to a pre-1994 single-family home to replace noncompliant toilets (over 1.6 gallons per flush), showerheads (over 2.5 gallons per minute) and faucets (over 2.2 gallons per minute) as a condition of final approval. Over $1,000 in valuation, smoke detectors are required in bedrooms and hallways (LABC section 91.8603.2); over $10,000, sliding and shower doors must be tempered or retrofitted with safety film (LABC section 91.2406.7) and a seismic gas shut-off valve is required at the meter (Ordinance 171,874). Almost every kitchen remodel crosses the $10,000 line.

    What a kitchen permit costs

    LADBS building, electrical, plumbing and mechanical fees are set by the city’s fee schedule and scale with the valuation and the number of fixtures and circuits; they are a small fraction of the project, and we list them as their own line on every proposal. The larger cost of the permit is the work it makes you do right: the second small-appliance circuit, the metal hood duct, the pressure-tested gas line. For context, a same-layout cosmetic kitchen in Los Angeles typically runs $25,000 to $40,000, a mid-range same-layout remodel $40,000 to $70,000, and a full remodel with layout, plumbing, electrical and structural changes $70,000 to $100,000 or more; a 100-to-200-amp panel upgrade is about $6,000 to $8,000. These are typical Los Angeles budgeting estimates, not a price list or a quote. Your project can come in lower or higher depending on the house, the scope and the finishes; the only real number is a written proposal after a site visit. Our kitchen remodel cost guide breaks those tiers down, and on a pre-1980 house we recommend holding 15 to 20 percent of the budget as a contingency for what the walls hide.

    What happens to an unpermitted kitchen when you sell

    Three things. First, California’s Real Estate Transfer Disclosure Statement (Civil Code section 1102.6) asks the seller, under item II.C.4, whether they are aware of “room additions, structural modifications, or other alterations or repairs made without necessary permits,” and under item 5 whether any were “not in compliance with building codes.” A remodeled kitchen with no permit on file is a yes, and a yes invites a price negotiation or an inspection contingency. Second, since July 1, 2024, a seller who bought within the previous 18 months must disclose every alteration made since purchase, name the contractors and provide the permits (AB 968). Third, if LADBS learns of the work, the current owner pays an investigation fee of double the permit fee, with a $400 minimum (LAMC section 98.0402), then opens the walls so an inspector can see the plumbing, wiring and any beam. The people who pay for unpermitted kitchens are the ones who buy them.

    Other cities run their own building departments

    LADBS covers the City of Los Angeles, which includes Van Nuys, Sherman Oaks, Encino, Studio City, Woodland Hills, Northridge and North Hollywood; unincorporated areas use Los Angeles County Building and Safety. Every other city in the five counties runs its own building division under the same California codes, with its own forms, fees and thresholds, and the thresholds are not identical:

    • Pasadena requires a permit for “removal and replacement and/or relocation of kitchen cabinets and countertops, sink, dishwasher, new/altered island, or replacement/alteration to the electrical and exhaust hood,” and exempts only “kitchen countertop replacement or re-facing of existing cabinets.” A cabinet swap that is permit-free in Los Angeles is not in Pasadena. Our Pasadena kitchen remodeling page covers what a Pasadena kitchen permit brings with it.
    • Burbank reviews “new construction, additions, and remodels” through its Building Division; electronic submittal is through ProjectDox, and the city says a first plan-check review “can take up to eight weeks.” Plan on that for a wall removal. How the city’s two permit tiers apply to a kitchen is covered on our page for kitchen remodeling in Burbank.
    • Irvine issues same-day online permits for eligible no-plan-check work through its Building and Safety Division’s PermitsDIRECT system, and reviews structural changes through plan check.
    • Rancho Cucamonga runs its permits 100 percent online through Building and Safety Services, with next-day inspections.
    • Glendale, Santa Clarita, Anaheim and Ontario each run their own building divisions; check the city’s handout before assuming the Los Angeles list applies.

    The rule that travels: cosmetic finishes are permit-free almost everywhere, anything with a pipe, a wire, a flame or a beam is not, and the city’s own handout is the only list that counts.

    How long does a kitchen permit take?

    Step Typical duration
    Express permit (no structural change) About one week, sometimes same day
    Counter plan check for a wall removal (engineer’s drawings ready) Same-day review; corrections can add one to two weeks
    Full permit with structural, plumbing and electrical changes Two to six weeks
    Construction, same-layout remodel Four to eight weeks
    Construction, layout or structural changes Eight to twelve weeks

    Add three to six weeks of design and selections before the permit, and about three weeks for custom cabinets to be manufactured, which usually overlaps with permitting. A same-layout kitchen is roughly a three-month project door to door; a full remodel with a wall removal runs four to six months.

    A 1960s Valley kitchen that needed more permit than planned

    A homeowner in a 1960s house planned a kitchen remodel that, on paper, would have been an express permit. Demolition found three things: the original electrical panel could not safely carry the planned appliances, the old cast-iron drain had to be replaced, and the wall the owners wanted moved was load-bearing and needed a structural engineer and a beam. The beam took the job from express to plan check, and the discoveries added about three weeks and costs the owners had not budgeted. We retold that project in what I wish I knew before remodeling my kitchen, and it is typical of 1960s Valley ranch houses, where the original panel and plumbing rarely survive a full kitchen remodel. Our Torrance open-plan kitchen shows the plan-check version done on purpose: an engineer sized a beam to replace the load-bearing wall between kitchen and dining room, temporary shoring carried the load while the beam went in, and rough electrical for the island and lighting was inspected before drywall.

    Where we do this work

    We pull kitchen permits and build kitchens from our Van Nuys office across the San Fernando Valley, the rest of Los Angeles County, Orange County, Ventura County, western Riverside County and western San Bernardino County. The permit office changes at every city line: LADBS in the City of Los Angeles, the county in unincorporated areas, Burbank, Glendale, Pasadena and Santa Clarita’s own divisions next door, Ventura County Building and Safety or the city halls of Thousand Oaks, Simi Valley and Oxnard to the west, each Orange County city to the south, and county or city departments in Riverside and San Bernardino. Master-planned Orange County communities add HOA review for anything that changes a window or exterior vent, and HPOZ neighborhoods in Los Angeles add the Office of Historic Resources. See all of our service areas.

    Sources

    Permit rules and fees are amended regularly, and every city outside Los Angeles runs its own building division. The rules below were checked against the current LADBS sources on the date shown; confirm anything decision-critical with the department that will issue your permit.

    Last reviewed 17 September 2026.

    Kitchen permit FAQs

    Do you need a permit to remodel a kitchen in Los Angeles?

    Yes, if the remodel touches plumbing, electrical circuits, gas, a wall, a window or the range-hood duct, and no if it is limited to paint, cabinets in the same place, countertops, backsplash and flooring. In the City of Los Angeles a kitchen remodel with no structural changes is an express permit issued over the counter without plan check under LADBS Information Bulletin P/GI 2026-003; removing a wall or enlarging an opening requires plan check.

    Do I need a permit to replace kitchen cabinets and countertops?

    Not in the City of Los Angeles, where cabinets in the same location, countertops and refacing are finish work with no building permit, and not in unincorporated Los Angeles County, whose exempt list names “cabinets, counter tops, and similar finish work.” Pasadena is stricter and requires a permit for removal and replacement of cabinets. The outlets, under-cabinet lighting and hood that usually come with new cabinets do need electrical and mechanical permits.

    What is an LADBS express permit?

    An LADBS express permit is a building, electrical, plumbing or mechanical permit issued online or at the counter without plan review for work listed in Information Bulletin P/GI 2026-003, including a residential kitchen or bathroom remodel with no structural changes, replacing or adding plumbing fixtures, gas piping up to 10 outlets, electrical work up to 400 amps in an existing residence, and exhaust fans up to 2,000 cfm. The inspector checks the work in the field instead of reviewing drawings first.

    How long does a kitchen permit take in Los Angeles?

    An express permit for a same-layout kitchen in the City of Los Angeles takes about a week and is sometimes issued the same day. A kitchen with a wall removal needs an engineer’s drawings and plan check; counter plan check reviews a single-family alteration the same day in roughly 45 to 60 minutes, and a full permit with structural, plumbing and electrical changes typically takes two to six weeks including corrections.

    What happens if I remodel my kitchen without a permit?

    If LADBS finds out, the owner pays an investigation fee of double the permit fee with a $400 minimum, then opens finished walls so the wiring, plumbing and any beam can be inspected before the permit is finalized. When the house sells, the Transfer Disclosure Statement asks whether any alterations were made without permits, and since July 2024 a seller who has owned the house less than 18 months must list every alteration, the contractors and the permits. Unpermitted structural work can also stop a lender or appraiser from counting the space.

    Does a kitchen permit require other upgrades to the house?

    In the City of Los Angeles, yes. A permit over $500 requires water-conserving fixtures throughout the house, a permit over $1,000 requires smoke detectors in bedrooms and hallways, and a permit over $10,000 requires tempered or film-retrofitted sliding and shower doors and a seismic gas shut-off valve. California Civil Code section 1101.4 separately requires pre-1994 single-family homes to replace noncompliant toilets, showerheads and faucets as a condition of final approval on any alteration permit.

    Get a kitchen proposal with the permit already figured out

    We will tell you at the site visit whether your kitchen is an express permit or plan check, what the rough inspection will want to see, and which retrofit items your house still needs, and put the permit and inspections on the proposal as their own lines. The site visit and the estimate are free.

  • How Much Does a Tub-to-Shower Conversion Cost in Los Angeles?

    How Much Does a Tub-to-Shower Conversion Cost in Los Angeles?

    A tub-to-shower conversion in Los Angeles typically costs $18,000 to $40,000 when it is done as part of a mid-range bathroom remodel with a tiled, waterproofed shower, frameless glass and a new exhaust fan. A basic conversion that drops a prefab pan and surround into the tub’s footprint with the drain left in place can land inside the $8,000 to $18,000 refresh tier, and a curbless, fully tiled shower with a relocated drain and a heated floor is a high-end job at $40,000 to $80,000 or more. Green Design and Build is a licensed general contractor (CSLB #1110975) based in Van Nuys, serving homeowners across Los Angeles County, Orange County, Ventura County, western Riverside County and western San Bernardino County (Ontario, Rancho Cucamonga and neighboring cities). These are typical Los Angeles budgeting estimates, not a price list or a quote. Your project can come in lower or higher depending on the house, the scope and the finishes; the only real number is a written proposal after a site visit.

    We are led by Dekel Sofer. The company has completed hundreds of projects and holds a 4.7-star rating across 146 reviews on Yelp.

    On this page

    Tub-to-shower conversion cost by scope

    A conversion is never just the shower: the tub comes out, the wall behind it is opened, the valve and drain are reworked, and the new shower is waterproofed and tiled before glass goes on. That is why we budget it as a bathroom remodel tier, set by what happens to the plumbing and how the shower is built.

    Conversion scope What it includes Typical Los Angeles budgeting estimate
    Basic conversion inside a refresh Tub out, acrylic pan and surround in the tub footprint, drain and valve replaced in place, new door, paint; rest of the bathroom lightly refreshed $8,000–$18,000 (top of the refresh tier)
    Tiled conversion inside a mid-range remodel Tub out, waterproofed tile pan or prefab pan, tiled walls with a niche, low curb, frameless glass, new exhaust fan, relocated vanity, moved plumbing where needed, new floor tile, lighting $18,000–$40,000
    Curbless or luxury conversion Recessed curbless entry with a linear drain, relocated drain, large-format or stone tile, heated floor, custom vanity, premium fixtures, full layout change $40,000–$80,000+

    These are typical Los Angeles budgeting estimates, not a price list or a quote. Your project can come in lower or higher depending on the house, the scope and the finishes; the only real number is a written proposal after a site visit.

    The mid-range tier is where most conversions land; our bathroom remodeling page lists tub-to-shower conversion, relocated vanity, moved plumbing, frameless glass and a new exhaust fan as the work that defines it, and the bathroom remodel cost guide covers the same tiers for the whole room.

    The line items that move a conversion up or down

    Inside those tiers, these lines decide where your job lands.

    Line item Typical Los Angeles budgeting estimate What it depends on
    Plumbing with the drain and valve left in place $500–$2,500 New valve and trim, tub drain converted to a shower drain in the same spot
    Relocating the drain, raised foundation $2,500–$6,000 Crawl-space access, new trap and vent tie-in, drain size
    Relocating the drain, slab foundation $5,000–$12,000+ Saw-cutting and trenching the slab, patching, whether the line has to move far
    Electrical package (exhaust fan, GFCI receptacle, lighting) $1,000–$3,000 New or replaced fan, duct route to the outside, lighting count
    Floor tile, installed $12–$25 per sq ft Tile choice and layout; a 40 sq ft bathroom floor is roughly $480–$1,000

    These are typical Los Angeles budgeting estimates, not a price list or a quote. Your project can come in lower or higher depending on the house, the scope and the finishes; the only real number is a written proposal after a site visit.

    The drain is the decision that changes the number most. A tub drain sits at one end of the tub; a shower drain usually wants the center of the pan or, for a linear drain, one wall. On a raised-foundation house, which describes many 1950s to 1970s San Fernando Valley ranch houses, the plumber works from the crawl space and the move is routine; on a slab, which is most of Orange County and the Inland Empire, it means cutting concrete. Keeping the drain where it is and choosing a pan that fits it is the first thing we look at when a budget is tight. Shower wall tile is priced by the square foot the same way, and frameless glass is the most variable finish item; ask for it as its own line on any proposal you compare.

    Curbed or curbless?

    Curbed shower Curbless shower
    Entry Step over a 3–6 inch curb Level with the bathroom floor
    Floor structure Pan sits on the existing subfloor Floor recessed so the pan can slope to the drain: cut or furred joists on a wood floor, cut concrete on a slab
    Waterproofing Membrane stops at the curb Membrane runs at least a foot past the high point of the floor into the room
    Permit Express permit in the City of Los Angeles when nothing structural changes Recessed floor framing is structural, so expect plan check
    Tier Refresh or mid-range High-end

    A curb is the simpler build and the lower budget. Curbless is the right answer when the person using the shower cannot step over a curb, or when the design calls for one continuous floor, but it is not a finish upgrade you bolt on at the end. Our walk-in shower guide covers sizes, drain layouts and what the code actually says; the Tile Council of North America publishes curbless methods for concrete floors and none for wood-framed floors, so a curbless conversion on a raised Valley house is engineered case by case.

    Prefab pan or tile pan?

    An acrylic or composite pan is molded with the slope built in, drops onto the subfloor, and is set the same day; it is the right choice for a basic conversion or a rental, and its limits are size and drain location, which must match the maker’s dimensions. A tile pan is built on site from a sloped mortar bed or foam pan, a membrane and tile, at any size and any drain position, and it is what the mid-range and high-end tiers assume. Wall surrounds follow the same split: acrylic over water-resistant backer, or tile over cement board or foam board with a membrane behind it.

    Waterproofing is where conversions fail

    A properly built shower has a continuous waterproofing system under the finished surface: a sloped pan tied to the drain, membrane or waterproof backer on the walls, sealed corners and penetrations, and a flood test before tile goes on. We fill the pan to the top of the curb, leave it, and check it before anyone tiles; some cities make that test an inspection stop. The systems we build with are sheet membranes bonded to a foam or mortar pan, liquid-applied membranes over cement board, and foam-board systems with sealed seams. All three work when the drain and corners follow the manufacturer’s instructions; a sheet system with the wrong drain, or a liquid membrane applied too thin, is where most of the leaks we get called to fix started.

    While the walls are open, put in grab-bar blocking: a 2×6 or 2×8 flat between the studs at 33 to 36 inches above the finished floor on the valve wall and the back wall. It costs almost nothing during framing, lets a bar be bolted through tile later, and is not required in a private home, but everyone who has tried to add a bar afterward wishes it had been done.

    Glass

    Frameless glass is 3/8-inch or 1/2-inch tempered glass, with the thickness set by the panel height and width rather than preference. It is measured only after the tile is grouted, because the template has to follow the real walls, and fabrication takes one to two weeks after that; that gap at the end of the job is what surprises people. Any window in the shower wall with its bottom edge under 60 inches above the shower floor must be tempered as well.

    Do you need a permit for a tub-to-shower conversion in Los Angeles?

    Yes. In the City of Los Angeles, which covers Van Nuys, Sherman Oaks, Encino, Studio City, Woodland Hills, Northridge and North Hollywood along with the rest of the city, a bathroom remodel with no structural changes is an express permit under the Los Angeles Department of Building and Safety’s Information Bulletin P/GI 2026-003, issued over the counter with no plan check. The same bulletin lists replacing plumbing fixtures, adding plumbing fixtures, and adding an exhaust fan of 2,000 cfm or less as express permits, so a conversion that swaps the tub for a shower, moves the drain within the room and adds a fan is permit work, but the fast kind. Plan check comes in when floor framing is cut for a curbless entry, a wall moves, or a window in the shower wall changes size.

    The permit brings a rough inspection with the plumbing, electrical and fan ductwork exposed, and a final. Any bathroom permit in the city also triggers the retrofit items that ride along with it: water-conserving fixtures under California Civil Code section 1101.4 and LAMC section 122.03, smoke detectors when the valuation is over $1,000, and impact-hazard glazing and a seismic gas shut-off valve when it is over $10,000. Our guide to bathroom permits in Los Angeles goes through each of them. Burbank, Glendale, Pasadena, Santa Clarita, every Orange County city and the Inland Empire cities issue their own permits under the same state codes; Pasadena’s handout, for one, requires a permit for any remodel that removes and replaces or relocates a tub or shower.

    Sources: LADBS Information Bulletin P/GI 2026-003, Express Permits (the list of work permitted without plan check, including a residential bathroom remodel with no structural changes); City of Los Angeles e-permit portal, bathroom remodel detail (the scope of the online bathroom e-permit); California SB 407 (2009), Civil Code sections 1101.1–1101.8 (the water-conserving fixture retrofit required when a permit is issued).

    How long does a tub-to-shower conversion take?

    Phase Typical duration
    Design, selections (tile, pan, valve, glass) and permit 1–4 weeks (express permits are usually faster)
    Construction, basic conversion inside a refresh 2–3 weeks
    Construction, tiled conversion inside a mid-range remodel 3–5 weeks
    Construction, curbless or full reconfiguration 5–8 weeks
    Frameless glass after tile is finished 1–2 weeks to fabricate

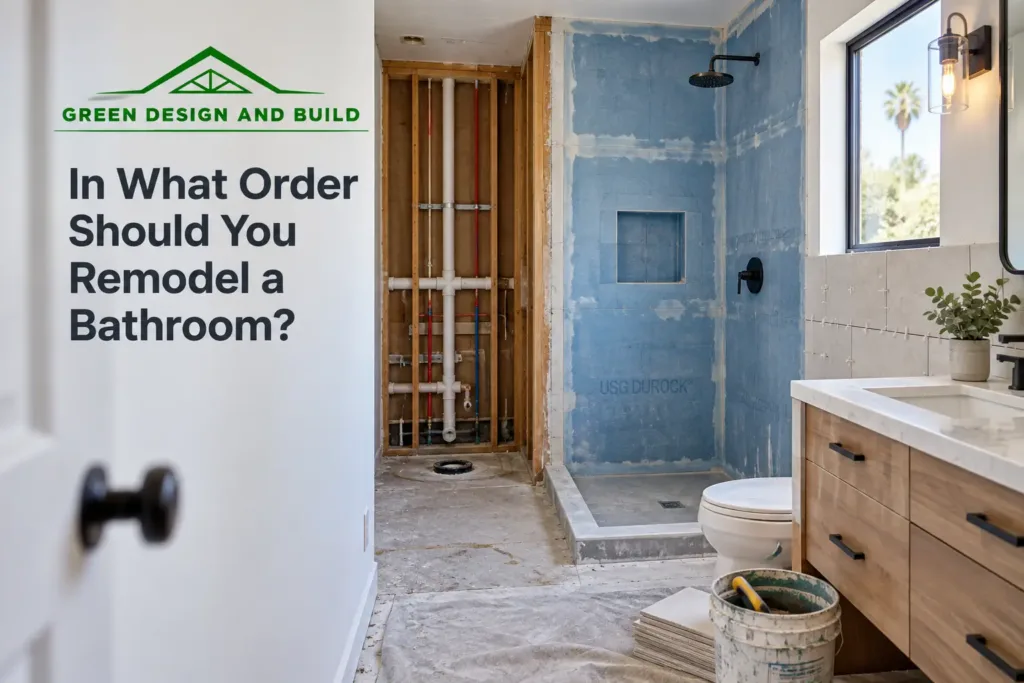
    The bathroom is out of service from demolition to glass. Our post on the correct bathroom remodel order shows where the inspections and the pan test fall in the sequence.

    What we find when the tub comes out

    The tub overflow gasket is the part nobody sees and the part that fails most often. On a hall bathroom in a late-1980s house, a homeowner planned a refresh at about $22,000. When we pulled the tub, the wall behind it was soft: the overflow drain gasket had been leaking for years, rotting the bottom plate and the subfloor. The job became a complete tub removal, subfloor replacement, framing repairs and mold-related cleanup, and it finished at approximately $28,500, close to 30 percent over; the full story is in our bathroom remodel cost guide. It is why we recommend a contingency on any bathroom that has had a tub in it for 20 years.

    Two recent bathrooms show how the shower side of a conversion is built. In an Inglewood primary bathroom (2025) we gutted the room to the studs, rerouted supply and drain lines in new copper for a new tub position and shower valve, built the shower walls in cement board with a waterproofing membrane before tile, and finished with large-format tile and a frameless glass shower. In Irvine (2025) the corner tub platform that took a third of the room came out, the drain was relocated, and the original framed shower was rebuilt as a walk-in with three tiled niches and a low curb. Both kept one tub in the house, which brings up resale.

    Will converting the tub hurt resale?

    Removing the only bathtub in a house narrows the buyer pool, because families with small children and many older buyers want at least one tub. Removing a tub from a second bathroom, or from a primary bath when a hall bath keeps its tub, does not, and a walk-in shower is what most Los Angeles buyers expect in a primary bathroom. We do not quote a return-on-investment percentage because there is no reliable Los Angeles dataset for that single item. The practical rule: keep one tub in the house if you can.

    How to compare tub-to-shower conversion quotes

    Quotes are only comparable when they describe the same shower: the pan and waterproofing system by name, the board behind the tile, whether the drain moves and how, the valve model, the fan and where it ducts, the glass thickness and whether it is framed or frameless, grab-bar blocking, the permit and who pulls it, and what happens if the subfloor is rotten when the tub comes out. Confirm the license on the Contractors State License Board site; in California the down payment on a home-improvement contract cannot exceed $1,000 or 10 percent of the contract price, whichever is less.

    Where we do this work

    We convert tubs to showers from our Van Nuys office across the San Fernando Valley, the rest of Los Angeles County, Orange County, Ventura County, western Riverside County and western San Bernardino County. The house changes the job: raised-foundation Valley ranch houses give the plumber a crawl space, so a drain move is routine; the slab houses of Irvine, Anaheim, Corona and Ontario turn the same move into concrete cutting; and pre-1960 houses often have galvanized supply lines that get replaced while the wall is open. Permits run through LADBS in the City of Los Angeles, Los Angeles County Building and Safety in unincorporated areas, and each city’s own building division everywhere else. See all of our service areas.

    Related cost guides: Bathroom remodel cost · Kitchen remodel cost · Whole-home renovation cost. If you plan to finance the work, our financing page explains the programs we offer and how progress payments work under California law.

    Tub-to-shower conversion cost FAQs

    How much does it cost to convert a tub to a shower in Los Angeles?

    A tub-to-shower conversion in Los Angeles typically costs $18,000 to $40,000 as part of a mid-range bathroom remodel with a tiled, waterproofed shower, frameless glass and a new exhaust fan. A basic prefab conversion in the tub’s footprint can land in the $8,000 to $18,000 refresh tier, and a curbless, stone-tiled shower with a moved drain runs $40,000 to $80,000 or more. These are typical budgeting estimates, not a price list; a real project can come in lower or higher.

    What is the cheapest way to convert a bathtub to a shower?

    The cheapest tub-to-shower conversion keeps the drain and valve where they are, uses a prefab acrylic pan sized to the tub footprint (usually 60 by 30 or 60 by 32 inches) with a matching surround, and adds a framed door. Leaving the drain in place avoids the $2,500 to $6,000 cost of moving it on a raised foundation or $5,000 to $12,000 or more on a slab.

    Does a tub-to-shower conversion need a permit in Los Angeles?

    Yes. In the City of Los Angeles a bathroom remodel with no structural changes, including replacing plumbing fixtures and adding an exhaust fan, is an express permit issued over the counter without plan check under LADBS Information Bulletin P/GI 2026-003. Recessing the floor for a curbless shower, moving a wall or changing a window size sends the job to plan check. Other cities in the five counties issue their own permits under the same state codes.

    How long does a tub-to-shower conversion take?

    A tub-to-shower conversion in Los Angeles takes about two to three weeks of construction for a basic prefab conversion and three to five weeks for a tiled conversion inside a mid-range remodel, after one to four weeks of design and permitting. Frameless glass is templated after the tile is finished and takes one to two weeks to fabricate.

    Is a curbless shower worth the extra cost?

    A curbless shower is worth it when someone in the house cannot step over a curb, or when the design depends on one continuous floor. It costs more because the floor has to be recessed to slope to the drain, which on a wood-framed floor means cutting or furring joists and a structural plan check, and the waterproofing has to extend at least a foot into the room. For most conversions a low curb delivers the walk-in look for far less.

    Does removing a bathtub lower a home’s value?

    Removing the only bathtub in a house can narrow the buyer pool, because families with young children and many older buyers want at least one tub. Converting a tub in a second bathroom, or in a primary bath while a hall bath keeps its tub, does not have that effect. We do not quote a resale percentage for a conversion because no reliable Los Angeles figure exists for that single item.

    Get a written estimate for your tub-to-shower conversion

    We will look at the drain location, the foundation type, the wall behind the tub and the permit path for your address before we write a number, and give you an itemized proposal that lists the pan, waterproofing system, tile, valve, fan, glass, blocking and permit line by line. The site visit and the estimate are free.

  • How Much Does a Backyard Remodel Cost in Los Angeles?

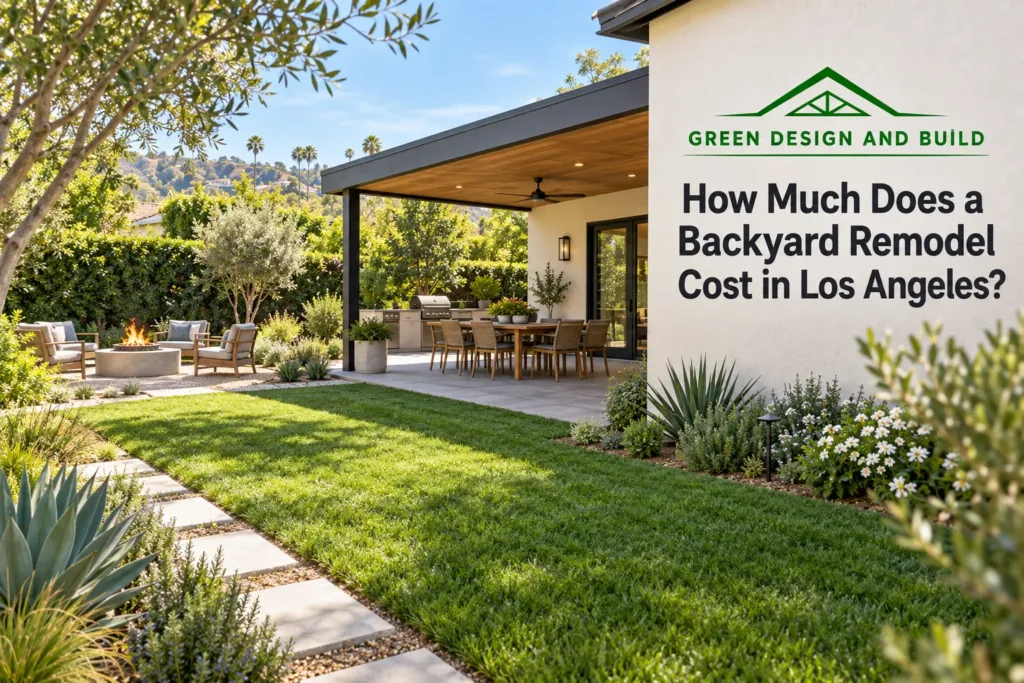
    How Much Does a Backyard Remodel Cost in Los Angeles?

    A backyard remodel in Los Angeles usually lands between $13,000 and $70,000, because unlike a kitchen there is no such thing as a standard backyard. It is a set of separate components, each priced on its own: paving at $8 to $25 per square foot depending on material, a patio cover at $25 to $110 per square foot depending on what it is made of, vinyl fencing at $60 to $110 per linear foot, plus drainage, outdoor electrical, permits and engineering. Add up the pieces you actually want and you have your number. Green Design and Build is a licensed general contractor (CSLB #1110975) based in Van Nuys that builds patios, patio covers, paving, fencing and drainage across Los Angeles County, Orange County, Ventura County, western Riverside County and western San Bernardino County. Every figure here is a typical Los Angeles budgeting range, not a quote.

    We are led by Dekel Sofer; the company has completed hundreds of projects and holds a 4.7-star rating across 146 reviews on Yelp. The prices below are the same ones we publish in our individual cost guides, which are linked from the table.

    On this page

    Backyard remodel cost by component

    Component Typical Los Angeles range What that looks like
    Paver patio, path or driveway, installed $15–$25+ per sq ft A 400 sq ft patio: $6,000–$10,000
    Concrete, standard finish $8–$18 per sq ft A 600 sq ft driveway: $4,800–$10,800
    Concrete, decorative (stamped, exposed aggregate, colored) $12–$26 per sq ft Stamped adds roughly $4–$8 per sq ft over standard
    Patio cover, Alumawood or aluminum lattice $25–$45 per sq ft A 12×20 cover: $6,000–$10,800
    Patio cover, Alumawood solid $30–$55 per sq ft A 12×20 cover: $7,200–$13,200
    Patio cover, insulated aluminum $45–$75 per sq ft A 14×24 cover: $15,100–$25,200
    Patio cover, wood $40–$80 per sq ft Douglas fir or redwood, solid or lattice
    Patio cover, steel $60–$110 per sq ft Custom work and long spans
    Freestanding rather than attached cover Add $1,500–$4,000 Its own posts and footings
    Vinyl fencing, installed $60–$110 per linear foot 100 linear feet: $6,000–$11,000
    Outdoor electrical for fans, lights or heaters $1,000–$3,500 Depends on the run from the panel
    Permits and plan check $400–$1,500 Where a structure is involved
    Engineering $800–$2,500 Where a structure is involved
    Demolition and haul-away of existing concrete $1,500–$3,000 More if access is tight
    Difficult access Add $500–$1,500 or more Wheelbarrow distance is real money

    How we estimated these numbers

    The ranges on this page are budgeting estimates for Southern California, not a price list. They are drawn from Green Design and Build’s own written proposals and completed projects across Los Angeles, Orange, Ventura and western Riverside and San Bernardino counties, checked against current supplier and subcontractor pricing. A real project can come in lower or higher depending on the house, the scope and the finishes. Reviewed by Dekel Sofer, founder and CEO of Green Design and Build (California contractor license #1110975, Class B, General Building), September 2026. Publishers and journalists are welcome to cite these figures with a link to this page.

    The detail behind each of these is in our patio cover cost guide, our concrete driveway cost guide, our vinyl fence cost guide and our comparison of DIY pavers against hiring a professional.

    Three worked backyards

    A patio and some shade: about $13,000 to $27,000

    A 240 square foot paver patio ($3,600 to $6,000), a 12 by 20 solid Alumawood cover over it ($7,200 to $13,200), outdoor electrical for a fan and lights ($1,000 to $3,500), and the permit, plan check and engineering that come with an attached structure ($1,200 to $4,000). This is the most common backyard project we do, and it is the one that changes how a house is used for the least money.

    A full hardscape refresh: about $22,000 to $39,000

    Tearing out cracked concrete and starting again: demolition and haul-away ($1,500 to $3,000), a 600 square foot paver patio ($9,000 to $15,000), a 300 square foot side path ($4,500 to $7,500), and 120 linear feet of new vinyl fence ($7,200 to $13,200). No structure, so usually no plan check, and on a job with no permit we can often start within days of signing rather than weeks.

    The whole yard: about $38,000 to $69,000

    800 square feet of pavers ($12,000 to $20,000), a 14 by 24 insulated cover ($15,100 to $25,200), outdoor electrical ($1,000 to $3,500), permits and engineering ($1,200 to $4,000), and 150 linear feet of vinyl fencing ($9,000 to $16,500). Add drainage and grading on a sloped lot.

    What is not in those numbers

    We would rather leave something out than publish a figure we cannot stand behind. Not included above, and priced individually on a site visit: pools and spas, planting and irrigation, artificial turf, outdoor kitchens and their appliances, fire features, retaining walls, and significant grading. Pools in particular are a different trade with a different permit path and are not something we price from a table. If you are replacing a lawn, our guide to drought-tolerant landscaping in Los Angeles explains the turf rebate rules, plant choices and drip conversion that shape the planting part of the budget.

    What actually changes the price

    Access

    The single most underestimated line. If a machine can reach the back yard, excavation and base take a day. If everything goes through a 32-inch side gate by wheelbarrow, the same work takes three days and the spoil has to be carried out the same way. Look at your side yard before you compare quotes, because a contractor who has not looked at it has not priced it.

    Drainage and grade

    Any new hard surface changes where water goes, and a backyard that drains towards the house is worse than a backyard that is bare dirt. In Los Angeles a graded pad is expected to fall about two percent to the street, and a project that changes drainage can require a grading permit even when the earthwork is small. On a sloped lot the drainage design is a real design task, not a line item.

    Demolition and what is under the old surface

    Old concrete over a poor base, tree roots, buried debris from an earlier project, an abandoned drain line. None of it shows until the surface comes off, and all of it is common in Valley and Orange County yards where the last work was done decades ago.

    How far you are from the panel and the gas meter

    Outdoor lighting, a ceiling fan in the patio cover, a heater, an outlet by the barbecue: the cost is in the trench and the run, not the fixture. The same is true of gas. If the panel is on the far side of the house from the patio, that is the number moving.

    The base is where cheap paving fails

    Excavated side yard with compacted aggregate base going down in lifts before pavers, Anaheim
    Excavation and compacted aggregate base, Anaheim

    Two paver quotes can be $8 per square foot apart and look identical on paper. The difference is almost always underneath: how deep the excavation goes, how much aggregate base is laid, whether it is compacted in lifts or dumped in one go, and whether there is a proper edge restraint. The base is what keeps pavers flat for decades. Skipping it is why cheap paver jobs heave and settle within a couple of winters, and it is invisible on the day the job finishes, which is exactly why it gets cut.

    Ask any paving quote to state the excavation depth, the base depth and whether it is compacted in lifts. A quote that will not put those numbers in writing is telling you something.

    What needs a permit in a Los Angeles backyard

    This is where most published advice is wrong, because the rules people repeat are usually the County’s rules rather than the City of Los Angeles’s, and the two differ on exactly the items homeowners care about. The table is the City of Los Angeles. Every other city in our service area sets its own thresholds, so confirm yours.

    Item City of Los Angeles
    Masonry or concrete fence or wall Building permit required over 3 ft 6 in. Not 6 ft, which is the County rule people quote
    Wood, vinyl or metal fence Exempt from a building permit up to 10 ft, but zoning still caps the height
    Fence height by zoning 3 ft 6 in in the front yard; 6 ft in side and rear yards, up to 8 ft on wider lots outside hillside areas; 3 ft 6 in near the side street line on a corner lot
    Retaining walls Permit and engineering once the wall is over 4 ft measured from the bottom of the footing to the top, or at any height when it carries a surcharge such as a slope or driveway
    Decks and platforms Exempt up to 30 in above grade, if not over a basement or story below. Above 30 in, a permit
    Patio covers and pergolas Permit required for a cover attached to the house; the City’s exempt-work list has no square-footage exemption for a freestanding cover, so assume a permit. The 120 sq ft rule people quote is the County’s
    Grading Permit needed once earthwork exceeds 50 cubic yards, or whenever the work changes drainage, regardless of volume
    Driveway approach or curb cut A separate A-Permit from the Bureau of Engineering. Residential driveways 10 ft minimum, 18 ft maximum in most residential zones
    Pools and spas Permit for anything over 24 in deep or 250 sq ft, plus electrical and plumbing permits
    Outdoor gas, water or new circuits Trade permits. A gas run to a grill and a new outdoor circuit are both permitted work

    These are typical Los Angeles budgeting estimates, not a price list or a quote. Your project can come in lower or higher depending on the house, the scope and the finishes; the only real number is a written proposal after a site visit.

    Two of these are worth repeating because they catch people out. In the City of Los Angeles a masonry wall needs a permit above three and a half feet, which is far lower than most homeowners expect, though there is a recognized detail using masonry pilasters with lightweight infill between them that stays exempt. And the City measures its 4-foot retaining wall exemption from the bottom of the footing, not from the lawn, and removes it entirely for any wall supporting a surcharge or sloping earth, so most real retaining walls need a permit and an engineer. Our patio cover cost guide covers the structure side of permitting in more detail.

    Stormwater, water rules and what you can plant

    Los Angeles changed its stormwater rules in April 2024 and a lot of published guidance has not caught up, including one of the City’s own web pages. The old trigger requiring small residential projects to mitigate new impervious surface above 500 square feet was removed. Under the current ordinance, a house project is generally only pulled into low impact development requirements if it creates or replaces 2,500 square feet or more of impervious area within an Environmentally Sensitive Area, with much larger thresholds elsewhere. If someone tells you your patio triggers stormwater mitigation, ask which threshold and check the date on their source. Unincorporated Los Angeles County is different again, and asks small residential projects to include a couple of low impact development measures such as permeable paving, a rain garden, a dry well or disconnected downspouts.

    On landscaping, California’s Model Water Efficient Landscape Ordinance applies to new landscape areas of 500 square feet or more, and to rehabilitated landscapes of 2,500 square feet or more, where the project requires a permit, plan check or design review. Below the prescriptive threshold it asks for compost, a three-inch mulch layer, mostly low water-use planting, and a cap of 25 percent turf in a residential landscape. LADWP also restricts outdoor watering to set days and times, and the schedule has changed more than once, so check the current one rather than assuming. Practically, this all points the same way: hardscape, drought-tolerant planting and drip irrigation, which is what most Southern California backyards are moving to anyway.

    Fire features, and backyards in fire zones

    If you want a wood-burning outdoor fireplace built into a new patio, you generally cannot have one. South Coast AQMD Rule 445 prohibits permanently installing a wood-burning device, and its definition expressly includes outdoor fireplaces, in new development across the basin. Gas and propane fire features are the compliant answer, and portable wood-burning fire pits remain allowed except on no-burn days. There are narrow exemptions above 3,000 feet elevation and where there is no natural gas infrastructure within 150 feet of the property line.

    If the house is in a Very High Fire Hazard Severity Zone, the backyard is now part of the fire compliance picture rather than separate from it. California’s Board of Forestry adopted an ember-resistant Zone 0 rule for the first five feet around a structure in August 2026 and withdrew it in September 2026 for technical edits; as of September 2026 it is not in effect and has no effective date. If it returns, the practical consequences for a backyard project will be combustible decking, wood fencing where it meets the house, bark mulch and stored firewood in that first five feet. If you are in a fire zone, make the decking and fencing decision with that in mind rather than purely on looks, and confirm the current requirements with your building department, because the rules and the maps have both moved recently.

    A real backyard in Anaheim

    Bare dirt side yard between the house and fence before paving, Anaheim
    Before: packed dirt, no drainage
    Gray concrete pavers in a mixed-size pattern with flush drains across the driveway and side yard, Anaheim
    After: pavers and drains set flush

    In August 2026 we paved a driveway and a side yard in Anaheim. The side yard was packed dirt between the house and the fence, with no drainage and no way to walk through without tracking mud inside, which is the most common unloved space in a Southern California house.

    The work was excavation, a compacted aggregate base laid in lifts, bedding sand, gray concrete pavers in a mixed-size pattern, edge restraint, and drains set flush with the finished surface. The drainage is the part that will not be visible in a photograph in five years and is the reason the side yard stays usable. It is also a good illustration of the schedule point: this was a non-permitted job, so it started within days of signing rather than waiting on a plan check. The full sequence is on the Anaheim paver driveway project page.

    How to compare backyard quotes

    • Square footage each quote is actually pricing. A 40 square foot difference at $20 per square foot is $800 of apparent savings that is not savings.
    • Excavation depth, base depth, and whether the base is compacted in lifts.
    • Edge restraint, and what happens where paving meets the house, the fence and any planting.
    • Drainage: which drains, where they run, and where the water actually ends up. “Slopes away from the house” is not a drainage plan.
    • The patio cover material by name and gauge, not just “aluminum”, and whether it is attached or freestanding.
    • Whether engineering, permit and plan check fees are included or billed separately.
    • Demolition and haul-away of the existing surface, and the disposal.
    • Electrical: how many circuits, how long the run, and whether the panel has capacity.
    • Who is responsible if the fence line turns out not to be the property line.

    Verify the license on the CSLB website with workers’ compensation on file, and remember that on a California home improvement contract the down payment may not exceed $1,000 or 10 percent of the contract price, whichever is less. Our guide on hiring a general contractor without getting scammed covers the rest.

    Where we build backyards

    We work from our Van Nuys office across the San Fernando Valley, the rest of Los Angeles County, Orange County, Ventura County, western Riverside County and western San Bernardino County. Valley and Inland Empire backyards are usually flat with tight side-yard access and heat that makes shade the priority. Orange County tracts often come with HOA architectural review on top of the city permit, which is a separate approval on its own timeline. Hillside lots in the Santa Monica Mountains and the canyons bring grading, retaining and fire-zone requirements that change the project entirely. See our outdoor living, pavers and patio cover services, or all of our service areas.

    Cost guides by component: Paver patio cost · Concrete patio cost · Stamped concrete cost · Retaining wall cost · Artificial turf cost · Outdoor kitchen cost · Pergola cost · Patio cover cost

    If you plan to finance the work, our financing page explains the programs we offer and how progress payments work under California law.

    Backyard remodel cost FAQs

    How much does a backyard remodel cost in Los Angeles?

    Typically $13,000 to $70,000 depending on what you include. A paver patio with a covered area runs about $13,000 to $27,000; a full hardscape refresh with new fencing about $22,000 to $39,000; a whole yard with a large insulated cover, 800 square feet of paving and new fencing about $38,000 to $69,000. Pools, spas, planting, artificial turf and outdoor kitchens are priced separately. These are typical Los Angeles budgeting ranges, not quotes.

    Do I need a permit to redo my backyard?

    Paving at grade generally does not need a building permit. A patio cover attached to the house does, and in the City of Los Angeles a freestanding one should be assumed to as well; the 120 square foot exemption people quote is a County rule. In the City of Los Angeles a masonry or concrete wall needs a permit above three feet six inches, a deck needs one above 30 inches off the ground, and a retaining wall needs one once it is over 4 feet measured from the bottom of the footing, or at any height if it supports a surcharge or sloping earth. Grading needs a permit above 50 cubic yards or whenever it changes drainage. A new driveway approach needs a separate permit from the Bureau of Engineering.

    How high can my fence be in Los Angeles?

    In residential zones in the City of Los Angeles, three feet six inches in the front yard and six feet in the side and rear yards, rising to eight feet on lots at least 40 feet wide outside hillside areas. On a corner lot the height drops to three feet six inches near the side street line for visibility. Separately from zoning height, a masonry or concrete wall needs a building permit above three feet six inches while a wood, vinyl or metal fence is permit-exempt up to ten feet. Other cities set their own numbers.

    Are pavers or concrete cheaper?

    Standard concrete is cheaper at $8 to $18 per square foot against $15 to $25 or more for installed pavers. Once you move to a decorative concrete finish such as stamped or exposed aggregate, at $12 to $26 per square foot, the two overlap. Pavers can be lifted and reset over a utility or a settled area, and individual units can be replaced; concrete cracks and is patched or removed. Both live or die on the base underneath.

    How long does a backyard remodel take?

    Paving and fencing with no permit required can often start within a few days of signing and take one to two weeks on site. Anything with a structure adds design, engineering and plan check before work starts. Grading, retaining walls and hillside conditions add more, because those go through their own review.

    Can I have a wood-burning fire pit or outdoor fireplace?

    Not as a permanently installed one in new work. South Coast AQMD Rule 445 prohibits permanently installing a wood-burning device, including outdoor fireplaces, in new development across the South Coast basin, with narrow exemptions above 3,000 feet elevation and where no natural gas service exists within 150 feet of the property line. Gas or propane fire features are the compliant option. Portable wood-burning fire pits are still allowed, but not on mandatory no-burn days.

    Does a new patio trigger stormwater requirements?

    Usually not, and this changed recently. In April 2024 the City of Los Angeles removed the old 500-square-foot impervious-surface trigger for small residential projects. A house project now generally only falls under low impact development requirements if it creates or replaces 2,500 square feet or more of impervious area within an Environmentally Sensitive Area, with much higher thresholds elsewhere. Some published guidance, including one of the City’s own pages, still shows the old figure. Unincorporated Los Angeles County applies its own rules and asks small residential projects to include low impact development measures.

    Does a backyard remodel add value to the house?

    Outdoor projects are among the weaker performers in resale terms. In the 2025 Cost vs. Value Report for the Los Angeles market, a backyard patio recouped about 47 percent of its cost and a wood deck addition about 100 percent, against 128 percent for fiber-cement siding. Those are metro-wide survey averages rather than a valuation of your house. In Southern California, where a backyard is usable most of the year, the better argument for the work is the twelve months a year you use it rather than the resale percentage.

    Get your backyard priced by the component

    We will walk the yard, measure it, look at the side-yard access, check where water currently goes and where it would go afterwards, look at the panel, and confirm what your city requires a permit for. The proposal comes back itemized by component with square footages, base depths and materials named, so you can compare it against anyone else’s line by line. The site visit takes about two hours and the written proposal follows within 48 hours. Both are free, and we reply within one business day.

  • Walk-In and Doorless Showers: Sizes, Layouts and What the Rules Actually Say

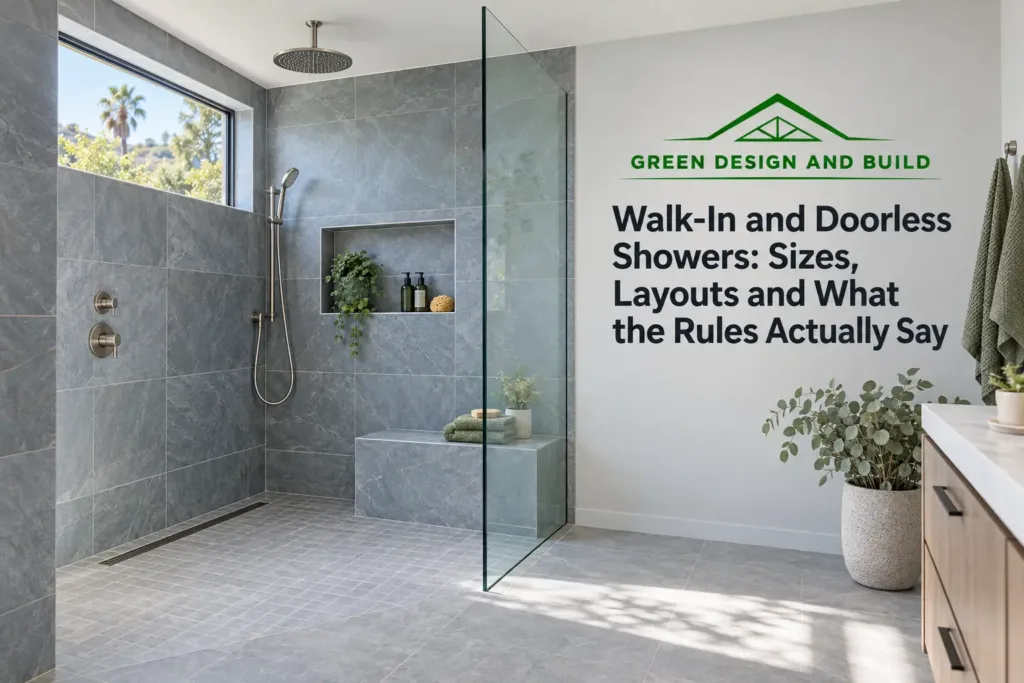
    Walk-In and Doorless Showers: Sizes, Layouts and What the Rules Actually Say

    A shower in California has to give you at least 1,024 square inches of finished interior area, has to be able to contain a 30-inch circle, and has to hold that dimension to a point 70 inches above the drain. If it has a door, the door swings out and leaves a 22-inch unobstructed opening. Those are the rules. Almost every other number you will read about walk-in and doorless showers, including the minimum size for a doorless one, is not a standard at all: nobody publishes one. Green Design and Build is a licensed general contractor (CSLB #1110975) based in Van Nuys that builds bathrooms across Los Angeles County, Orange County, Ventura County, western Riverside County and western San Bernardino County, and this guide separates what the code requires from what the industry recommends from what is simply how it is usually done.

    We are led by Dekel Sofer; the company has completed hundreds of projects and holds a 4.7-star rating across 146 reviews on Yelp.

    On this page

    Walk-in, doorless and curbless are three different things

    They get used interchangeably and they should not be. The differences decide the construction, the cost and whether your building department has an opinion.

    Term What it actually means Construction implication
    Walk-in shower A shower you step into rather than climbing over a tub wall. It usually still has a low curb, and often has a fixed glass panel Ordinary shower construction. The most common of the three
    Doorless (walk-through) shower No door and no glass across the opening. A fixed return panel may screen part of it Same construction, but the geometry has to keep water in without a door
    Curbless (zero-threshold) shower The shower floor is level with the bathroom floor. No curb to step over at all The floor structure has to be recessed. This is the one that changes the framing

    A shower can be any combination: curbless with a door, doorless with a curb, or both. Most of what people picture as a spa bathroom is a walk-in with a low curb and one fixed glass panel, and among Houzz users who recently remodeled a bathroom, 84 percent still chose a shower with a door and 44 percent chose a low curb. Curbless was 20 percent. That is an opt-in survey of people already renovating rather than a national sample, but it is the only dataset with a stated method, and it suggests the fully doorless shower is a smaller category than the photography implies.

    The dimensions that are actually required

    These come from the California Plumbing Code and the building code, and a plan checker will hold you to them.

    Requirement Figure
    Minimum finished interior area 1,024 sq in, and able to encompass a 30-inch circle
    Height to which that dimension must be maintained 70 in above the drain outlet
    Egress opening where a door is fitted 22 in unobstructed, door swings out
    Ceiling height 80 in above a 30 x 30 in area at the showerhead
    Showerhead position Must not discharge directly at the entrance to the compartment
    Finished floor slope Uniform, within the code-permitted range; the tile industry works to 1/4 in per foot, which sits inside it
    Waste outlet 2-inch trap and drain for a new shower
    Valve Pressure-balancing or thermostatic mixing valve, limited to 120°F
    Wall finish Nonabsorbent surface to 70 in above the drain inlet in Los Angeles
    Glass Safety glazing, because glazing facing a bathtub or shower where the bottom of the glass is under 60 in above the standing surface is a hazardous location

    Note the showerhead rule. It is one line in the plumbing code and it is the only enforceable statement anywhere about doorless geometry: point the head away from the opening. Everything else about keeping water in is design judgment.

    The National Kitchen and Bath Association publishes bathroom planning guidelines. They are recommendations from a trade association, not law, and they are more generous than code because code sets the floor rather than a comfortable room.

    Item NKBA recommendation
    Interior shower size At least 36 x 36 in
    Clear floor space in front of fixtures At least 30 in from the front edge to any opposite fixture, wall or obstacle
    Shower controls Reachable from both inside and outside the spray, 38 to 48 in above the floor
    Shower seat 17 to 19 in above the shower floor, 15 in deep, without eating into the minimum interior size
    Grab bars Walls reinforced at construction for a 250-lb static load; bars 33 to 36 in above the floor, 1.25 to 2 in diameter, 1.5 in from the wall
    Threshold, where accessibility matters No more than 1/2 in high; changes in level between 1/4 and 1/2 in beveled no steeper than 1:2

    One thing NKBA does not publish, contrary to what you will read: a showerhead mounting height. There is no code figure and no NKBA figure. The common 78 to 80-inch rough-in is trade convention, and the right height is the one that suits the tallest person using it.

    Why nobody can tell you the minimum size for a doorless shower

    This is the section most articles on this subject get wrong, confidently. You will see minimums quoted for the length of the wet zone, the distance from the showerhead to the opening, the width of the return panel, and the radius of the splash zone. We went looking for the source of those figures. There isn’t one. NKBA, the Tile Council of North America, the plumbing code and the building code publish nothing on any of them. Every number in circulation traces back to a design blog or a contractor’s marketing page.

    That does not mean the question has no answer. It means the answer is geometry rather than a table, and there are four things that actually control whether a doorless shower keeps water off your bathroom floor:

    • Where the head points. The code requirement to keep the showerhead off the entrance is the whole game. A head on the wall perpendicular to the opening, spraying towards the back, throws almost nothing out.
    • How far the opening is from the spray. Distance does the work no barrier can. A longer wet zone means the water has run out of energy before it reaches the opening.
    • Which way the floor falls. A linear drain at the back wall lets the entire floor slope away from the opening on a single plane. A center drain in a rectangle produces four converging planes, one of which necessarily falls towards the opening. That is the single most useful decision you can make in a doorless shower, and it is a plumbing decision made at rough-in.
    • Whether there is a return panel. A fixed glass or tiled return that screens the head, without closing the opening, catches the direct spray while leaving the walk-through.

    If somebody quotes you a minimum length for a doorless shower as though it were a rule, ask them where it comes from. We size ours from the room and the head position, and we say plainly that it is our judgment rather than a published standard.

    Curbless showers in California

    Curbless is the version that changes the structure, and it is also the one where California is genuinely murky. The plumbing code language about a finished dam or threshold is written as a conditional rather than a mandate, which is what permits curbless construction, but at least one county building department still publishes a handout reading it restrictively. Los Angeles publishes an approval path with specific requirements. The practical position: curbless showers are built in California all the time, but the path is jurisdiction-specific, and the answer for your address comes from your building department rather than from the internet.

    What curbless requires structurally:

    • The floor has to be recessed. On a slab that means a depressed pour or a cut; on a wood floor it means dropping the subfloor between the joists, usually with the joists doubled around the opening.
    • The floor is sloped to the drain at a quarter-inch per foot, which sits inside the range the code permits.
    • Waterproofing continues past the wet area, at least a foot beyond the high point of the floor, and turns up the walls. Individual manufacturers ask for more than that, and their instructions govern.
    • The recess depth is set by the pan and drain system you choose. There is no universal figure, and anyone quoting one is describing a particular product.

    Here is the fact that is worth more than any dimension in this article. The Tile Council of North America publishes standard methods for curbless receptors on a depressed concrete slab. For wood-framed floors it publishes none, and says so: there are no current standards or Handbook methods for these systems, so the manufacturer’s instructions are what you follow. That is most houses in the San Fernando Valley. It means a curbless shower on a wood floor is only as good as the installer’s discipline in following one manufacturer’s system end to end, without mixing components from another. Ask which system is being used, and ask to see that everything in the shower belongs to it.

    Linear drains and center drains

    A center drain is cheaper and it is what most alcove showers have. It requires the floor to slope from four directions, so with large-format tile every piece has to be cut or the tile has to be small enough to follow the planes. That is why traditional shower floors are mosaic.

    A linear drain lets the floor slope on one plane only, which is what makes large-format tile possible on a shower floor and what lets the whole floor fall away from a doorless opening when the drain sits at the back wall. It costs more in the fitting and it takes coordination at rough-in, because the drain position is fixed long before the tile. If you want a doorless or curbless shower with big tiles, this is not an upgrade, it is the thing that makes it work.

    Want a real number for your project?

    The site visit and the itemized written estimate are free.

    Glass, and what coatings actually do

    Shower glass is safety glazing by definition, because glazing facing a tub or shower with its bottom edge below 60 inches above the standing surface is a hazardous location. Frameless panels are typically 3/8-inch or 1/2-inch tempered, and the thickness is chosen from the panel’s height, width and area rather than by preference: as a rough guide from the glass industry, 3/8-inch runs to about 84 inches tall and 1/2-inch to about 120 inches, with narrower limits where a corner is unsupported.

    Glass is templated after the tile is finished, not from the drawing. Finished tile walls are rarely perfectly plumb or square, and a frameless panel has no frame to absorb the difference. Ordering glass early buys nothing and risks a panel that does not fit. Build the fabrication time into the schedule instead.

    On coatings, be careful what you are promised. There are two different products: a factory treatment where the glass surface itself is sealed during manufacture, and an applied coating done after the fact. Both make glass easier to clean, and neither manufacturer claims their product removes the need to clean it. The factory-treated product’s own literature asks for a minimal amount of regular cleaning. Anyone telling you coated glass is maintenance-free is contradicting the people who make it.

    Ventilation is where big open showers go wrong

    California requires mechanical exhaust to the outdoors in any room with a tub or shower, at 50 CFM intermittent or 20 CFM continuous, and unlike the model code used elsewhere there is no operable-window exception. That 50 CFM is a minimum for a small bathroom, not a design target for a large one.

    Sources: California Building Standards Commission, Title 24 codes (the official index to Title 24, including the California Plumbing Code and the California Mechanical Code); California Energy Commission, 2025 Single-Family Residential Mandatory Measures Summary (the bathroom exhaust requirements of Energy Code section 150.0(o)).

    The Home Ventilating Institute, the fan manufacturers’ association, sizes fans two ways. For bathrooms up to 100 square feet: one CFM per square foot, roughly eight air changes an hour. Above 100 square feet: add up the fixtures, at 50 CFM each for a toilet, a shower and a bathtub, and 100 CFM for a jetted tub. Their own worked example, a room with a tub, a shower and an enclosed toilet, comes to 150 CFM. A large primary bathroom with an open doorless shower is exactly the case where the code-minimum fan is plainly undersized, and the symptom is a mirror that never clears and paint that peels near the ceiling. Run the fan for about 20 minutes after use, ideally on a timer, and duct it to the outside rather than into the attic.

    Benches, niches and heated floors

    Every horizontal surface inside a shower has to slope towards the drain: the bench, the curb, the window sill, the niche shelf. Waterproofing manufacturers say so plainly, though notably none of them publish a slope rate for a bench top, so anyone quoting you one is quoting a habit rather than a specification. The requirement that matters more is continuity: the waterproofing has to run unbroken across the bench and through the niche, with the fasteners and seams sealed. A niche is a hole cut in your waterproofing, and it either gets detailed properly or it becomes the leak. If a seat is the main reason you are rebuilding, our guide to walk-in showers with a seat or bench covers the right height and depth, how a bench counts against the required floor area, and what it costs.

    Electric radiant floor heating is permitted in a shower floor with the right system, and it is a genuinely nice thing in a curbless bathroom where the shower floor is the bathroom floor. Two conditions. Each circuit needs a Class A ground fault circuit interrupter. And the heating membrane is not the waterproofing: in a shower, the bonded waterproofing membrane goes over the heating cables and the uncoupling mat, not instead of them. That detail gets missed, and it is the difference between a warm floor and a slow leak. Not every manufacturer lists their mat for shower floors, so the specific product’s listing is the thing to check.

    Designing for later, not just for now

    Accessibility standards apply to public buildings and covered multifamily housing, not to a private single-family house, so none of the following is required of you. It is worth knowing anyway, because a curbless shower is the single most future-proof thing in a bathroom and the incremental cost at construction is small.

    The accessible benchmarks: a transfer shower is 36 by 36 inches exactly; a standard roll-in is at least 60 inches wide by 30 inches deep; the threshold maximum is half an inch; grab bars sit 33 to 36 inches above the floor and everything, bar, seat, fastener and mount, is designed for a 250-pound load applied in any direction; controls sit 38 to 48 inches up; and a handheld spray on a 59-inch hose that also works as a fixed head covers both cases. Among Houzz users who recently remodeled, 61 percent included grab bars and 28 percent went curbless, so this is not a fringe consideration.

    The cheap version of all of this is blocking. While the framing is open, screw 2x blocking between the studs where a bar might one day go. It costs an hour. Retrofitting it means demolishing a tiled wall. Our guide to the order a bathroom is remodeled in explains where that step falls.

    A real walk-in shower in Irvine

    Corner soaking tub on a platform beside a framed glass shower before remodeling, Irvine bathroom
    Before: a corner tub platform taking a third of the room
    Freestanding tub under the window beside a tiled walk-in shower with niches after remodeling, Irvine bathroom
    After: freestanding tub and a walk-in shower with three niches

    This Irvine primary bathroom, completed in 2025, is a good example of what a walk-in actually buys you, which is floor. The room had beige tile, a corner soaking tub sitting on a platform that took roughly a third of the floor area, a framed glass shower and a builder-grade vanity running wall to wall under a dropped soffit.

    The platform came out and the tub drain moved so a freestanding tub could sit under the window. The shower was rebuilt as a walk-in with a low curb and three tiled niches, and the vanity became a floating wood cabinet with a single backlit mirror. The plantation shutters stayed. Same room, same footprint, and you can now see the whole floor, which is most of what makes a bathroom feel bigger. Note the low curb rather than curbless: on a job like this, where the structure was not being opened, a low curb was the honest answer. Photographs are on the Irvine bathroom remodel project page, and there is a full gut with a large glass shower on the Inglewood primary bathroom page.

    What to ask before you sign

    • Curbless or low curb, and if curbless, is the floor structure being recessed and how?
    • Which waterproofing system, and is every component in the shower from that same system?
    • Linear or center drain, and which way does the floor fall relative to the opening?
    • What size is the exhaust fan, how was that size arrived at, and where does the duct terminate?
    • Is blocking for future grab bars included?
    • Is the glass in the price, and is the schedule allowing for templating after the tile is done?
    • If a heated floor is included, whose system, and does the waterproofing go over the cables?
    • Has the local building department been asked about curbless, or is that assumed?

    Our bathroom remodel cost guide covers pricing by scope, and how to hire a general contractor without getting scammed covers verifying the license and the contract terms.

    Where we build walk-in showers

    We build bathrooms from our Van Nuys office across the San Fernando Valley, the rest of Los Angeles County, Orange County, Ventura County, western Riverside County and western San Bernardino County. Curbless is easiest on the slab-on-grade houses common in Orange County and the Inland Empire, where the pour can be depressed or cut. On raised-foundation Valley houses it means dropping the subfloor between joists, which is a framing decision made early or not at all. Older Los Angeles and Pasadena houses often have a hot-mopped pan at the end of its life behind the tile, which is worth knowing before you plan around keeping the existing shower. See our bathroom remodeling service and all of our service areas.

    Walk-in shower FAQs

    What is the minimum size for a walk-in shower?

    By code in California, at least 1,024 square inches of finished interior area, able to encompass a 30-inch circle, maintained to 70 inches above the drain. That works out to roughly 32 by 32 inches. The National Kitchen and Bath Association recommends at least 36 by 36 inches, which is a comfort recommendation rather than a legal minimum, and in practice a shower you would actually enjoy using is larger than either.

    How big does a doorless shower need to be?

    There is no published standard, and any specific figure you find online is somebody’s opinion presented as a rule. The code minimum interior size still applies, and the one enforceable rule about geometry is that the showerhead must not discharge directly at the entrance. Containment is controlled by where the head points, how far the opening is from the spray, whether the floor slopes away from the opening, and whether a fixed return panel screens the head. A linear drain at the back wall, which lets the whole floor fall away from the opening on one plane, does more than any dimension.

    Are curbless showers allowed in California?

    They are built throughout California, and Los Angeles publishes an approval path for them, but the position is jurisdiction-specific: the plumbing code language on thresholds is conditional rather than mandatory, and at least one county still publishes guidance reading it restrictively. Confirm with your building department before you design around it. Structurally, curbless requires the floor to be recessed, the slope run to the drain, and the waterproofing extended past the wet area.

    Can you build a curbless shower on a wood floor?

    Yes, and it is common on raised-foundation houses, but it is worth knowing that the tile industry publishes standard methods only for curbless receptors on a depressed concrete slab. For wood-framed floors there are no current standards or handbook methods, so the installation follows one manufacturer’s system and instructions exactly. The subfloor is recessed between the joists, usually with the joists doubled around the opening. Ask which system is being used and confirm nothing is being mixed between brands.

    Do I need a bigger exhaust fan for a large walk-in shower?

    Usually yes. The California minimum is 50 CFM intermittent, which is a floor for a small bathroom. The Home Ventilating Institute recommends one CFM per square foot up to 100 square feet, and above that adding up the fixtures at 50 CFM each for a toilet, shower and bathtub, or 100 for a jetted tub. A large primary bathroom easily reaches 150 CFM on that method. Duct it outside, not into the attic, and run it about 20 minutes after use.

    Linear drain or center drain?

    A linear drain lets the shower floor slope on a single plane, which is what makes large-format floor tile possible and what lets the entire floor fall away from a doorless opening when the drain is at the back wall. A center drain needs four converging slope planes, which is why traditional shower floors use small mosaic tile. Linear costs more and the position has to be fixed at rough-in, well before tile.

    How thick should frameless shower glass be?

    Frameless panels are typically 3/8-inch or 1/2-inch tempered safety glass, and the thickness is determined by the panel’s height, width and area rather than by taste. As a guide, 3/8-inch is generally used up to about 84 inches tall and 1/2-inch up to about 120 inches, with tighter limits where a corner is unsupported. All shower glass must be safety glazing. The glass is templated against the finished tile, so it is fabricated after tiling rather than ordered from the drawing.

    Is a walk-in shower a good idea if we might sell?

    Showers are the most upgraded feature in bathroom remodels, and low-curb and curbless entries are among the most common aging-in-place features people include, so a well-built walk-in is not a niche choice. The judgment call is whether you are removing the only bathtub in the house, which matters to buyers with small children. We have no data to put behind that, so treat it as an opinion rather than a rule.

    Get a shower designed around your room, not a photograph

    We will measure the room, look at the floor structure to tell you honestly whether curbless is straightforward or a framing project, check the venting and the existing drain, confirm your city’s position on curbless, and lay out the shower around where the head can point. You get an itemized proposal naming the waterproofing system, the drain type and the fan size rather than the word “standard”. The site visit takes about two hours and the proposal follows within 48 hours. Both are free, and we reply within one business day.

  • Removing a Load-Bearing Wall in Los Angeles: How to Tell, and What It Costs

    Removing a Load-Bearing Wall in Los Angeles: How to Tell, and What It Costs

    You can remove almost any load-bearing wall in a house. What you cannot do is remove it cheaply or quietly. In Los Angeles the work typically runs $10,000 to $25,000 on a single-story house on a raised foundation, and $25,000 to $60,000 or more once steel, a second story or new footings come into it. In the City of Los Angeles it needs a building permit with structural plans and calculations stamped by a California-licensed engineer or architect, a beam sized for the span, posts at each end, and usually new footings under those posts. It does not qualify for an express permit. The part most homeowners never hear about until plan check is that a wall can carry no roof load at all and still be structurally essential, because in a seismic zone it may be holding the house sideways. Green Design and Build is a licensed general contractor (CSLB #1110975) based in Van Nuys, and opening the wall between the kitchen and the dining room is one of the remodels we are asked for most across the San Fernando Valley.

    We are led by Dekel Sofer; the company has completed hundreds of projects and holds a 4.7-star rating across 146 reviews on Yelp. The permit detail below is City of Los Angeles; every other city in Los Angeles, Orange, Ventura, Riverside and San Bernardino counties adopts the same state codes with its own administration, so confirm the process with your building department.

    On this page

    How to tell whether a wall is load-bearing

    You cannot tell from the painted side. What you can do is collect evidence, and there is a lot of it available from an attic hatch and a crawlspace.

    What you see What it suggests
    Ceiling joists or rafters run perpendicular to the wall and their ends land on it Bearing. This is the classic case
    The wall runs parallel to the joists, but the joists directly under it are doubled or solid-blocked Bearing. Framers double joists under a parallel wall precisely because it carries load
    A double top plate on the wall Suggestive, not proof. Code caps bearing partitions with a double top plate, but single-plate construction is also permitted
    The wall sits directly above a girder, an interior footing, or a wall on the story below Bearing. There is a continuous load path down to a footing for a reason
    There is a wall in the same position on the floor above Bearing, regardless of which way the joists run
    The attic shows stick-framed rafters with ceiling joists Often bearing. Rafters usually need an interior bearing wall or a purlin and strut line
    The attic shows engineered trusses spanning wall to wall Often not bearing for gravity, but see the warning below
    A post, a girder end, or a header from an opening above lands at one point on the wall A point load. The wall can be non-bearing along its length and still carry a concentrated load at one spot

    Want a real number for your project?

    The site visit and the itemized written estimate are free.

    Two cautions about trusses, because this is where do-it-yourself reasoning most often goes wrong. A truss roof usually does make interior walls non-bearing for gravity, but the wall may still be a required lateral brace point for the trusses. And the trusses themselves are off limits: the residential code forbids cutting, notching, drilling or splicing a truss member without the approval of a registered design professional, so a plan that involves trimming a truss to make room for anything is not a plan.

    What a homeowner genuinely cannot determine: whether a strut line lands on the wall, how much a point load actually carries, whether the floor framing below can take a concentrated post reaction, whether the existing footing is adequate, and whether the wall is doing lateral work. In the older Los Angeles housing stock the framing frequently does not match the drawings, where drawings exist at all. This is why we do not price a wall removal until we have been in the attic and looked at the framing, and why the engineer’s calculations have to reflect what is actually there rather than what should be.

    The wall may be holding the house sideways, not up

    This is the California-specific point that almost no article on this subject makes, and it is the one that most often changes the budget.

    Houses resist earthquake and wind forces through braced wall lines: straight lines through the building plan made up of braced wall panels, full-height sections of wall built to resist in-plane shear through the interaction of framing, sheathing and anchors. A wall can carry no roof or floor load whatsoever and still be a required braced wall panel. Remove it and you have removed lateral capacity that has to be put back somewhere.

    Los Angeles sits in a high seismic design category, and the bracing demands are correspondingly heavy. LADBS’s own prescriptive wood-framing provisions cap braced wall lines at 25 feet apart, require hold-downs of at least 1,800 pounds at panel ends, and permit no penetrations at all in a braced wall panel. In the highest category, a 20-foot braced wall line can require 16 feet of gypsum or plaster bracing, or 5 feet of wood structural panel. When the wall you want gone is the only braced element on its axis, the replacement is not a beam. It is an engineered lateral system.

    The usual replacements, in rough order of cost: additional or upgraded shear panels elsewhere on the same wall line, which is often the cheapest fix and simply means re-sheathing another wall; prefabricated portal frames or narrow proprietary shear panels at the opening; or a steel special moment frame, which is what you use when the opening is close to the full width of the wall. All three need hold-downs and usually new or enlarged footings, and all three need collectors, the framing that drags load from the removed wall’s tributary area across to whatever is replacing it. Collectors are the item homeowners never anticipate, and they frequently mean opening ceilings well beyond the wall itself.

    Hillside houses get another layer. For a house built on or into a slope steeper than one in three, the municipal code prohibits wood structural panel sheathing, cement plaster and lath, gypsum wallboard and tension-only braced frames from resisting seismic forces below the base level diaphragm in the downhill direction, and requires that lateral anchorage be symmetrical. On a hillside lot the lateral replacement stops being a framing problem and becomes a steel and foundation problem.

    What replaces the wall

    New framing with the beam pocket and rough electrical after a load-bearing wall was removed, Torrance kitchen remodel
    New framing and the beam pocket after the wall came out, Torrance

    The chain has three links, and the price of the job is decided by how hard each one is on your house.

    LVL, steel or flush: which beam, and what it does to the cost

    Beam Where it fits Cost direction Trade-off
    Built-up dimensional lumber (2x10s or 2x12s nailed together) Short spans, light roof loads, single story Lowest Deep for what it carries; often not enough for spans over 8–10 ft under a tile roof
    LVL or PSL (laminated veneer or parallel strand lumber) Most single-story Valley and Orange County kitchens, spans to about 16 ft Low to mid Shallower than sawn lumber for the same load; hand-carried and cut on site
    Glulam Larger or exposed spans Mid Can be left exposed and stained; heavier to set
    Steel wide-flange Long spans, two-story loads, flush installs with limited ceiling depth Highest Needs a crane or a crew to set, welded or bolted connections, and wood nailers to receive joists; fabricated off site
    Flitch beam (steel plate between lumber) Where steel capacity is needed but a crane is not possible Mid to high Bolted on site; heavy but hand-portable in pieces

    Dropped or flush matters as much as the material. A dropped beam hangs below the ceiling and the joists rest on top of it: simplest, cheapest, and it leaves a soffit across the opening. A flush beam sits inside the ceiling depth, so every joist has to be cut and hung on hangers, which means shoring on both sides at once and, for any real span, steel or a deep LVL to carry the load within the joist depth. Flush is the clean ceiling most people picture in an open-plan kitchen; budget for it being the more expensive version of the same wall. Under a clay or concrete tile roof, which weighs several times what composition shingle does, the beam and the posts get sized for that dead load, and that alone can move a job from LVL to steel.

    Point loads, posts and footings: slab versus raised foundation

    The wall spread the load across its whole length. The beam collects it into two points, and what is under those points decides a large part of the cost. On a raised foundation, which is most 1950s to 1970s San Fernando Valley houses and older homes across Los Angeles County, the post usually lands on an existing girder or gets a new concrete pier in the crawl space; the work is dirty but cheap. On a slab, which is most of Orange County, Corona, Ontario and Rancho Cucamonga, the engineer specifies a pad footing under each post, and the crew saw-cuts the slab, digs, sets rebar, pours and patches. Where the post can be placed on an exterior wall, it often lands on the existing perimeter footing and no new concrete is needed; the engineer decides that, not the carpenter. With a second story above, the load path has to be traced from the roof through both floors to the ground, and hold-downs and straps are usually part of the drawing.

    Everything the wall was hiding

    Electrical circuits are rerouted easily enough. Water supply is not much worse. The two that change the price are the drain-waste-vent stack and the heating system. A vent stack rises vertically and terminates through the roof, so it cannot simply be turned sideways. If the wall you are removing is the wall your kitchen or bathroom vents through, the options are a new vent path through a remaining wall up to the roof, which means attic and roof work, or an island vent, which the plumbing code allows but regulates tightly: a return vent rising to drainboard height and coming back down to the drain, a foot vent taken off below the floor and run to open air through the nearest partition, an accessible cleanout, and minimum slope. If neither is geometrically possible, the opening has to move or shrink. A wall that doubles as a duct chase or a return-air path is the same story in a different trade, and losing a return can leave a system starved. Gas piping in the wall has to be re-run, pressure-tested and inspected.

    Permits and plan check in Los Angeles

    A permit is required. The municipal code’s list of exempt work covers flagpoles, painting, low fences and similar; structural alteration is not on it, and there is no version of this job that is legal without a permit.

    It cannot go through an express permit. LADBS’s express permit bulletin lists a residential kitchen or bathroom remodel only with the explicit qualifier “no structural changes”. It does not, however, automatically mean the longest queue either: LADBS’s counter plan check lists alteration to a single-family dwelling or duplex as an eligible category, reviewed the same day in roughly 45 to 60 minutes. Whether a given job clears the counter depends on its complexity; larger or more complicated scopes move to expanded counter or regular plan check, and everything can be submitted electronically.

    The plans have to be stamped. The municipal code requires structural computations to be signed or stamped by an engineer or architect licensed by the State of California. There is an exemption in the Business and Professions Code that lets an unlicensed person design a wood-frame single-family dwelling of two stories or fewer, but it stops applying the moment any part of the work departs from conventional framing, and the building official must then require plans prepared by a licensed engineer or architect. Removing a bearing wall is exactly that departure. LADBS’s own policy is more specific still: for structures over one story, structural plans and calculations must be signed by a California professional engineer or licensed architect, and the conventional wood-frame exemption cannot be used in the high seismic design categories that cover Los Angeles.

    Then it gets inspected, and nothing structural may be covered before it is approved. Expect a footing or foundation inspection before any pour, and a framing inspection with the beam, the posts, the hardware and the shear nailing all still visible. On larger jobs the engineer may also have to perform structural observation as a separate obligation to the owner, with reports at each significant stage; LADBS exempts one-story wood-framed residential work under 2,000 square feet in our seismic category, so a small single-story job usually avoids it while a two-story house with an engineered lateral element usually does not. Steel moment frames, field welding and certain epoxy anchors also carry special-inspection requirements. Whatever the approved plans say about special inspection is what governs on site.

    Lead and asbestos come before demolition

    Two rules attach to knocking down an interior wall, and both sit ahead of demolition on the schedule.

    If the house was built before 1978, the federal Renovation, Repair and Painting rule applies to anyone paid to disturb painted surfaces. There is a minor-work exemption of six square feet inside a room, but it does not help here, because demolition of painted surfaces is covered regardless of area. The firm has to be certified and use certified renovators. Ask to see the certification.

    For asbestos, South Coast AQMD Rule 1403 covers Los Angeles, Orange, Riverside and San Bernardino counties. A survey by a Certified Asbestos Consultant or Certified Site Surveillance Technician is required before renovation or demolition, with an exception for single-unit dwellings where less than 100 square feet of intact material is disturbed. Above 100 square feet of material containing more than one percent asbestos, notification must be filed 10 working days ahead. There is an owner-occupant exemption, but it is narrower than people assume: it applies only to an owner living at the property who personally performs the work, with no contractor, laborer, friend or family member helping. Note also that there is no year cutoff for asbestos the way there is for lead. Popcorn ceilings, plaster, joint compound, floor tile and mastic in Los Angeles houses of many vintages can contain it, and only the survey settles the question.

    Load-bearing wall removal cost by situation

    Two things set the price: what carries the load once the wall is gone (the beam) and what carries the beam (the posts and what is under them). Everything else is patching.

    Situation What it usually involves Typical Los Angeles budgeting estimate
    Non-bearing partition wall Demolition, reroute of any wiring in it, patch drywall and floor $2,000–$6,000
    Bearing wall, single story, raised foundation, span up to about 12 ft Engineer’s letter and calcs, counter plan check, shoring, LVL or built-up beam (dropped), posts to existing girder or new pier in the crawl space, patching $10,000–$25,000
    Bearing wall, single story, slab foundation As above, plus saw-cutting the slab for new pad footings under the posts $15,000–$35,000
    Bearing wall with a second story above, or span over about 16 ft Steel or deep LVL beam, often flush, heavier shoring both floors, engineered footings and hold-downs, regular plan check $25,000–$60,000+
    Open-plan kitchen remodel including the wall removal Everything above plus new cabinets, island with power and plumbing, relocated sink or range, new circuits, flooring run continuous $70,000–$100,000+

    These are typical Los Angeles budgeting estimates, not a price list or a quote. Your project can come in lower or higher depending on the house, the scope and the finishes; the only real number is a written proposal after a site visit.

    Opening the wall between the kitchen and the dining room is one of the most requested remodels we see in 1950s to 1970s San Fernando Valley ranch houses; the last row is the full-remodel tier from our kitchen remodel cost guide, and the wall-specific rows are starting points, not a bid.

    What is inside the number

    Line item Typical Los Angeles budgeting estimate Notes
    Structural engineer (site visit, calculations, stamped drawings, letter) $1,500–$5,000 More for a two-story house or a lateral (shear) redesign
    Plan check and permit Set by LADBS fee schedule Counter plan check for a single-family alteration; regular plan check for two-story or hillside
    Temporary shoring and demolition $1,500–$4,000 Both sides of the wall on a flush beam; both floors on a two-story
    LVL or built-up lumber beam, hangers, posts, hardware, installation $3,000–$10,000 Rises with span and depth
    Steel wide-flange beam, delivered and set, with connections $8,000–$25,000 Crane or manual set; welding or bolted plates
    New pad footings (per post) $1,500–$4,000 each Crawl-space pier is the low end; saw-cut slab footing the high end
    Electrical rerouting (kitchen package: circuits, island power, lighting) $3,000–$8,000 Approved kitchen electrical package; a bearing wall in a kitchen almost always has circuits in it
    Plumbing reroute for an island $1,500–$5,000 Approved kitchen rough plumbing figure; a drain-waste-vent stack inside the wall is a separate problem
    Asbestos survey and lead-safe practices (pre-1978 house) $400–$1,200 survey Abatement, if needed, is priced by the survey
    Drywall, paint, ceiling and floor patching $1,500–$5,000 More when flooring cannot be matched and a room gets refloored

    These are typical Los Angeles budgeting estimates, not a price list or a quote. Your project can come in lower or higher depending on the house, the scope and the finishes; the only real number is a written proposal after a site visit.

    The electrical and plumbing lines are the ones people forget. A bearing wall between a kitchen and a dining room in a Valley ranch house usually has the kitchen’s original circuits, a switch leg, sometimes the range feed, and occasionally a drain vent inside it. None of that goes away with the wall; it gets rerouted through the ceiling or the floor, and on a 1960s house that is often the moment the panel upgrade conversation starts.

    When removing the wall is the wrong answer

    Sometimes the honest advice is a wider cased opening rather than a full removal, or moving the opening a few feet. The situations where we say so:

    • The wall is the only braced wall line on that axis, so the replacement is a full engineered lateral system with collectors rather than a beam
    • A vent stack in the wall has no available route to the roof and no geometry for an island vent
    • The wall is the return-air path for the heating system in a slab-on-grade house with no alternative route
    • A second-story point load lands mid-wall, which also pushes the design past the unlicensed-design exemption
    • The house is on a slope steeper than one in three, where the hillside provisions rule out the cheap lateral solutions
    • The roof is trussed and the wall turns out to be a required truss brace point
    • New footings would mean cutting a post-tensioned slab, or the existing foundation is unreinforced and needs its own attention first

    None of these makes the job impossible. They make it a different job, with a different budget, and it is better to know that during design than after demolition. If the house is already showing signs of foundation movement, deal with that first.

    How long does removing a load-bearing wall take?

    Step Typical duration
    Structural engineer: site visit, calculations, stamped drawings 1–3 weeks
    Counter plan check (single-story, single-family) Same day; corrections can add 1–2 weeks
    Regular plan check (two-story, hillside, HPOZ) Several weeks; 50 percent surcharge to expedite
    Shoring, demolition, beam and posts set, framing inspection 2–5 working days on site
    New footings on a slab, cure before loading Add about a week
    Whole open-plan kitchen remodel, construction 8–12 weeks

    Because the engineering runs before the permit and the cabinets take about three weeks to manufacture, a kitchen with a wall removal is a four-to-six-month project door to door, against about three months for a same-layout kitchen. Our guide to kitchen permits in Los Angeles walks through the express-versus-plan-check split.

    A real open-plan conversion in Torrance

    Closed-off formal dining room before the load-bearing wall was removed, Torrance
    Before: the dining room closed off from the kitchen
    Kitchen open to the living room after the load-bearing wall was replaced with an engineered beam, Torrance
    After: one room instead of three

    This Torrance house had the arrangement we see constantly: a kitchen closed off from a formal dining room, and a living room beyond a hallway, with none of the three spaces able to see each other. The owners wanted one connected space, which meant taking out the wall between the kitchen and the dining room.

    That wall was carrying roof load. An engineer sized a beam to replace it, and temporary shoring held the ceiling while the beam went in. The kitchen and dining room came back to the studs and the flooring came out, which is what let the rough electrical for the island and the new recessed lighting be run properly rather than fished. With the wall gone the layout resolved itself: a long run of white shaker cabinets on the exterior wall, a full-height pantry beside the refrigerator, and an island long enough for four stools. The new flooring runs continuously from the kitchen through to the living room, which is the detail that makes an open plan read as one room rather than two rooms with the wall missing. Every stage is on the Torrance open-plan kitchen project page.

    A second example, finished in Pasadena in 2026, shows the same sequence inside a city that runs its own building department: engineered drawings and plan check first, temporary support and the beam next, framing inspection before anything was covered, and only then the kitchen itself. About two months start to finish. See the Pasadena kitchen remodel with a load-bearing wall removed.

    What if a previous owner already removed one without a permit

    We find this regularly, usually when we open a ceiling for something else. The signs, in a house where an opening was made and the structure was not properly replaced: a visible sag or dip in the ceiling line across the opening, diagonal cracking in drywall or plaster at the corners of the opening and at nearby door and window corners, doors and windows that bind or swing on their own, sloping floors above, and separated trim. Sometimes what looks like a beam is only a soffit with nothing in it, and there are no bearing posts anywhere. None of these prove a violation on their own, but together they are a reason to look.

    Two things are worth knowing. First, responsibility follows the property, not the person: LADBS states plainly that the current owner is responsible for resolving an order even where a previous owner or tenant did the work. Second, the municipal code charges an investigation fee where work has been done without authorization, set at double the normal permit or inspection fee with a minimum of $400, and paying it does not excuse compliance. Resolving it means an engineer investigating and documenting what was actually built, finished surfaces being opened so the concealed beam, posts, hardware and footings can be seen and inspected, and then plan check and inspection as if it were new work, including any retrofit needed to make it comply.

    It also follows you to closing. California’s transfer disclosure obligations require a seller to disclose alterations or structural modifications made without necessary permits or not in compliance with building codes, and lenders and appraisers may decline to give value to unpermitted structural work. Buyers routinely ask for a credit or for retroactive permitting as a condition of close, which is a worse position to be in than fixing it on your own schedule.

    Questions to ask before you sign

    • Have you been in the attic and looked at the framing, and what did you see?
    • Who is the engineer, and is the engineering included in this price or billed separately?
    • Is the wall doing any lateral work, and if so what replaces it and where do the collectors run?
    • Is the beam flush or dropped, and what does the price assume?
    • Are new footings included, and does the price cover cutting and patching the slab?
    • Where does the vent stack go, and is that route confirmed or assumed?
    • Is the asbestos survey in the price, and what happens to the schedule and the number if it comes back positive?
    • What does the patching allowance cover, and how far past the opening does it go?
    • Who pulls the permit? A contractor asking the homeowner to pull it as an owner-builder is shifting liability onto you.

    Verify the license on the CSLB website with workers’ compensation on file before any of that. Our guide on hiring a general contractor without getting scammed covers the rest.

    Where we do this work

    We remove walls and build open plans from our Van Nuys office across the San Fernando Valley, the rest of Los Angeles County, Orange County, Ventura County, western Riverside County and western San Bernardino County. The pattern changes by area. Valley ranch houses from the 1950s to the 1970s are the classic case: a bearing wall between the kitchen and the dining room, stick-framed rafters above it, and a crawlspace that makes new footings straightforward. South Bay and Orange County tracts more often have trusses, which shifts the question from gravity to bracing. Hillside houses in the Santa Monica Mountains and the canyons bring the hillside provisions with them. See our kitchen remodeling and remodeling services, or all of our service areas.

    Load-bearing wall removal FAQs

    How do I know if a wall is load-bearing?

    The reliable indicators are structural, not visual: joists or rafters landing on the wall perpendicular to it, doubled or blocked joists directly beneath a wall that runs parallel to them, the wall sitting above a girder, an interior footing or a wall on the story below, or a wall stacked in the same position on the floor above. A double top plate is suggestive but not proof. None of it can be confirmed from the painted side, and a wall can also carry a single concentrated point load while being non-bearing along the rest of its length. An engineer or a contractor who has looked in the attic and at the framing is the only reliable answer.

    Do I need a permit to remove a load-bearing wall in Los Angeles?

    Yes, always. Structural alteration is not on the city’s exempt-work list, and it does not qualify for an express permit, which covers a kitchen or bathroom remodel only where there are no structural changes. It needs structural plans and calculations stamped by a California-licensed engineer or architect. It may still be reviewable at the counter the same day, since LADBS lists alteration to a single-family dwelling as a counter plan check category, depending on complexity.

    Can a non-load-bearing wall still be structural?

    Yes, and this is the most commonly missed point in California. A wall that carries no roof or floor load can still be a braced wall panel resisting lateral seismic and wind forces. Removing it removes lateral capacity that must be replaced, typically with additional shear panels elsewhere on the same wall line, a prefabricated portal frame, or a steel moment frame, along with hold-downs, new footings and collector framing to transfer the load.

    What kind of beam replaces a load-bearing wall?

    Built-up dimensional lumber for short spans, laminated veneer lumber or parallel strand lumber for longer spans in a shallow depth, glulam for larger or exposed sections, a steel wide-flange beam for the longest spans and heaviest loads, or a flitch beam as a hybrid. The size depends on the tributary width, what the beam carries, the deflection limit and the roof dead load, which in Los Angeles varies a lot between tile and composition shingle. Only the engineer can size it.

    Why is a flush beam more expensive than a dropped beam?

    Because of what it takes to install, not how it looks. A dropped beam hangs below the ceiling and the joists keep bearing on top of it. A flush beam sits inside the ceiling depth, so every joist must be cut and hung off the beam with hangers, the ceiling must be shored throughout, and the beam usually has to be steel or engineered lumber to deliver the same capacity in less depth.

    How much does it cost to remove a load-bearing wall in Los Angeles?

    Removing a load-bearing wall in Los Angeles typically costs $10,000 to $25,000 for a single-story house on a raised foundation with an engineered lumber beam, $15,000 to $35,000 on a slab where new footings are cut, and $25,000 to $60,000 or more where steel, a second story or a long span is involved. As part of an open-plan kitchen remodel the whole project is $70,000 to $100,000 or more. These are typical budgeting estimates, not a price list; a real project can come in lower or higher.

    How much does a structural engineer charge for a wall removal?

    A structural engineer’s site visit, calculations, stamped drawings and letter for a single-story bearing wall removal in Los Angeles typically run $1,500 to $5,000 as a budgeting range, more for a two-story house or where a shear wall has to be replaced with a new lateral system. The engineer’s drawings are what LADBS reviews at plan check, so the fee is not optional.

    Is a steel beam more expensive than an LVL beam?

    Yes. A steel wide-flange beam delivered and set with its connections typically costs $8,000 to $25,000 in Los Angeles against $3,000 to $10,000 for an LVL or built-up lumber beam installed, because steel is fabricated off site, needs a crane or a large crew to set, and needs nailers and bolted or welded connections. Steel earns its cost on long spans, two-story loads and flush installs where the ceiling depth is limited.

    How long does it take to remove a load-bearing wall?

    The beam itself goes in over two to five working days on site: shoring, demolition, beam and posts set, and the framing inspection. Before that, engineering takes one to three weeks and plan check anywhere from a same-day counter review to several weeks. As part of a full open-plan kitchen remodel the construction runs eight to twelve weeks and the project four to six months door to door.

    Is it cheaper to widen the opening instead of removing the whole wall?

    Usually, yes. A shorter beam over a wider cased opening carries less load, can often stay in LVL rather than steel, and may land its posts on existing framing with no new footings, so it avoids the biggest cost drivers. It also keeps a shear wall doing its job. On a two-story house or a slab, a wide opening often gives most of the light and sightline of a full removal at a fraction of the structural cost.

    Can I remove a wall myself if my house is single story?

    The Business and Professions Code lets an unlicensed person design a wood-frame single-family dwelling of two stories or fewer, but the exemption stops the moment the work departs from conventional framing, and the building official must then require plans by a licensed engineer or architect. Removing a bearing wall is that departure, and LADBS does not allow the conventional wood-frame exemption in the seismic design categories that cover Los Angeles for structures over one story. Separately, the state’s minor-work licensing exemption applies only where no building permit is required, so it never applies here.

    What happens if a wall was removed without a permit?

    The current owner is responsible for resolving it even if a previous owner did the work. Los Angeles charges an investigation fee of double the normal permit or inspection fee, with a minimum of $400, and paying it does not excuse compliance. Resolving it means an engineer documenting what was actually built, opening finished surfaces so the beam, posts, hardware and footings can be inspected, and going through plan check and inspection as though it were new work. It also has to be disclosed when you sell.

    Sources

    The permit and structural-review requirements described on this page are City of Los Angeles rules and the California Building Standards Code. The code is amended on a three-year cycle and requirements differ outside the City of Los Angeles, so confirm what applies with your own building department before planning a wall removal.

    Last reviewed 17 September 2026.

    Find out what your wall is actually doing

    We will get into the attic, look at the framing and the joist direction, check whether the wall stacks, find out what is inside it, and tell you honestly whether it is bearing, bracing, both or neither before anyone writes a number. If it is worth doing, we handle the engineering, the plans, the permit and the build under one contract. The site visit takes about two hours and the written proposal follows within 48 hours. The site visit and the estimate are free, and we reply within one business day.

  • In What Order Should You Remodel a Bathroom?

    In What Order Should You Remodel a Bathroom?

    A bathroom remodel runs in a fixed order: design and selections, permit, demolition, framing and blocking, rough plumbing, rough electrical, exhaust ventilation, rough inspection, backer board, waterproofing, the shower pan water test, tile, then vanity, fixtures and glass, then final inspection. The sequence is not a matter of preference. Half of it is dictated by inspection stops, and the other half by the fact that each trade needs the one before it finished and cured. Green Design and Build is a licensed general contractor (CSLB #1110975) based in Van Nuys that builds bathrooms for homeowners across Los Angeles County, Orange County, Ventura County, western Riverside County and western San Bernardino County.

    We are led by Dekel Sofer; the company has completed hundreds of projects and holds a 4.7-star rating across 146 reviews on Yelp. Code requirements below are the California state minimum and the City of Los Angeles amendments; other cities in our service area adopt the same state codes with their own amendments, so confirm the local details with your building department.

    On this page

    The bathroom remodel order, step by step

    # Step What has to be true before it starts
    1 Design, layout and every selection Nothing. This is where the money is made or lost
    2 Permit Layout final; drawings if walls or openings change
    3 Demolition to the studs Permit in hand; fixtures and tile ordered
    4 Framing repairs and blocking Everything is visible and dry
    5 Rough plumbing: supply, drain, vent, valve Fixture positions locked to the actual fixtures bought
    6 Rough electrical Plumbing set, so wire routes around pipe
    7 Exhaust fan and duct to the outside Fan model chosen; duct path confirmed
    8 Rough inspection All of the above complete and nothing covered
    9 Insulation, drywall and cement board Rough inspection signed off
    10 Waterproofing the wet area Backer board fastened; pre-slope in place
    11 Shower pan water test Waterproofing complete and cured
    12 Tile: floor, walls, shower, niche Pan test passed
    13 Vanity, counter, toilet, trim plumbing, lighting Tile set and grouted
    14 Shower glass templated and installed Tile finished; glass cannot be measured before
    15 Final inspection, paint touch-up, punch list Everything installed and working

    Why the order matters more than the finishes

    Almost every expensive bathroom problem is a sequencing problem wearing a different costume. A vanity chosen after the plumbing is roughed in means the drain is in the wrong place for the cabinet. A freestanding tub chosen after the rough means the floor has to be opened again for the filler. A niche framed before the tile layout is drawn ends up with cut tiles on both sides. Shower glass ordered early cannot be measured, because glass is templated against the finished tile, not the drawing.

    The single most useful thing a homeowner can do is finish step one completely. Every fixture, the exact tub, the exact vanity, the shower valve trim, the tile and the layout, decided and purchased or confirmed available, before demolition. Rough plumbing is set to the fixtures you actually bought, not to a generic layout, and that is why we settle selections during design rather than during construction. In a primary suite, where the layout itself is the biggest of those decisions, our guide to master bathroom layouts and what each one costs sets out what to decide first.

    Do you need a permit to remodel a bathroom in Los Angeles?

    Usually yes, and the answer decides your schedule. In the City of Los Angeles, a straightforward remodel that replaces cabinets, flooring, wall finishes, tile, counters and plumbing or electrical fixtures can be pulled as a combined permit online. As soon as the work involves changes to walls or openings, or new plumbing or electrical penetrations into existing walls, the city asks for two sets of floor plans at quarter-inch scale showing the existing and proposed layouts of the bathroom and the adjacent rooms, and it goes through a Development Services Center rather than the online counter. LADBS separately lists a kitchen or bathroom remodel with no structural changes as eligible for an express permit, which is issued without plan check.

    Three Los Angeles rules attach to the permit itself rather than to the design, and they surprise people. A permit valued over $500 on a house or duplex triggers water-conservation fixture requirements. A valuation over $1,000 triggers smoke detectors in each sleeping room and on each story. A valuation of $10,000 or more triggers an impact-hazard glazing retrofit that expressly includes shower doors, and, where there is gas piping, a seismic gas shut-off valve. Most full bathroom remodels clear all of these.

    There is also a statewide rule worth knowing before you budget. Under Civil Code sections 1101.1 to 1101.8, a property built and available for use on or before 1 January 1994 must have all noncompliant plumbing fixtures in the building replaced as a condition of final approval when a permit is issued for alterations or improvements. Noncompliant means toilets over 1.6 gallons per flush, showerheads over 2.5 gallons per minute and interior faucets over 2.2 gallons per minute. On a 1950s Valley house with three original toilets, that is a real line item in a one-bathroom remodel.

    The code checkpoints inside the sequence

    These are the requirements that decide whether a rough inspection passes. They are worth knowing because they constrain the design, not just the build, and a layout drawn without them gets redrawn.

    Item Requirement Decided at which step
    Toilet clearance Not closer than 15 in from centerline to any side wall or fixture, and not less than 24 in clear in front 1, design
    Shower size Not less than 1,024 sq in of finished interior area, able to contain a 30-in circle, maintained to 70 in above the drain 1, design
    Shower door opening Doors swing out and leave a 22-in unobstructed egress opening 1, design
    Anti-scald valve Pressure-balancing or thermostatic mixing valve, limited to 120°F 5, rough plumbing
    Shower drain 2-in trap and drain for a new shower; see the retrofit exception below 5, rough plumbing
    Bathroom circuit At least one dedicated 20-amp 120-volt circuit for bathroom receptacles 6, rough electrical
    Receptacles GFCI protected, tamper resistant, at least one within 3 ft of the basin 6, rough electrical
    Tub and shower zone No receptacle within 3 ft horizontally and 8 ft vertically of the tub rim or shower threshold; luminaires in that zone listed for damp or wet locations 6, rough electrical
    Lighting controls At least one luminaire on an occupancy or vacancy sensor with automatic off; recessed cans IC-rated and airtight 6, rough electrical
    Ventilation Mechanical exhaust to the outdoors in every room with a tub or shower: 50 CFM intermittent or 20 CFM continuous. A window does not substitute 7, ventilation
    Fan specification ENERGY STAR compliant, ducted to terminate outside, humidity control unless part of a whole-house system 7, ventilation
    Wet-area surface Nonabsorbent finish to 70 in above the drain inlet in Los Angeles 10 and 12
    New fixtures Toilet 1.28 gal/flush, showerhead 1.8 gpm, lavatory faucet 1.2 gpm 13, trim

    Want a real number for your project?

    The site visit and the itemized written estimate are free.

    The ventilation line catches the most people. California requires mechanical exhaust in any room containing a bathtub or shower, and unlike the model code used in most other states there is no operable-window exception. The duct has to terminate outside the building. A fan that dumps into the attic or a soffit cavity is not compliant and, in a Los Angeles climate, is how you get mold in the roof sheathing above a shower.

    Waterproofing: the step that decides whether the bathroom lasts

    Tile and grout are not waterproof, and this is the step where cheap bathrooms are made. There are two legitimate systems and they are not interchangeable.

    A pan liner under a mortar bed

    A sheet membrane or a hot-mopped liner sits under the mortar bed, turns up at least 3 inches vertically at the walls, and drains to the weep holes of a clamping-ring drain. Water passes through the tile and the setting bed and is carried out by the liner. This system only works if there is a pre-slope beneath the liner, sloped to the drain, so the water that reaches the liner actually goes somewhere. A flat liner on a flat floor holds water permanently. It is the most common defect we find in a shower built in the 1990s.

    A bonded membrane over a pre-sloped bed

    A liquid or sheet membrane meeting ANSI A118.10 is applied on top of a pre-sloped mortar bed, directly under the tile, and drains to a bonding-flange drain. Water never enters the setting bed at all. This is what we use on most bathrooms now, including the Inglewood project below. The failure mode to avoid is mixing the two systems: a bonded membrane paired with a clamping-ring drain, or either system without the pre-slope, will leak eventually no matter how good the tile work is. The relevant standards are published by the Tile Council of North America.

    What goes behind the tile

    Water-resistant gypsum board, the green or purple board sold as a bathroom product, is not a shower material. The residential code permits it in a bathroom but not over a vapor retarder in a shower or bathtub compartment, and every California building department handout we work from calls for cement board or fiber-cement backer in the wet area. If a bid says green board in the shower, that bid is not comparable to one that says cement board and a bonded membrane.

    The pan is then filled with water to the level of the rough threshold and left to stand before anything covers it. That test is a code requirement, and in some cities it is a scheduled inspection stop of its own. It is also the last cheap moment to find a problem.

    Converting a tub to a shower

    The received wisdom is that a tub-to-shower conversion means opening the floor or the ceiling below, because a tub drains through a 1.5-inch trap and a shower needs a 2-inch one. In California that is not always true. The plumbing code carries a retrofit allowance: for a bathtub-to-shower conversion, a 1.5-inch trap and trap arm is permitted where the shower is no larger than 36 inches wide by 60 inches long. That is exactly the footprint of a standard alcove tub, so a same-footprint conversion in that size usually keeps the existing drain, and the cost driver everyone warns about disappears. Anything larger than 36 by 60 needs the 2-inch drain. Confirm it with your building department, because this is the kind of provision cities amend.

    What actually determines whether the drain can move is the trap arm limit: the distance from the trap to its vent is capped by pipe size, roughly 42 inches on 1.5-inch pipe and 60 inches on 2-inch, sloped a quarter-inch per foot. Move the drain further than that and you are adding venting, which is when the ceiling below comes down. Ask any contractor quoting a conversion where the vent is, and whether the new drain position stays inside that distance. It is the single question that separates a two-week job from a five-week one.

    One caution that is judgment rather than code: if it is the only bathtub in the house, think hard before removing it. Buyers with small children look for one. We have no data to put behind that, so treat it as an opinion, not a rule.

    Blocking for grab bars, while the walls are open

    Accessibility requirements in the building code apply to multifamily and public buildings, not to a detached single-family house, so nothing here is mandatory for most homeowners. It is still the cheapest thing you will ever do in a bathroom. At step four, while the framing is exposed, screwing horizontal 2x blocking between the studs beside the toilet and along both shower walls costs almost nothing in materials and about an hour of labor.

    The reason it matters is the load. The building code designs grab bars to resist a 250-pound concentrated load applied in any direction. Drywall anchors do not carry that, and no toggle bolt in tile and cement board does either with any confidence. If the blocking is not there, a grab bar added later means opening a finished tiled wall. Put the blocking in now whether or not anyone in the house needs a bar today, and note on the plans where it is. The same logic applies to a curbless shower: it needs the subfloor recessed between the joists, which is a decision at framing and impossible afterwards.

    A real bathroom remodel in Inglewood, in order

    New copper supply lines and drain roughed in through open stud framing, Inglewood bathroom remodel
    Step 5: rough plumbing in open framing
    Waterproofing membrane applied over cement board in the shower before tile, Inglewood bathroom remodel
    Step 10: waterproofing over cement board

    This primary bathroom in Inglewood, completed in 2025, ran the sequence exactly as described. The room came out to the studs. With the walls open, the supply and drain lines were rerouted for the new tub position and the shower valve, which is the only moment those decisions are cheap. Drywall went up on the dry walls and cement board in the wet area, then a waterproofing membrane over the cement board before any tile. Then marble-look panels on the main walls, black textured tile in the shower, and only after all of that the freestanding tub, the double vanity with black stone counters, the sconces and the frameless glass.

    The owners now have a bathroom with none of the original plumbing behind the walls. That is the argument for doing the rough work properly rather than resurfacing: you only have the walls open once. Every stage is photographed on the Inglewood primary bathroom project page, and there are two more finished bathrooms on our Irvine freestanding tub and Ontario hall bathroom project pages.

    How long does a bathroom remodel take, and what sets the schedule?

    Construction takes 2–3 weeks for a same-layout refresh, 3–5 weeks for a mid-range remodel and 5–8 weeks for a full reconfiguration, after 1–4 weeks of design and permitting. That timeline only means something when you know what it is made of. Six things control it, and five of them are in the sequence rather than in the labor:

    • Which permit path you are on. An express or online permit can issue quickly; anything that changes walls or openings goes to plan check with drawings.
    • How many inspection stops there are, and the wait between requesting an inspection and getting one. Work stops at each one, because nothing may be covered before it is approved.
    • Cure and test time. The waterproofing has to cure, and the pan is filled and left standing before tile.
    • Whether the drain moves. If the vent distance forces the ceiling below to be opened, that is another trade, another inspection and another repair.
    • Shower glass, which cannot be templated until the tile is finished and then has to be fabricated.
    • Long-lead items: stone fabrication, a specific tub, a custom vanity.

    Our guide to bathroom remodel cost covers pricing by scope and the typical duration ranges we quote.

    Mistakes that come from working out of order

    • Demolishing before the fixtures are on site. Rough plumbing gets set to a guess, and the tub that arrives three weeks later does not match it.
    • Skipping the pre-slope. The most expensive omission in the trade, and completely invisible once the tile is on.
    • Green board in the shower. Cheap on the bid, and a tear-out in seven years.
    • Venting the fan into the attic. Not compliant, and it moves the moisture problem rather than solving it.
    • No blocking for grab bars. An hour of work at framing, or a demolished tile wall later.
    • Ordering glass from the drawing. Glass is templated against finished tile. Ordering early buys nothing and risks a piece that does not fit.
    • Choosing the vanity after the rough. The drain and the supply stubs end up behind a drawer bank.
    • Tiling to an undecided niche. Frame and locate the niche with the tile layout drawn, so it lands on full tiles.

    Where we remodel bathrooms

    We build bathrooms from our Van Nuys office across the San Fernando Valley, the rest of Los Angeles County, Orange County, Ventura County, western Riverside County and western San Bernardino County. The work varies with the housing stock: 1950s and 1960s Valley houses usually mean galvanized supply lines and cast-iron drains that are worth replacing entirely while the walls are open, Orange County tracts from the 1970s and 1980s are more often a straight reconfiguration, and older Pasadena and Los Angeles houses bring lath and plaster, undersized venting and sometimes a hot-mopped pan at the end of its life. See our bathroom remodeling service and all of our service areas.

    Bathroom remodel order FAQs

    In what order should you remodel a bathroom?

    Design and selections, permit, demolition, framing and blocking, rough plumbing, rough electrical, exhaust ventilation, rough inspection, backer board and drywall, waterproofing, the shower pan water test, tile, then vanity, fixtures and lighting, then shower glass, then final inspection and punch list. The order is set by inspection stops and by each trade needing the previous one finished, so it is not adjustable.

    Does the floor or the shower tile go in first?

    All tile goes in after waterproofing is complete and the shower pan has been water tested, and before the vanity, toilet and trim. Within the tile stage, walls are usually set before the floor in a shower so that the wall tile lands on the pan correctly, and the bathroom floor is generally tiled before the vanity and toilet are set so the finished floor runs under them.

    When should I buy the fixtures?

    Before demolition. Rough plumbing is set to the actual tub, shower valve, vanity and toilet you have chosen, and their real dimensions and rough-in requirements. Buying after the rough is the most common cause of a bathroom that has to be opened up twice.

    Do I need a permit to remodel a bathroom in Los Angeles?

    In most cases yes. Replacing cabinets, flooring, wall finishes, tile, counters and fixtures can be pulled as a combined permit online in the City of Los Angeles. Changing walls or openings, or making new plumbing or electrical penetrations into existing walls, requires floor plans and a full submittal. A permit also triggers Los Angeles retrofit rules at $500, $1,000 and $10,000 of valuation, and on a property built on or before 1 January 1994 it triggers replacement of all noncompliant plumbing fixtures in the building under state law.

    Can I convert a tub to a shower without moving the drain?

    Often, yes. The California Plumbing Code allows a 1.5-inch trap and trap arm for a bathtub-to-shower retrofit where the shower is no larger than 36 inches wide by 60 inches long, which is the footprint of a standard alcove tub. A same-size conversion in that range can usually keep the existing drain. A larger shower needs a 2-inch drain, and moving the drain beyond the trap-arm-to-vent distance means adding venting and opening the ceiling below.

    Does a bathroom need an exhaust fan if it has a window?

    Yes. California requires mechanical exhaust directly to the outdoors in every room containing a bathtub, shower or tub-shower combination, at 50 CFM intermittent or 20 CFM continuous. There is no operable-window exception here as there is in the model code used in many other states, and the duct must terminate outside the building rather than in the attic.

    What is the minimum size for a shower in California?

    Not less than 1,024 square inches of finished interior area, capable of containing a 30-inch circle, maintained to a point 70 inches above the shower drain. If a door is fitted it must swing out and leave a 22-inch unobstructed opening. A toilet needs at least 15 inches from its centerline to any side wall or fixture and 24 inches of clear space in front.

    Is green board acceptable behind shower tile?

    No. Water-resistant gypsum board may be used elsewhere in a bathroom but not over a vapor retarder in a shower or bathtub compartment, and California building departments call for cement board or fiber-cement backer in the wet area, with a waterproofing system over it. Tile and grout alone are not a waterproofing system.

    Get a written bathroom remodel price and a sequence you can see

    We will look at the existing plumbing and venting, tell you honestly whether the drain has to move, confirm the permit path for your city, and give you an itemized proposal with the stages laid out in order so you know what happens in which week. The site visit takes about two hours and the written proposal follows within 48 hours. The site visit and the estimate are free, and we reply within one business day.

  • How Much Does a Whole-Home Renovation Cost in Los Angeles?

    How Much Does a Whole-Home Renovation Cost in Los Angeles?

    A whole-home renovation in Los Angeles typically costs $100 to $500 per square foot of house: about $200,000 to $350,000 to refresh a 2,000-square-foot house cosmetically, $300,000 to $500,000 for a multi-room renovation, and $500,000 to $800,000 to take the same house down to the studs. Moving walls, changing the roof line or touching the foundation pushes it past that. Green Design and Build is a licensed general contractor (CSLB #1110975) based in Van Nuys that designs, permits and builds whole-home renovations for homeowners across Los Angeles County, Orange County, Ventura County, western Riverside County and western San Bernardino County. The figures on this page are typical Los Angeles budgeting ranges, not a quote; your number depends on how much of the house you open, what demolition finds, and the finishes you choose.

    We are led by Dekel Sofer; the company has completed hundreds of projects and holds a 4.7-star rating across 146 reviews on Yelp.

    On this page

    Whole-home renovation cost by scope

    Whole-house work is priced per square foot of the house, not per square foot of the rooms you are changing. The table gives the range for each level of work and what it comes to on the three house sizes we see most often across the San Fernando Valley and Orange County.

    Level of work Per sq ft of house 1,500 sq ft house 2,000 sq ft house 2,500 sq ft house
    Cosmetic refresh, whole house $100–$175 $150,000–$260,000 $200,000–$350,000 $250,000–$440,000
    Multi-room renovation $150–$250 $225,000–$375,000 $300,000–$500,000 $375,000–$625,000
    Full gut to the studs $250–$400 $375,000–$600,000 $500,000–$800,000 $625,000–$1,000,000
    Gut plus structural changes $350–$500+ $525,000–$750,000+ $700,000–$1,000,000+ $875,000–$1,250,000+

    How we estimated these numbers

    The ranges on this page are budgeting estimates for Southern California, not a price list. They are drawn from Green Design and Build’s own written proposals and completed projects across Los Angeles, Orange, Ventura and western Riverside and San Bernardino counties, checked against current supplier and subcontractor pricing. A real project can come in lower or higher depending on the house, the scope and the finishes. Reviewed by Dekel Sofer, founder and CEO of Green Design and Build (California contractor license #1110975, Class B, General Building), September 2026. Publishers and journalists are welcome to cite these figures with a link to this page.

    Those ranges include design, engineering, permits, demolition, all trades, materials and finishes at a normal mid-range to upper-mid-range specification. They do not include furniture, landscaping, a pool, a detached structure or the cost of living somewhere else while the work happens.

    What you get at each level

    Cosmetic refresh, $100 to $175 per square foot

    Nothing structural moves and very little plumbing or electrical is rerouted. New flooring throughout, paint inside and out, new interior doors and hardware, new lighting and switches, refinished or replaced kitchen cabinets with new counters, and bathrooms updated in place with the same fixture locations. This is the level where a house stops looking dated without the walls ever coming down, and it is the best value per dollar of the four. For the line items, see our cost guides to hardwood floors, vinyl plank flooring, interior painting and exterior painting.

    Multi-room renovation, $150 to $250 per square foot

    The kitchen and bathrooms are taken back to the framing and rebuilt, usually with new layouts, while bedrooms and hallways get the cosmetic treatment. Plumbing and electrical are rerouted in the rooms being rebuilt. Most of the whole-house projects we run land here. See our guides to kitchen remodel cost and bathroom remodel cost for what those rooms carry on their own.

    Full gut to the studs, $250 to $400 per square foot

    Every interior surface comes off. The house is rewired and repiped, the HVAC is replaced, insulation goes in everywhere the walls are open, and the entire interior is rebuilt. On a 1950s to 1970s house this is often the only honest answer, because the wiring, the galvanized supply lines and the single-pane windows all reach the end of their lives at the same time. Layouts can change freely as long as bearing walls stay put.

    Gut plus structural changes, $350 to $500 and up

    Bearing walls come out and steel or engineered beams go in, the roof line changes, windows are enlarged, or the foundation is repaired or extended. Everything above applies, plus a structural engineer, deeper footings, and a longer plan check. If you are also adding square footage, price that part separately at addition rates; our room addition cost guide covers those.

    What changes the price

    Two houses of the same size on the same street can be $300,000 apart. When they are, it is one of the items below.

    How much of the house you actually open

    Drywall is cheap; what is behind it is not. Once a wall is open you are into rewiring, repiping, insulation, and whatever framing repair the inspector wants. Deciding to open one more room is rarely a small decision, and deciding to leave a room closed is the single most effective way to hold a budget down.

    Kitchens and bathrooms carry most of the budget

    On a typical whole-house project the kitchen and bathrooms are roughly half the money in about a fifth of the floor area. A published kitchen remodel in Los Angeles runs $25,000 to $100,000 or more on its own, and each full bathroom adds meaningfully on top. If the whole-house number is coming in high, these rooms are where the specification actually moves it.

    What demolition finds

    Knob-and-tube wiring, galvanized water lines, cast-iron drains at the end of their life, termite damage in the sill plate, a rotted subfloor under a bathroom, an unpermitted addition framed without a header. None of it is visible before demolition, and all of it is common in Valley houses from the 1950s and 1960s. We carry an allowance for it and price the work as it is uncovered, with the framing photographed and shown to you before anything is closed up. If the house already shows signs of foundation movement, get that assessed before the design is finished rather than after demolition.

    The electrical service

    No code section says a remodel requires a new panel. What forces it is the load calculation: add an induction range, a heat pump, a heat-pump water heater and an EV charger to a 1950s 100-amp service and the calculation fails. In the City of Los Angeles, an electrical service up to 400 amps in an existing residential building qualifies for an express permit with no plan check, so the permitting is straightforward; the cost sits in the panel, the service conductors and the utility coordination for the meter, which runs on its own track alongside the city permit. That work is performed by licensed electrical contractors and scheduled and supervised by us as your general contractor.

    The energy code, once the walls are open

    The 2025 California Energy Code took effect for permits filed on or after 1 January 2026, and the edition is set by your permit application date. On an alteration it does not ask for everything, but it does ask for specific things once you disturb specific assemblies: walls you open must be insulated to roughly R-15 in a 2×4 cavity or R-21 in a 2×6, altered ceilings go to about R-49 in most Los Angeles-area climate zones, replacement windows must meet current U-factor and solar-heat-gain numbers, and 25 feet or more of new or replaced duct triggers sealing and third-party leakage testing. Altered or replacement heating systems generally may not use electric resistance as the primary heat source. Los Angeles spans several energy-code climate zones, so the exact numbers depend on your address. The full requirements are in the California Energy Commission’s 2025 Single-Family Residential Compliance Manual.

    Fire-zone requirements

    In a Very High Fire Hazard Severity Zone, the wildland-urban interface requirements are not a new-construction-only code. LADBS applies them to alterations and additions: replacing 50 percent or more of the roof within 12 months means the new roof must meet current standards and achieve a Class A rating, and altering exterior walls, windows, doors, decking or siding pulls that work into compliance too. Ember-resistant vents, ignition-resistant decking and rated glazing are the usual line items. Check your address against the state map and confirm with your building department at permit time, because jurisdictions adopted the 2025 CAL FIRE zone maps on their own schedules. Our roof replacement cost guide covers the roofing side of this in detail.

    Finishes, and how late you choose them

    The spread between a good stock cabinet and a custom one, or between a porcelain slab and a book-matched natural stone, is easily $80,000 across a whole house. The more expensive problem is timing. Custom cabinets take about three weeks to manufacture after the order is placed, and a decision made after framing is finished usually costs more than the material difference, because it moves the electrical, the plumbing rough-in and the tile crew with it. We settle finishes during design, not during construction.

    Do you need permits for a whole-home renovation in Los Angeles?

    Yes, and usually four of them. LADBS issues building, electrical, plumbing and mechanical permits separately, and a whole-house project needs all four. The question that matters is which review track you land on. Simple like-for-like work, including a kitchen or bathroom remodel with no structural changes, can go through an express permit with no plan check. The moment you move a bearing wall, change the roof structure or go past 400 amps of electrical service, you are into plan check with stamped drawings.

    LADBS does not publish a committed turnaround for regular residential plan check; its own description is that plans are assigned within a few days and returned within weeks depending on workload, with an expedited option available for 50 percent more of the plan check fee. In our experience across Los Angeles-area jurisdictions, plan check on a whole-house remodel runs one to six weeks. There is also an LA-specific trigger worth knowing: the Los Angeles Green Building Code applies to any alteration with a valuation greater than $200,000, which a whole-house renovation almost always exceeds even with no added square footage. Other cities in our service area do not have that valuation trigger.

    The four rules that can turn a remodel into a rebuild

    This is the part that surprises homeowners, and it is the reason a “we will just keep one wall” plan so often fails. There is no single definition of a major remodel in Los Angeles. There are four separate percentage tests in four different bodies of law, and a gut remodel can trip them independently. Cross one and your existing house stops being grandfathered and starts being measured against today’s rules.

    Test Threshold What crossing it triggers
    Zoning floor-area documentation Demolishing more than 50% of perimeter exterior walls and more than 50% of the roof, or adding more than 1,000 sq ft Full as-built architectural and engineering plans; the house is measured against current floor-area ratio, height and setback rules
    Legal nonconforming status (LAMC 12.23) Retaining less than 50% of the perimeter wall length of the nonconforming portion Loss of the grandfathered setback or yard; the rebuilt house must meet today’s setbacks
    Hillside major remodel (LAMC 12.03) Alterations worth more than 50% of the building’s replacement cost within any one-year period Baseline Hillside Ordinance standards: slope-based floor area, height limits, grading caps, street dedication
    Building code alteration level (California Existing Building Code) Work area exceeding 50% of the aggregate building area Level 3 requirements that reach beyond the work area: egress, fire protection, structural and building services

    The hillside test is a value test rather than a wall-percentage test, and it aggregates over a rolling year, so phasing the project across two winters does not avoid it. The nonconforming rule is the one that catches the most people: a 1930s house sitting in what is now the side-yard setback keeps that position only if you keep half the perimeter wall length of the nonconforming portion. Gut it past that line and the new house has to sit where today’s code says it can. The restoration allowance in the same section is capped at 75 percent of replacement value. You can read the section itself in LAMC 12.23.

    Also check ZIMAS for overlays before you pay for drawings. A Historic Preservation Overlay Zone means most exterior changes need Planning approval and significant changes can be under review for up to 75 days. In the Coastal Zone the thresholds are far tighter than anywhere else in the city: a coastal development permit is required once internal floor area increases by 10 percent or height increases by 10 percent, and the single-family improvement exemption itself depends on retaining 50 percent or more of the existing exterior walls.

    Asbestos and lead: the step before demolition

    On any house built before about 1990, an asbestos survey sits on the critical path before demolition starts, and it is a regional rule that covers Los Angeles, Orange, Riverside and San Bernardino counties. Under South Coast AQMD Rule 1403, a survey report signed by a Certified Asbestos Consultant is required before any demolition or renovation, with a narrow exception for single-unit dwellings where less than 100 square feet of intact material is disturbed. Removing more than 100 square feet of material containing more than 1 percent asbestos requires notification 10 working days ahead, and only contractors on the Cal/OSHA asbestos registration may do the removal. A whole-house project clears those thresholds easily, so build the survey and the notification window into the schedule rather than discovering them the week demolition was supposed to start.

    Lead is the second one. Houses built before 1978 fall under the federal Renovation, Repair and Painting rule, which requires the firm doing the work to be certified and to use certified renovators following specific containment practices. A whole-house remodel of a pre-1978 house will exceed any plausible threshold, so ask any contractor bidding your project to show you their certification. It is a fair question and a licensed firm will not mind it.

    How long does a whole-home renovation take?

    Plan on two to five months of construction, plus roughly one to three months of design and permitting before anyone swings a hammer. The design and permitting stage is the one homeowners consistently underestimate.

    Phase Typical duration What happens
    Feasibility and site assessment 2–4 weeks Site visit, measurements, zoning and overlay check, scope and budget alignment
    Design and engineering 10–20 days Plans, structural engineering where walls move, energy compliance documents, 3D rendering
    Plan check 1–6 weeks City review and corrections; longer with hillside, coastal or historic review
    Construction 2–4 months typical, up to 5 on a full gut Demolition, rough trades and inspections, insulation, drywall, cabinets, tile, finishes
    Close-out 1–4 weeks Final inspections, punch list, cleaning, handover

    Two things stretch a schedule more than anything else: decisions made late, and long-lead materials ordered late. Custom cabinets alone take about three weeks to manufacture. We approve a 3D rendering before demolition starts precisely so the layout and the finish list are settled while changing them is still free.

    Should you move out?

    For a full gut, yes. There is no functioning kitchen, the bathrooms are out, the power is off in sections, and the dust from demolition goes everywhere regardless of containment. Most families move out for the two to five months of construction, and that housing cost belongs in the project budget from the start, not as a surprise in month two.

    The alternative is a phased, room-by-room renovation where you keep a working kitchen or bathroom while the other half of the house is under construction. Phasing typically runs two to five months as well, and it is genuinely the right answer for some households, but it is not cheaper. Crews mobilize more than once, temporary partitions and protection get built and rebuilt, and the trades cannot run their rough-in in one continuous pass. Decide this before design, because it changes how the drawings are sequenced.

    A real whole-home remodel in Encino

    Interior stripped to the studs during a whole-home remodel in Encino, CA
    Demolition: down to the studs
    Finished white kitchen with quartz waterfall island after a whole-home remodel in Encino, CA
    After: the finished kitchen

    The Encino project is a good illustration of what a multi-room renovation actually involves. The interior was stripped back to framing so the electrical and plumbing could be rerouted for new layouts in the kitchen and both bathrooms, and the subfloor and framing were repaired where demolition exposed problems, before anything went back in. The kitchen was rebuilt with white shaker cabinets, a marble-look tile backsplash and a dark island wrapped in a quartz waterfall top; the primary bath went to large-format black marble-look slabs with a floating fluted vanity, the second bath to a double vanity with backlit mirrors; the living room fireplace was rebuilt as a full-height stone surround with a slat-wood wall that hides the television wiring. New flooring and doors ran throughout.

    The sequence matters more than any single finish. Cabinets were set first, then counters templated to the installed cabinets, then tile. Doing it in that order is why the backsplash meets the counter cleanly. Photographs of every stage are on the Encino whole-home remodel project page.

    What actually pays you back at resale

    If part of the reason for the project is resale value, the pattern in the data is consistent and slightly counterintuitive: modest exterior and mid-range work recoups far more than large upscale interior work. The figures below are the Los Angeles market rows from the 2025 Cost vs. Value Report, which is an industry survey rather than a government dataset, and which reports averages across the metro rather than your street.

    Project (Los Angeles, 2025 report) Job cost Resale value Cost recouped
    Siding replacement, fiber-cement $21,879 $28,030 128.1%
    Minor kitchen remodel, midrange $29,765 $37,768 126.9%
    Bath remodel, midrange $27,143 $24,312 89.6%
    Window replacement, vinyl $23,783 $19,799 83.2%
    Roofing replacement, asphalt $36,417 $26,804 73.6%
    Major kitchen remodel, midrange $86,214 $49,079 56.9%
    Bath remodel, upscale $85,055 $35,982 42.3%
    Major kitchen remodel, upscale $171,369 $65,023 37.9%
    Primary suite addition, midrange $182,518 $58,271 31.9%

    Source: 2025 Cost vs. Value Report, Los Angeles market (JLC); metro-wide survey averages, not Green Design and Build estimates.

    The practical reading: a whole-home renovation is mostly a decision about how you want to live, not an investment that returns its cost. If resale is the driver, the money goes furthest on the envelope and on mid-range kitchens and baths. If you are staying ten years, spend where you will notice it every day and ignore the percentages.

    How to compare whole-home renovation quotes

    Quotes for a whole house are only comparable when they describe the same scope, and on projects this size the differences are usually hidden in what is left out. Check that each proposal states, line by line: which rooms are taken to the studs and which are cosmetic; whether design, structural engineering and energy compliance documents are included or billed separately; the permit and plan check fees, and who pays for corrections; the asbestos survey and any abatement; a named allowance for concealed conditions found at demolition, and the unit price beyond it; the actual cabinet line, counter material and tile allowances rather than the word “standard”; whether appliances, light fixtures and plumbing fixtures are supplied or owner-provided; the electrical service size the price assumes; temporary protection, dust containment and debris disposal; and the warranty.

    Then check the contract terms, because California sets rules here and they are worth knowing. Under the CSLB home improvement contract rules, the down payment on a home improvement contract may not exceed $1,000 or 10 percent of the contract price, whichever is less; payments may not run ahead of the value of work performed; and you have three business days to cancel, or five if the buyer is 65 or older. Verify the license itself on the CSLB website, with workers’ compensation on file. A contractor asking for a third of the job up front is telling you something about how they are funded. Our guide on how to hire a general contractor without getting scammed goes through the rest of the red flags, and what a Los Angeles general contractor costs explains how overhead and management fit into a number like this.

    Where we do whole-home renovations

    We run whole-home renovations from our Van Nuys office across the San Fernando Valley, the rest of Los Angeles County, Orange County, Ventura County, western Riverside County and western San Bernardino County. The work changes with the housing stock. Valley ranch houses from the 1950s and 1960s usually need rewiring, repiping and a wall taken out between the kitchen and the dining room. Post-war Orange County tracts tend to be cosmetic refreshes with one reconfigured bathroom. Hillside houses in the Santa Monica Mountains and the canyons bring the hillside ordinance, fire-zone materials and access constraints with them. Spanish and Mediterranean houses in Pasadena and the Inland Empire come with tile roofs and plaster that reward keeping rather than replacing. See all of our service areas, or read more about our full home renovation service.

    If you plan to finance the work, our financing page explains the programs we offer and how progress payments work under California law.

    Whole-home renovation cost FAQs

    How much does it cost to renovate a whole house in Los Angeles?

    About $100 to $500 per square foot of house, depending on how deep the work goes. On a 2,000-square-foot house that is roughly $200,000 to $350,000 for a whole-house cosmetic refresh, $300,000 to $500,000 for a multi-room renovation with the kitchen and bathrooms rebuilt, $500,000 to $800,000 for a full gut to the studs, and $700,000 and up when bearing walls, the roof line or the foundation change. These are typical Los Angeles budgeting ranges, not a quote.

    Is it cheaper to renovate or to tear down and rebuild?

    Renovating is usually cheaper as long as you stay on the right side of the thresholds that trigger full current-code compliance. Once a project demolishes more than half the perimeter walls and more than half the roof, it needs full as-built plans and is measured against today’s floor-area, height and setback rules, and it may forfeit a grandfathered setback. At that point the cost gap between a deep remodel and new construction narrows considerably, and rebuilding can buy you a better plan for similar money. The test is worth running early, during feasibility, not after demolition.

    How long does a whole-house renovation take?

    Two to five months of construction, plus about one to three months of design and permitting first. Within that: feasibility and site assessment two to four weeks, design and engineering 10 to 20 days, plan check one to six weeks, construction two to four months for most projects and up to five for a full gut, and close-out one to four weeks. Hillside, coastal or historic review adds time at the plan check stage.

    Do I need to move out during a whole-home renovation?

    For a full gut, effectively yes; most families move out for the two to five months of construction, and that housing cost should be in the budget from the start. A phased room-by-room renovation lets you stay, and also runs about two to five months, but it costs more rather than less because crews mobilize repeatedly and the trades cannot run their rough-in in one pass.

    Do I need permits to renovate my whole house in Los Angeles?

    Yes. LADBS issues building, electrical, plumbing and mechanical permits separately and a whole-house project needs all four. Like-for-like work with no structural changes can go through an express permit with no plan check; moving a bearing wall, changing the roof structure or exceeding 400 amps of electrical service moves the project into plan check with stamped drawings. In the City of Los Angeles, any alteration valued above $200,000 also falls under the Los Angeles Green Building Code, which a whole-house renovation almost always does.

    Does a whole-house remodel require solar panels?

    No. Under the California Energy Code, the solar photovoltaic requirement applies to newly constructed homes, not to alterations or additions to an existing single-family house. A remodel, even a complete gut, does not trigger a solar requirement. It does trigger the alteration requirements: insulation in walls you open, current window performance on replacements, duct sealing and testing, and limits on electric-resistance heating.

    Which renovations add the most value in Los Angeles?

    According to the 2025 Cost vs. Value Report for the Los Angeles market, fiber-cement siding replacement recoups about 128 percent of its cost and a minor midrange kitchen remodel about 127 percent, while a midrange bath remodel recoups about 90 percent, a major midrange kitchen about 57 percent, and a midrange primary suite addition about 32 percent. The pattern is that modest exterior and mid-range interior work returns more than large upscale projects. These are metro-wide survey averages, not a valuation of your house.

    How much should I pay before work starts?

    On a California home improvement contract, no more than $1,000 or 10 percent of the contract price, whichever is less. After that, payments follow a written schedule tied to work actually completed, and a payment may not exceed the value of the work performed. A request for a large percentage up front on a project of this size is a reason to slow down and ask how the contractor is funding your job.

    Sources

    The payment rule and the code requirements on this page are set by the state; the price ranges are our own, from whole-home renovations we have built, and they move with the market. Title 24 is amended on a three-year cycle. Confirm current requirements before you budget.

    Last reviewed 17 September 2026.

    Get a written price for your whole-home renovation

    We will walk the house, check the zoning, overlays and fire-zone status for your address, look at the panel, the plumbing and the framing where we can see it, and talk through which rooms genuinely need to be opened before we write a number. The site visit takes about two hours, the written proposal follows within 48 hours, and it is itemized by room and by trade rather than given as one figure. Design, engineering, permits and construction run under one contract with one project manager. The site visit and the estimate are free, and we reply within one business day.

  • How Much Does a Roof Replacement Cost in Los Angeles?

    How Much Does a Roof Replacement Cost in Los Angeles?

    A roof replacement in Los Angeles typically costs $12,000 to $65,000 for a single-story house of 1,500 to 2,000 square feet: about $5 to $10 per square foot of roof for composition shingle, $8 to $15 for a tile lift and relay, $10 to $20 for new concrete tile, and $15 to $30 for clay tile or standing-seam metal, all with tear-off, material and labor. Green Design and Build is a licensed general contractor (CSLB #1110975) based in Van Nuys that manages roof tear-offs, repairs and replacements as your general contractor for homeowners across Los Angeles County, Orange County, Ventura County, western Riverside County and western San Bernardino County. The roofing itself is performed and permitted under a C-39 Roofing license, by a roofing contractor scheduled and supervised by us as your general contractor. The figures on this page are typical Los Angeles budgeting ranges, not a quote; your number depends on the material, the size and pitch of the roof, and what the tear-off finds underneath.

    We are led by Dekel Sofer; the company has completed hundreds of projects and holds a 4.7-star rating across 146 reviews on Yelp.

    On this page

    Roof replacement cost by material

    The material sets most of the number. The table gives the per-square-foot range for each kind of roof we price, and what that comes to on a typical 1,500 to 2,000-square-foot single-story house, whose roof is somewhat larger than its floor area, including tear-off of the old covering, underlayment, flashing and the new roof. Repairs are priced by the job.

    Roofing work Per sq ft of roof 1,500–2,000 sq ft single-story house
    Roof repair (flashing, a few tiles, one leak) By the job $500–$3,000
    Composition (asphalt) shingle, tear-off and replace $5–$10 $12,000–$25,000
    Tile lift and relay (new underlayment, tile reused) $8–$15 $15,000–$30,000
    Concrete tile, new roof $10–$20 $20,000–$45,000
    Clay tile, new roof $15–$30 $30,000–$65,000
    Standing-seam metal $15–$30 $30,000–$65,000
    Flat roof, torch-down modified bitumen $5–$10 $8,000–$20,000
    Flat roof, TPO single-ply $7–$14 $11,000–$28,000

    Roofers quote in “squares” (100 square feet of roof), so a $5 to $10-per-square-foot shingle roof is $500 to $1,000 a square. The roof area is larger than the floor area because of the pitch and the overhangs; a 1,600-square-foot single-story ranch house in the San Fernando Valley usually carries 1,800 to 2,100 square feet of roof, and a two-story house of the same floor area has roughly half that. Our guide to what a Los Angeles general contractor costs covers how these trade prices fit into a larger remodel.

    What changes the price of a roof replacement

    Two houses on the same street can get quotes $15,000 apart for what sounds like the same roof. When they do, it is one of the items below.

    The material and its weight

    Composition shingle is the least expensive roof to install and the right choice for most pitched roofs, including the 1950s to 1970s Valley ranch houses where we manage the most re-roofs: laminated architectural shingles in a Cool Roof Rating Council-rated color over synthetic underlayment, with ice-and-water membrane in the valleys and around penetrations. Concrete and clay tile cost two to three times as much and weigh roughly 9 to 12 pounds per square foot, so moving from shingle to tile needs a structural review of the framing, and that engineering is part of the price. Standing-seam metal costs about what clay tile does and is gaining ground on hillside and fire-zone homes because it is Class A in a tested assembly, sheds embers and takes solar clamps instead of roof penetrations.

    What the tear-off finds

    Rotten plywood only shows itself after the old roof comes off, and the deck is the most common reason a roofing job costs more than the quote. We replace up to 10 percent of the deck at no additional charge and price anything beyond that per sheet, before we cover it, so you see the damaged sections and the number at the same time. A house with two layers of old shingles also costs more to tear off and dispose of than a house with one, and California code does not allow a third layer, so a roof that already has two must come down to the deck.

    Size, pitch and complexity

    A simple gable roof with two planes is the cheapest roof to cover. Every hip, valley, dormer, skylight, chimney and plumbing vent adds cut tile or shingle, flashing and labor, and a steep pitch slows the crew and adds fall protection. A 2,000-square-foot roof cut up by four valleys and three skylights can cost as much as a plain 2,600-square-foot roof in the same shingle.

    Solar, gutters and ventilation

    If you have solar panels, they come off before the tear-off and go back on after the final inspection. That work is performed by licensed solar and electrical contractors and scheduled and supervised by us as your general contractor, and it runs roughly $1,500 to $5,000 depending on the size of the array. Seamless aluminum gutters and downspouts installed with the roof run about $8 to $20 per linear foot. Attic ventilation is worth adding while the roof is open: the residential code calls for net free vent area of at least 1/150 of the attic floor, and on most 1950s to 1970s Valley houses the soffit vents are painted shut or missing.

    Cool-roof and fire-zone requirements

    These are code requirements rather than options, and they narrow which products you can use. Under the 2025 California Energy Code, in effect for permits filed on or after January 1, 2026, replacing more than 50 percent of a roof triggers the cool-roof requirement, and products must carry a Cool Roof Rating Council label; the City of Los Angeles has separately required cool roofs on residential re-roofs since 2014. In a Very High Fire Hazard Severity Zone, which now includes much of the hillside Valley, the Santa Monica Mountains and the Orange County canyons after CAL FIRE’s March 2025 maps, the roof must be a Class A assembly with closed gaps under tile at the eaves and ridges, metal valley flashing, ember-resistant vents and no wood shakes or shingles. Cool-rated shingles and Class A assemblies are standard products now and rarely move the price much, but a fire-zone roof that also needs new vents, gutter covers and eave closures is a larger job than a like-for-like re-roof.

    Repair, overlay or full replacement?

    Repair makes sense when the covering has years left and the leak has a specific cause: a cracked pipe-jack boot, a rusted valley, a slipped tile, or a failed seam on a flat roof. Most repairs land between $500 and $3,000. What a repair cannot fix is underlayment gone brittle everywhere; patching one spot moves the leak to the next. If the worn-out roof is a flat or low-slope section, our guide to flat roof replacement compares TPO, torch-down and cap sheet and explains the drainage, insulation and cool-roof rules that come with it.

    Overlay means new shingles over the existing layer. The California Residential Code does not allow it where the roof already has two or more layers, where the covering or deck is water-soaked or deteriorated, or over wood shake, slate or tile. We rarely recommend one even when it is legal: it hides damaged decking, adds weight, traps heat, and makes the next replacement cost more because there are two layers to remove instead of one.

    Full replacement is a tear-off to the deck, replacement of damaged sheathing, new underlayment, new flashing at every penetration, and the new covering. It is the only option that lets you see the deck, and it is what every figure in the table above describes.

    Tile roofs: lift and relay for about half the cost of new tile

    If your tile roof dates from the 1980s or 1990s, the felt underneath is probably at the end of its life even if the tile looks perfect; the first signs are leaks at valleys and skylights and staining on the underside of the sheathing. A lift and relay removes the tile in sections, tears off the old underlayment and battens, replaces damaged sheathing, installs new underlayment with new metal at every valley, eave, wall and penetration, and resets the original tile with new fasteners. Broken tiles come from matching salvage stock. At $8 to $15 per square foot you keep the look for roughly half the cost of a new tile roof, and because the weight does not change, the job qualifies for the same express permit as any re-roof.

    Do you need a permit to replace a roof in Los Angeles?

    Yes. In the City of Los Angeles, which includes most of the San Fernando Valley, a re-roof is an express permit with no plan check when the new covering is Class A or B, weighs less than 6 pounds per square foot, and goes over solid sheathing. Heavier tile, new skylights, a pitch change or rafter work means plan check. The contractor certifies the finished work on the LADBS Re-roofing Certificate of Compliance, and any new sheathing gets a nailing inspection before it is covered. Our post on whether you need a permit to replace a roof in Los Angeles walks through the process. Burbank, Glendale, Pasadena, Santa Clarita, unincorporated Los Angeles County and every Orange County city issue their own re-roof permits under the same state codes.

    The permit is a small part of the cost, and a quote that leaves it out is not cheaper. Without one there is no inspection of the new sheathing, no Certificate of Compliance for the next buyer’s disclosure, and no cool-roof or Class A documentation if the house is ever in a fire-zone insurance review.

    Sources: LADBS Information Bulletin P/GI 2026-003, Express Permits (lists re-roofing among the work that can be permitted without plan check); California Energy Commission, 2025 Building Energy Efficiency Standards (the 2025 Energy Code and its cool-roof rules, which apply to permit applications filed on or after January 1, 2026).

    How long does a roof replacement take?

    Job Typical duration once material is on site
    Composition shingle tear-off and replace 2–5 working days
    Tile lift and relay, or new tile roof 1–2 weeks
    Standing-seam metal 1–2 weeks
    Flat roof (torch-down, TPO or foam) 2–4 working days

    These are typical Los Angeles budgeting estimates, not a price list or a quote. Your project can come in lower or higher depending on the house, the scope and the finishes; the only real number is a written proposal after a site visit.

    An LADBS express re-roof permit is usually issued in days; heavier tile or new skylights go through plan check, and solar removal adds about a week on each side of the roofing work for the panels to come off and go back on. Add a week or two for shingle or tile to arrive if you choose a color that is not stocked locally.

    A real roof: what the tear-off found in Newport Beach

    Before: rotted decking at the eave — roof replacement in Newport Beach, CA
    Before: rotted decking at the eave
    After: new shingle roof — roof replacement in Newport Beach, CA
    After: new shingle roof

    In October 2025 we managed a roof replacement on a single-story house in Newport Beach that looked fine from the street. Once the old roofing came off, the original plank decking at the eaves was rotted through in several places, with old vent openings cut into it. The damaged boards were cut out and replaced and the fascia checked before any underlayment went on; then synthetic underlayment, new flashing and a light-gray architectural shingle went across the full roof, including the chimney and vent details. The homeowner saw the damaged sections before they were covered, which is the point of a full tear-off. Photos of every stage are on the Newport Beach roof replacement project page, and a Buena Park roof from August 2026 shows the same thing: one area of rotted decking under curling shingles, cut out and replaced before the new underlayment.

    The same lesson is in our permit post: on a 1960s San Fernando Valley shingle replacement, tear-off exposed about 80 square feet of soft, stained deck around a bathroom vent from a slow leak nobody had seen from inside. Covering it would have put a new roof over a failing deck.

    How to compare roofing quotes

    Quotes for the same roof are only comparable when they describe the same work. Check that each one lists the tear-off and disposal of every existing layer, the underlayment product (synthetic or felt, and the ice-and-water membrane at valleys and penetrations), new flashing at every pipe, wall and chimney rather than reuse of the old metal, the exact shingle or tile product and its Cool Roof Rating Council listing, how much deck replacement is included and the per-sheet price beyond it, the permit and the Certificate of Compliance, ventilation, and the manufacturer’s and the contractor’s workmanship warranties. A quote priced in squares should say how many squares it counted; a difference of five squares on a 20-square roof explains a lot of price gaps. Confirm the license on the CSLB site: the contractor performing and permitting the roofing must hold an active C-39 Roofing classification, with workers’ compensation on file.

    Where we manage roof replacements

    We manage re-roofs from our Van Nuys office across the San Fernando Valley, the rest of Los Angeles County, Orange County, Ventura County, western Riverside County and western San Bernardino County. The material mix changes with the area: composition shingle on Valley and South Bay ranch houses, concrete and clay tile on the Spanish and Mediterranean homes of Pasadena, Orange County and the Inland Empire, flat torch-down and TPO on mid-century Valley houses and garage conversions, and Class A shingle or metal on hillside and canyon homes in the fire zones. The cool-roof rule reaches all of it: the Valley and Los Angeles basin, Orange County, inland Ventura, Riverside and San Bernardino all sit in climate zones where a steep-sloped re-roof needs a cool-rated product, and only the coast in Climate Zone 6 escapes the steep-slope rule. See all of our service areas.

    Related cost guides: Foundation repair cost · Window replacement cost · Exterior house painting cost. If you plan to finance the work, our financing page explains the programs we offer and how progress payments work under California law.

    Roof replacement cost FAQs

    How much does a new roof cost in Los Angeles?

    A new roof on a typical 1,500 to 2,000-square-foot single-story house in Los Angeles costs about $12,000 to $25,000 in composition shingle, $15,000 to $30,000 for a tile lift and relay, $20,000 to $45,000 in new concrete tile, and $30,000 to $65,000 in clay tile or standing-seam metal, including tear-off. Flat roofs run $8,000 to $28,000 depending on the system. These are typical Los Angeles budgeting ranges, not a quote.

    How much does a roof replacement cost per square foot?

    In Los Angeles, composition shingle runs about $5 to $10 per square foot of roof with tear-off, a tile lift and relay $8 to $15, new concrete tile $10 to $20, clay tile and standing-seam metal $15 to $30, torch-down flat roofing $5 to $10 and TPO $7 to $14. Roofers often quote per “square” (100 square feet), so $5 to $10 per square foot is $500 to $1,000 per square.

    Is it cheaper to put new shingles over the old roof?

    An overlay is cheaper up front because it skips the tear-off, but California code does not allow it where the roof already has two layers, where the covering or deck is deteriorated, or over shake, slate or tile, and we rarely recommend it even when it is legal. It hides damaged decking, adds weight, traps heat and makes the next replacement more expensive because two layers must come off instead of one.

    Do I need a permit to replace my roof in Los Angeles?

    Yes. In the City of Los Angeles a like-for-like re-roof with a Class A or B covering weighing under 6 pounds per square foot over solid sheathing is an express permit with no plan check, and the contractor signs the LADBS Re-roofing Certificate of Compliance at the end. Heavier tile, new skylights or structural changes go through plan check. Other cities in Los Angeles, Orange, Ventura, Riverside and San Bernardino counties issue their own permits under the same state codes.

    How long does a roof replacement take?

    Once material is on site, a composition shingle tear-off and replacement on a single-family house takes two to five working days, a tile lift and relay or new tile roof one to two weeks, standing-seam metal one to two weeks, and a flat torch-down, TPO or foam roof two to four working days. An LADBS express permit is usually issued in days, and removing and reinstalling solar panels adds about a week on each side.

    Does a cool roof cost more?

    Usually not much. Since 2014 the City of Los Angeles has required cool roofs on residential re-roofs, and under the 2025 California Energy Code replacing more than half of a roof triggers the cool-roof rule across the Valley, the Los Angeles basin, Orange County, inland Ventura, Riverside and San Bernardino. Cool-rated architectural shingles, tile and metal are standard products carrying a Cool Roof Rating Council label, so the requirement narrows the color choices more than it raises the price.

    How long will the new roof last?

    It depends on the material, and the honest figures are shorter than the warranties suggest. Composition shingle runs around 20 years in this climate, standing seam metal in excess of 60 according to the Metal Construction Association field assessment, and tile effectively as long as the house provided the underlayment beneath it is replaced periodically. We set out the sourced numbers by material in how long a roof lasts in Southern California.

    My roof is leaking. Do I need to replace it?

    Not necessarily. Most leaks start at a failed detail such as flashing, a valley or a pipe penetration rather than at the covering itself, and those are repairs. The signals that point to replacement are age, widespread granule loss or corroded fasteners, and a pattern of leaks in different places rather than one recurring spot. Our guide to roof leak repair walks through how the entry point is found and how to tell the two situations apart.

    Get a written roof replacement price for your house

    We will measure the roof, count the layers, check the deck from the attic and the fire-zone and cool-roof rules for your address before we write a number, and give you an itemized proposal that lists tear-off, deck replacement, underlayment, flashing, the roofing product, ventilation, permit and warranties line by line. The site visit and the estimate are free. How we manage a re-roof as your general contractor, from inspection to the Certificate of Compliance, is on our roof replacement and repair page.

  • How Much Does a Garage Conversion Cost in Los Angeles?

    How Much Does a Garage Conversion Cost in Los Angeles?

    A garage conversion ADU in Los Angeles typically costs $100,000 to $200,000, and most two-car conversions we price land between $100,000 and $150,000 once the kitchen, bathroom, insulation, electrical and plumbing are included. Green Design and Build is a licensed general contractor (CSLB #1110975) based in Van Nuys that designs, permits and builds garage conversion ADUs for homeowners across Los Angeles County, Orange County, Ventura County, western Riverside County and western San Bernardino County. Every figure on this page is either already published on our site or simple arithmetic from those figures; none of it is a quote for your garage.

    Green Design and Build is led by Dekel Sofer. We hold a 4.7-star rating across 146 Yelp reviews and have completed hundreds of projects. A standard two-car garage in the San Fernando Valley is usually around 400 square feet, already has a slab, walls and a roof, and often sits on a lot where a new detached unit would not fit.

    On this page

    Garage conversion cost by scope

    The table puts the figures we have already published side by side so you can see where a conversion sits against the other routes to a legal ADU. All are typical Los Angeles budgeting ranges, not a quote.

    Scope Typical Los Angeles range
    Garage conversion ADU, most two-car garages (about 400 sq ft), kitchen, bathroom, builder-grade finishes $100,000 to $150,000
    Garage conversion ADU, full range including detached garages needing trenching, sewer work, a panel upgrade or upgraded finishes $100,000 to $200,000
    Same 400 sq ft garage at the all-in ADU rule of thumb of $300 to $450 per sq ft $120,000 to $180,000
    Attached ADU (new space added to the house) $150,000 to $300,000
    Detached new-construction ADU, 500 sq ft $180,000 to $260,000
    Detached new-construction ADU, any size $180,000 to $450,000 or more depending on size

    How we estimated these numbers

    The ranges on this page are budgeting estimates for Southern California, not a price list. They are drawn from Green Design and Build’s own written proposals and completed projects across Los Angeles, Orange, Ventura and western Riverside and San Bernardino counties, checked against current supplier and subcontractor pricing. A real project can come in lower or higher depending on the house, the scope and the finishes. Reviewed by Dekel Sofer, founder and CEO of Green Design and Build (California contractor license #1110975, Class B, General Building), September 2026. Publishers and journalists are welcome to cite these figures with a link to this page.

    These are typical Los Angeles budgeting estimates, not a price list or a quote. Your project can come in lower or higher depending on the house, the scope and the finishes; the only real number is a written proposal after a site visit.

    A $100,000 to $150,000 conversion of a 400 square foot garage works out to roughly $250 to $375 per square foot, below the $300 to $450 per square foot we quote for new construction, and that gap is the whole reason to convert rather than build. But the top of the conversion range overlaps the bottom of the detached range: a detached garage at the back of a deep Valley lot, with a cracked slab, a 100-amp panel and a clay sewer lateral, can cost as much as a small new unit. The garage is a head start, not a discount.

    The savings are specific: no foundation, no framing, no roof, and none of the solar panels that LADBS notes are required on detached ADUs built from scratch. What you still pay for is everything that makes a garage a home, which our ADU cost guide lists plainly: insulation, electrical, plumbing, HVAC, a complete kitchen, a full bathroom, code-compliance upgrades, windows and finishes. A kitchen and a bathroom are the two most expensive rooms in any house, and a 400 square foot ADU has both.

    What changes the price of a garage conversion

    When two quotes for the same garage are far apart, one of them usually skipped or deferred one of the items below. These are what we look at on the first site walk.

    The slab and the moisture barrier

    A garage slab was poured to hold a car, not a bedroom. Many older Valley slabs have no vapor barrier beneath them, slope toward the door, or sit below the finished floor of the house. In the conversion we describe in why ADU quotes vary so much, the slab “did not have a proper moisture barrier below it,” and correcting that meant additional preparation, materials, labor and concrete work before any framing started.

    Sewer and plumbing

    A garage has no drain, and a kitchen and bathroom need one. On an attached garage the tie-in is short; on a detached garage it can mean trenching across the yard, which is why our ADU cost guide notes that detached conversions typically cost more than attached ones. The lateral itself is the bigger risk: in the quote-variation post a camera inspection found “root intrusion and bellying,” and a section of sewer had to be replaced before the ADU could connect; in our ADU cost guide a cracked clay sewer line cost approximately $14,000 to reroute. We camera the lateral before we price the plumbing, which is performed by licensed plumbers and scheduled and supervised by us as your general contractor; see our plumbing page.

    The electrical panel

    Most 1950s to 1970s Valley houses still run on a 100-amp panel that is already at capacity. Add an electric range, a heat pump and a subpanel for the ADU and the main service has to grow to 200 amps. In our ADU cost guide that upgrade ran $6,000 to $8,000 and added around three weeks of delay for permitting, inspections and utility coordination. It is performed by licensed electricians and scheduled and supervised by us; our electrical page covers the panel and circuit work.

    Door opening, insulation, windows and fire separation

    The garage door span has to be framed in as a real wall with a header, sheathing and stucco that matches the house. Walls, roof and often the floor need insulation to the residential Title 24 standard, a bedroom needs an emergency escape window, and the unit needs light and ventilation openings a garage does not have. On an attached garage, the wall and any ceiling shared with the house must meet the code’s separation requirements between dwelling units, usually a rated assembly and a self-closing door. A quote that says “insulate and drywall” with no line for these is not describing a legal ADU. Our guide to converting a garage to an ADU in Los Angeles walks through each of these code requirements and the LADBS permit steps.

    Kitchen, bathroom and finishes

    This is where most of the money goes and where most of the movement happens after signing. In the project in our ADU cost guide that went from a $180,000 budget to $265,000, the homeowner added approximately $30,000 in finish upgrades once framing was done: a better tile package, solid-surface counters instead of laminate, better cabinetry and upgraded HVAC. That is why we recommend a 15 to 20 percent contingency on top of any base bid, and why you should ask what allowance a quote carries for cabinets, tile, fixtures and appliances.

    The ADU rules that shape a garage conversion budget

    California’s ADU statute now lives in Government Code sections 66310 to 66342. We verified each rule below against the code and the state’s guidance; the sources are listed at the end.

    You do not have to replace the parking

    When a garage, carport or covered parking structure is converted to an ADU, the local agency “shall not require that those offstreet parking spaces be replaced” (Government Code 66314(d)(11)). LADBS puts it plainly: “If you remove covered parking to build an ADU, you don’t need to replace it.” That removes what used to be the biggest hidden cost of a conversion, a new carport or driveway pad.

    Setbacks do not apply inside the existing footprint

    No setback is required for an existing accessory structure converted to an ADU (Government Code 66314(d)(7)). Under the state-exemption category for conversions, the unit must be within the existing space of the structure with side and rear setbacks “sufficient for fire and safety,” and may add up to 150 square feet for ingress and egress (Government Code 66323(a)(1)). A garage a foot off the rear property line can become an ADU where a new building could not, as long as fire separation is handled in the wall assembly. The four-foot setback is for new detached units. Our ADU rules calculator walks through what applies to your lot.

    Fire sprinklers follow the main house

    ADUs “shall not be required to provide fire sprinklers if they are not required for the primary residence” (Government Code 66314(d)(12); the same language appears in section 66323). Most existing single-family homes in Los Angeles have no sprinklers, so most garage conversions do not need them. If the main house is sprinklered, the ADU will be too.

    The City’s standard plans are for new detached units

    The LADBS ADU Standard Plan Program pre-approves complete designs, from studios of about 200 square feet to three-bedroom units of 1,200 square feet, in one- and two-story detached configurations. A conversion starts from the garage you already have, so it does not use a standard plan and goes through regular plan check with its own drawings. Our guide to ADU standard plans in Los Angeles explains when the catalog helps and when a custom design is faster.

    Impact fees, utility connections and the 60-day clock

    An ADU of 750 square feet or less is exempt from local impact fees. For an ADU converted from existing space, the city and the utility cannot require a new or separate utility connection, or a connection fee or capacity charge, unless the ADU is built with a new single-family home (Government Code 66311.5, formerly 66324); a separate electric meter for a rental is your choice, not a requirement. Once a complete application is filed, the agency must approve or deny it within 60 days or it “shall be deemed approved,” and a denial must list what is deficient (Government Code 66317). The word that matters is complete: a submittal missing Title 24 forms or a site plan does not start the clock.

    How long does a garage conversion take?

    Our published guidance for ADUs, repeated on our garage conversion in Los Angeles service page, is six months to a year, and a conversion sits at the shorter end because there is no foundation or framing phase. The stage durations below are our working estimates, not published figures.

    Stage Typical time
    Site walk, sewer camera, panel check, design and written proposal Four to eight weeks
    Plan check (City of Los Angeles through LADBS, or the local building division) Up to 60 days from a complete application under state law
    Electrical service upgrade, if needed About three weeks, often overlapping plan check
    Construction: demolition, slab work, framing, rough trades, inspections, insulation, drywall, kitchen and bath, finishes Three to five months
    Final inspections and certificate of occupancy One to two weeks

    The biggest schedule risks are what the camera finds in the sewer and what the utility says about the panel. Both are cheaper to learn before the contract than after demolition.

    A real garage conversion that rose 40 percent

    In why ADU quotes vary so much between contractors, we describe a homeowner converting a detached two-car garage, roughly 400 square feet, into a one-bedroom ADU with a kitchen, bathroom, bedroom and laundry area. The original estimate was $85,000 to $95,000. Three discoveries moved it to about $130,000, an increase of roughly 40 percent: the slab had no proper moisture barrier and needed preparation and concrete work; the home’s 100-amp panel was already insufficient and had to be upgraded to 200 amps; and a camera inspection found root intrusion and bellying in the sewer, so a section had to be replaced before the new fixtures could connect. Nothing on that list was a luxury. Each was a condition the garage already had.

    The $180,000 project in our ADU cost guide that finished at $265,000 was a new detached unit replacing an old garage, not a conversion, but two of its three surprises, the $14,000 clay sewer reroute and the $6,000 to $8,000 panel upgrade, are exactly the ones a garage conversion faces. That is why we check the lateral and the panel on every site walk.

    How to compare garage conversion quotes

    Ask every bidder for the same six items in writing. The lowest quote has usually left two or three of them out.

    1. Slab: what was assumed about the existing slab and moisture barrier, and what happens if it fails inspection.
    2. Sewer: whether a camera inspection was done, and whether lateral repair or trenching is included or excluded.
    3. Electrical: whether a 200-amp service upgrade is included, excluded or a change order, and who coordinates the utility.
    4. Allowances: the dollar amount carried for cabinets, counters, tile, plumbing fixtures and appliances.
    5. Envelope and code: Title 24 insulation, the framed-in door opening with matching stucco, the egress window, and fire separation on an attached garage.
    6. Permits: who pulls them, whether fees are included, and whether the price assumes a standard plan that does not apply to a conversion.

    Our ADU cost guide explains when a quote is simply too cheap and what a legitimate proposal should include. Read more on the garage conversion service page, or compare the route against a new unit on our ADU page. For layout decisions in a small unit, see our ADU design ideas.

    Where we build garage conversions

    We convert garages from our Van Nuys office across the San Fernando Valley, where 1950s to 1970s ranch houses with attached two-car garages are the classic candidate and permits run through LADBS; the rest of Los Angeles County, where Burbank, Glendale, Pasadena and Long Beach run their own building divisions; Orange County, where HOA architectural review often runs alongside the city permit; Ventura County; and western Riverside County and western San Bernardino County, where larger lots make detached garages more common. Every city applies the same state ADU law with its own plan-check process. Local conditions still move the answer: on a flat Burbank lot a conversion is often the cheapest legal unit in the county, as our Burbank ADU page explains. City of Los Angeles prices are on our page about what an ADU costs in Los Angeles. See all the areas we serve on our service areas page.

    Related cost guides: Junior ADU cost · Sewer line replacement cost · Electrical panel upgrade cost. If you plan to finance the work, our financing page explains the programs we offer and how progress payments work under California law, and our ADU financing guide compares the loans homeowners use to fund a unit.

    Sources

    ADU law changes most years and local ordinances are amended separately from the state statute. The rules referenced above were checked against the current state sources on the date shown; confirm anything decision-critical with LADBS or your city for your specific lot.

    Last reviewed 17 September 2026.

    Garage conversion cost FAQs

    How much does a garage conversion cost in Los Angeles?

    A garage conversion ADU in Los Angeles typically costs $100,000 to $200,000, and most two-car garage conversions land between $100,000 and $150,000 including a kitchen, bathroom, insulation, electrical and plumbing. The top of the range is reached by detached garages that need utility trenching, sewer lateral repair, a 200-amp panel upgrade or upgraded finishes. These are typical Los Angeles budgeting ranges, not a quote.

    Is converting a garage cheaper than building a detached ADU?

    Yes, usually. A garage conversion in Los Angeles typically runs $100,000 to $200,000, while a detached new-construction ADU of 500 square feet runs $180,000 to $260,000 and larger units $225,000 to $450,000 or more depending on size. The conversion saves the foundation, framing, roof and the solar panels required on a new detached unit, but it still needs a full kitchen and bathroom, so it is never as cheap as finishing the garage as a room.

    Do I have to replace the parking if I convert my garage into an ADU?

    No. Under California Government Code section 66314, when a garage, carport or covered parking structure is converted to an ADU, the city cannot require the lost off-street parking spaces to be replaced. LADBS states the same rule for the City of Los Angeles. That removes what used to be the largest hidden cost of a garage conversion.

    Does a garage conversion ADU need fire sprinklers?

    A garage conversion ADU does not need fire sprinklers if sprinklers are not required for the main house, under Government Code sections 66314 and 66323. Most existing single-family homes in Los Angeles are not sprinklered, so most conversions are exempt. If the primary residence has a sprinkler system, the ADU will need one and it should be in the budget.

    Can I use the Los Angeles pre-approved ADU standard plans for a garage conversion?

    No. The LADBS ADU Standard Plan Program pre-approves complete designs for new detached units, from about 200 square foot studios to 1,200 square foot three-bedroom plans, and a garage conversion works within the structure you already have. A conversion goes through regular plan check with its own drawings, and under state law the agency must approve or deny a complete application within 60 days.

    How long does a garage conversion take in Los Angeles?

    A garage conversion ADU in Los Angeles usually finishes at the shorter end of our published six-month to one-year ADU timeline, because there is no foundation or framing phase. Plan check is capped at 60 days from a complete application under state law, and construction typically takes three to five months. The most common delays are a sewer lateral that needs repair and a 200-amp service upgrade, which added about three weeks on a project we have written about.

    Get a written garage conversion price for your house

    We will walk the garage, camera the sewer lateral, check the panel and the slab, and give you an itemized proposal that lists allowances, exclusions and the permit path for your city. The site visit and the estimate are free.

  • How Much Does a Room Addition Cost in Los Angeles?

    How Much Does a Room Addition Cost in Los Angeles?

    A room addition in Los Angeles typically costs $300 to $500 per square foot all-in for a ground-floor addition and $400 to $650 per square foot for a second story, which puts a 250 square foot bedroom at roughly $75,000 to $125,000 and a full second story at $350,000 to $650,000 or more. Green Design and Build is a licensed, bonded and insured general contractor (CSLB #1110975) based in Van Nuys, led by Dekel Sofer; we design, engineer, permit and build additions for homeowners across Los Angeles County, Orange County, Ventura County, western Riverside County and western San Bernardino County. The figures on this page are typical Los Angeles budgeting ranges, not a quote, and “all-in” means design, structural engineering, permits, construction and standard finishes.

    Our room additions in Los Angeles service page covers zoning and how we build. This guide is about the money: what the number includes, what pushes it up, what the permit set costs, and how to read two quotes that are $80,000 apart.

    On this page

    Room addition cost by type

    Every range below includes design, engineering, permits, construction and standard finishes for a home on a flat lot with a conventional foundation.

    Addition type Typical size Typical Los Angeles range
    Bedroom or home office, ground floor 200–350 sq ft $75,000–$150,000
    Primary suite with bathroom, ground floor 350–500 sq ft $130,000–$250,000
    Family room or kitchen expansion, ground floor 300–500 sq ft $110,000–$230,000
    Partial second story (one or two rooms over part of the house) 400–600 sq ft $200,000–$350,000
    Full second story 800–1,200 sq ft $350,000–$650,000+

    Not sure which type of addition suits your house and lot? Our guide to home addition ideas compares ten options, including the ADU and junior ADU routes, and explains how the R1 floor-area limit narrows the choice.

    How we estimated these numbers

    The ranges on this page are budgeting estimates for Southern California, not a price list. They are drawn from Green Design and Build’s own written proposals and completed projects across Los Angeles, Orange, Ventura and western Riverside and San Bernardino counties, checked against current supplier and subcontractor pricing. A real project can come in lower or higher depending on the house, the scope and the finishes. Reviewed by Dekel Sofer, founder and CEO of Green Design and Build (California contractor license #1110975, Class B, General Building), September 2026. Publishers and journalists are welcome to cite these figures with a link to this page.

    The arithmetic is simple: a 400 square foot ground-floor addition at $300 to $500 per square foot is $120,000 to $200,000; a 500 square foot partial second story at $400 to $650 is $200,000 to $325,000; a 1,000 square foot full second story is $400,000 to $650,000. Where a project sits inside its range depends on whether it contains a bathroom or kitchen, what the existing structure and soil require, and the finish level. Our guide to what a Los Angeles general contractor costs puts most remodeling at $150 to $450 per square foot; additions run higher, $300 to $650, because every square foot involves foundation, framing, roof and exterior, where a remodel reuses the shell.

    Why a second story costs $400 to $650 per square foot

    The premium over a ground-floor addition, roughly $100 to $150 more per square foot, is not the upstairs rooms; it is what has to happen to the first floor and the roof to make them possible. The existing foundation and first-floor walls were sized for one story, so on most pre-1980 homes the engineer calls for new footings, posts, beams and shear walls threaded through finished rooms. The roof comes off and a new one goes on over the new floor. A stair takes floor space downstairs. A second story almost always needs its own HVAC zone and often a panel upgrade. And most families move out for the roof-off phase; that rent is not in the construction number, but it belongs in the budget. On a small Valley lot where a ground-floor addition would consume the backyard, the second story is still often the right answer, budgeted as a structural project first and a set of rooms second.

    What the all-in number includes, and what it does not

    The all-in ranges include drawings, engineering, the Title 24 report, plan check and permit fees, and every trade from foundation through paint, with electrical, plumbing and HVAC performed by licensed electricians, plumbers and HVAC contractors and scheduled and supervised by us as your general contractor. They do not include furniture, landscaping beyond what construction disturbed, work in rooms outside the addition, temporary housing, HOA fees, or the contingency. Our ADU cost guide recommends holding 15 to 20 percent of the accepted bid as a true contingency, and additions on pre-1980 homes deserve the same rule, because the tie-in opens walls, roofs and foundations nobody has seen in decades.

    Soft costs on a Los Angeles addition

    These third-party costs are inside the all-in ranges above, but they arrive before a shovel goes in and they surprise homeowners. We itemize each of them in the written estimate.

    Item When it applies
    Architectural drawings and structural engineering Every addition; second stories and hillside lots at the top
    Plan check, building permit and related city fees Every addition; fees scale with the permit valuation
    Geotechnical (soils) report Hillside lots, mapped hazard zones, and wherever the plan checker asks for one
    Title 24 energy compliance report Every addition

    What changes the price of a room addition

    When two bids for the same addition are far apart, one of them usually priced a different set of these.

    Bathrooms and kitchens inside the addition

    A wet room carries the cost of a bathroom remodel on top of the shell: drain and supply lines, a roof vent, waterproofing, tile and fixtures. A kitchen expansion with a relocated sink and new circuits costs more still.

    Foundation, soil and the structural tie-in

    A conventional footing on a flat lot is the baseline. Hillside lots in the Santa Monica Mountains, the Hollywood Hills and the Valley foothills usually need a geotechnical report and deeper footings, grade beams or caissons. LADBS requires geologic or soils reports under Los Angeles Building Code Sections 7006.2 and 1803 on sites in state-mapped liquefaction and landslide zones, Alquist-Priolo Earthquake Fault Zones and the city’s Preliminary Fault Rupture Study Areas, prepared by a state-licensed engineer or geologist and approved by the LADBS Grading Division. Expansive clay soils in parts of Santa Clarita and western Riverside County change footing design too. At the tie-in, opening the existing wall means a beam, posts and new footings, and on a pre-1980 house the engineer will often add shear panels, hold-downs and anchor bolts where the walls connect. Where the existing foundation has settled or cracked, the repair is part of the project.

    Roof, exterior and the cost of matching

    A new roof tied into a low-slope 1960s roofline, matching eave detail, and new stucco blended into old are what make an addition invisible from the street; we re-stucco the whole affected elevation rather than patching, because a patch line never disappears. If the existing roof is near the end of its life, re-roofing the whole house at the same time is often cheaper than tying new into old and returning in five years.

    Electrical panel and HVAC

    Many Valley ranch houses still run on a 100-amp panel, and a suite with a heat pump and new circuits is often what pushes it to a 200-amp upgrade, which runs $4,000 to $8,000 in our published ranges ($6,000 to $8,000 on the ADU in our cost guide) plus utility coordination time. A ground-floor addition can sometimes extend the existing HVAC system; a second story usually cannot.

    Fire zones, historic zones, HOA review and finish level

    In a Very High Fire Hazard Severity Zone (the hills above the Valley, Malibu, much of Santa Clarita and Ventura County), new work must meet Chapter 7A ignition-resistant requirements for siding, vents, eaves and glazing. In an HPOZ historic zone the addition goes through the Office of Historic Resources before LADBS, and in master-planned Orange County communities HOA review runs alongside the city permit. Standard finishes are in the ranges; wide-plank hardwood, slab countertops and a steam shower are not, and they are the most common reason a final number lands above the estimate.

    Permits and plan check for a room addition in Los Angeles

    Every room addition in Los Angeles needs a building permit, and unlike a re-roof or a same-size window replacement, an addition cannot use an LADBS Express Permit. LADBS states that building plans must be filed and approved through Building Plan Check before a permit is issued for any “addition to building,” and its Express Permit bulletin (the no-plan-check list) has no category for additions or new floor area. In practice that means a full drawing set with structural calculations and a Title 24 report, submission through ePlanLA or over the counter, one or more rounds of corrections, then plumbing, electrical and mechanical permits, staged inspections from foundation through final, and a Certificate of Occupancy. LADBS covers the City of Los Angeles, including Van Nuys, Sherman Oaks, Encino, Studio City, Woodland Hills, Northridge and North Hollywood; Burbank, Glendale, Pasadena, Santa Clarita, Long Beach, Torrance and every Orange County city run their own building divisions. The code baseline is the same everywhere; the fees, the queue and the correction culture are not.

    What your lot allows: setbacks and the 45 percent floor-area cap

    Zoning is a cost question because it decides whether the addition you want can exist. On a standard R1 lot in the City of Los Angeles, the Municipal Code requires a front yard of 20 percent of lot depth up to 20 feet (or the prevailing setback on the block), side yards of at least 5 feet for a house of up to two stories, and a rear yard of at least 15 feet. Under the Baseline Mansionization Ordinance, the residential floor area of all buildings on most R1 lots is capped at 45 percent of the lot area, and second-story walls must stay inside an encroachment plane that starts 20 feet above grade at the side setbacks, which pushes upper floors inward on narrow lots. A 7,500 square foot R1 lot therefore allows about 3,375 square feet: with a 1,900 square foot house, roughly 1,475 square feet is available before overlays; with a 3,000 square foot house, a 375 square foot bedroom is the ceiling. RS, RE, RA and hillside lots use different ratios. We run these numbers on the first site visit; our ADU rules calculator is a quick first check.

    How long does a room addition take?

    Addition projects typically run 9 to 14 months from the first design meeting to final inspection; on a second story, the five to seven months of construction are also months of rent for most families.

    Phase (second-story addition) Typical time
    Design, structural engineering and Title 24 8–12 weeks
    Plan check and permits (LADBS or city) 2–4 months
    Construction 5–7 months
    Total, ground floor or second story 9–14 months

    These are typical Los Angeles budgeting estimates, not a price list or a quote. Your project can come in lower or higher depending on the house, the scope and the finishes; the only real number is a written proposal after a site visit.

    A ground-floor addition follows the same phases with shorter design and construction stretches. Plan check is the phase homeowners underestimate: HPOZ, hillside, coastal and HOA reviews sit in front of the building department, and each correction cycle adds weeks.

    A real example of what “hidden” costs look like

    Our Montebello room addition with a full bathroom shows a ground-floor addition from roof framing and insulation through stucco to the finished room. For what hidden conditions cost in dollars, the best-documented example on our site is an ADU, because the same discoveries happen when an addition’s foundation goes in beside a 1950s house. In our ADU cost guide we describe a roughly 600 square foot detached unit the homeowner expected to cost about $180,000. Digging the foundation exposed the main house’s original clay sewer line under the new footprint, cracked and full of roots; rerouting it cost about $14,000. The 100-amp panel was full, and an electric range and heat pump forced a 200-amp upgrade at about $6,000 to $8,000 with about three weeks of utility delay. Then, walking through framed rooms, the owner upgraded tile, countertops, cabinets and HVAC, about $30,000 beyond the allowances. The unit finished at about $265,000. Two of those were conditions nobody could see and one was a decision made with better information, which is why the contingency is real money and why our proposals state every allowance before demolition.

    Room addition or ADU: which costs less?

    Per square foot, the two are close. Our published figures put a detached 500 square foot ADU at $180,000 to $260,000 and ADU construction at $300 to $450 per square foot all-in, against $300 to $500 for a ground-floor addition; the ADU number includes a kitchen, a bathroom and its own utility connections. The real difference is what each buys. An addition makes the house you live in bigger. An ADU is a separate unit that can be rented or house a parent, and it can go where an addition cannot: under California Government Code sections 66323 and 66321(b)(3), a detached ADU of up to 800 square feet with 4-foot side and rear setbacks must be approved even where the lot’s floor-area cap would block an addition of the same size. On a lot at its 45 percent limit, the ADU is the only new square footage available.

    How to compare room addition quotes

    Ask every bidder for the same six things in writing; the cheap quote usually stops being cheap somewhere in this list.

    1. Square footage. Conditioned area of the addition, plus any first-floor rooms reworked for a stair or a post.
    2. Design, engineering and permits. Included, excluded or an allowance, and who answers plan check corrections.
    3. Foundation and structure. The footing type assumed, whether a soils report is included, and whether seismic upgrades at the tie-in are in scope or “if required.”
    4. Systems. Whether a panel upgrade, a new HVAC zone and new plumbing runs are included.
    5. Exterior matching. Roof tie-in or whole-house re-roof, stucco to the full elevation or a patch, window brand and series.
    6. Allowances. The dollar amount assumed for flooring, tile, fixtures, cabinets and lighting, so an upgrade later is a known number.

    Green Design and Build puts all six in the proposal, with a fixed price for the defined scope and named allowances for selections you have not made yet. Our guide on how to hire a general contractor without getting scammed shows what a $28,000 kitchen became when none of this was written down.

    Where we build room additions

    Most of our additions are in the San Fernando Valley and the rest of Los Angeles County, where single-story post-war ranch houses leave room for a primary suite off the back or a second story over the garage wing, and where LADBS plan check and the floor-area cap shape most projects. In Orange County, city building divisions and HOA architectural review run side by side. Ventura County adds fire-zone construction on hillside and canyon lots, and western Riverside County adds expansive soils and tract-home HOAs in Corona, Eastvale and Murrieta. Western San Bernardino County adds single-story slab ranches with room for a rear addition in Ontario and Upland, HOA review in the master-planned tracts of Rancho Cucamonga, and expansive clay on parts of the valley floor. Every city and county we serve is listed on our service areas page.

    Related cost guides: Second-story addition cost · Whole-home renovation cost · Cost to build a house. If you plan to finance the work, our financing page explains the programs we offer and how progress payments work under California law.

    Sources

    Permit fees and building standards are amended regularly, and every city outside Los Angeles runs its own building division. Which code edition applies to your job is decided by the date the permit application is submitted, not the date work starts. The references below were checked against the official sources on the date shown.

    Last reviewed 17 September 2026.

    Room addition cost FAQs

    How much does a room addition cost per square foot in Los Angeles?

    A room addition in Los Angeles typically costs $300 to $500 per square foot all-in for a ground-floor addition and $400 to $650 per square foot for a second story, including design, engineering, permits, construction and standard finishes. A dry bedroom on a flat lot sits near the bottom; a suite with a bathroom, a hillside foundation or a second story sits near the top. These are typical Los Angeles budgeting ranges, not a quote.

    How much does a second-story addition cost in Los Angeles?

    A second-story addition in Los Angeles typically costs $400 to $650 per square foot, or $200,000 to $350,000 for a 400 to 600 square foot partial second story and $350,000 to $650,000 or more for a full 800 to 1,200 square foot second story. The premium over a ground-floor addition pays for structural work through the first floor, removing and rebuilding the roof, the stair and a separate HVAC zone, plus several months of temporary housing for most families.

    How much does it cost to add a primary bedroom and bathroom in Los Angeles?

    Adding a ground-floor primary suite with a bathroom in Los Angeles typically costs $130,000 to $250,000 for 350 to 500 square feet. The bathroom is what separates a suite from a plain bedroom of the same size: drain and supply lines, a roof vent, waterproofing, tile and fixtures add the cost of a bathroom remodel on top of the shell. Finish level and whether the panel needs a 200-amp upgrade move the number within the range.

    Is a room addition or an ADU cheaper in Los Angeles?

    Per square foot they are close: a ground-floor room addition in Los Angeles runs $300 to $500 per square foot and ADU construction $300 to $450 per square foot, with a detached 500 square foot ADU at $180,000 to $260,000. The ADU price includes a kitchen and its own utility connections; the addition price assumes the space joins a house that already has them. On a lot at its floor-area limit, a detached ADU of up to 800 square feet is usually the only new square footage allowed.

    How much contingency should I budget for a room addition?

    Hold 15 to 20 percent of the accepted bid as a contingency for a room addition in Los Angeles, especially on a pre-1980 home. The tie-in opens walls, roof framing and foundation that have not been seen since the house was built; the common surprises are deteriorated sewer lines, a full 100-amp panel, undersized footings and dry rot at the roof edge. The contingency is separate from finish upgrades you choose during the build.

    What does the permit for a room addition cost in Los Angeles?

    Plan check, building permit and related city fees for a room addition in Los Angeles scale with the permit valuation and are separate line items alongside the drawings, structural engineering and the Title 24 report; we itemize all of them in the written estimate. Additions cannot use an LADBS Express Permit; they go through full Building Plan Check with staged inspections and a Certificate of Occupancy at the end. These fees are included in the all-in figures on this page.

    Get a real number for your addition, not a per-square-foot guess

    Tell us what you need the space for, and we will check setbacks, floor-area allowance, the foundation and the panel on a free site visit, then give you a written estimate that lists design, engineering, permits, structure, systems and named allowances line by line. If an ADU turns out to be the cheaper way to get the space, we will say so.

Call Free Estimate