

Good outdoor kitchen design comes down to four decisions made in the right order: where the kitchen sits relative to the house, the sun and the utilities; which layout fits the space (a straight run, an L, a U or an island with seating); how the counter is divided into hot, cold, wet and dry zones; and which materials will survive Southern California sun without fading, cracking or burning hands. Settle the location and the utility runs first: moving a gas stub or a drain after the trench is backfilled is the most expensive change on the job.
We are Green Design and Build, a licensed residential general contractor based in Van Nuys (CSLB #1110975), working across Los Angeles, Orange and Ventura counties and western Riverside and San Bernardino counties. We design and build outdoor kitchens as part of our outdoor kitchens, decks and pergolas work, with the gas and electrical run by licensed specialty contractors we schedule and supervise. This guide is about design and planning. For prices, our outdoor kitchen cost guide breaks out tiers, line items and worked examples; any figures quoted here are budgeting ranges, not a quote.
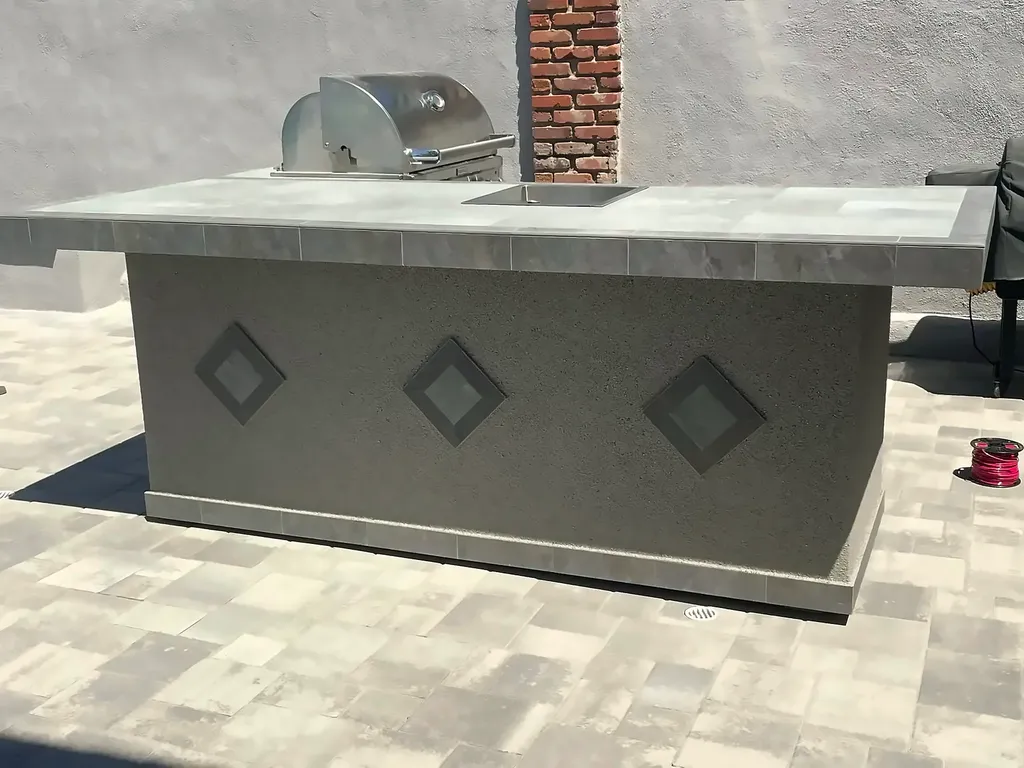
Start with location, not the grill
Most people start by picking a grill. Start instead with a site plan marking the gas meter, the electrical panel, the nearest sewer line and where the sun is at 5 pm in July. Those decide where the kitchen can go at a sensible cost and whether anyone will want to stand at it.
- Distance to the house. Close enough that carrying a tray from the indoor kitchen is a few steps, not a trek across the lawn. A kitchen at the far fence tends to become a storage cabinet.
- The utility runs. In much of our service area the gas meter and the panel sit on the side of the house farthest from the yard. Every foot of trench is paid for, and crossing a slab means cutting and patching it.
- Sun and wind. A west-facing cook position puts low afternoon sun in the cook’s eyes during dinner prep. Inland, the afternoon wind can matter as much as the view.
- Smoke. Breezes should carry it away from the seating and the back door.
- What it sits on. An island needs a sound base: a slab in good condition, a new concrete patio, or its own footing set into a paver patio. An island on loose pavers or a cracked slab moves, and the counter cracks with it.
This is where a rendering earns its keep. On our Encino pool, spa and outdoor kitchen project, the homeowner saw the kitchen, spa and decking laid out in his own yard in our 3D design before anything was ordered. Moving the kitchen six feet in a rendering costs nothing; moving it after the utilities and pavers are in costs real money and weeks.
Outdoor kitchen layouts: straight, L, U and island
Four layouts cover almost every outdoor kitchen. The choice depends on how much counter you need, how many people cook, and whether guests face the cook or the view.
| Layout | What it looks like | Best for | The catch |
|---|---|---|---|
| Straight run (galley) | One counter, often 6 to 8 feet | Narrow yards, a grill island, the smallest budget | The cook’s back is to the guests; landing space gets tight |
| L-shape | Two runs at a right angle, commonly 10 to 14 feet in total | Separating the grill from the sink and refrigerator; patio corners | The inside corner is awkward storage |
| U-shape | Three runs around the cook | Serious cooks with several heat sources | Needs floor area; can wall the cook off |
| Island with seating | A freestanding block with a bar on the guest side | Entertaining; the cook faces guests across the counter | Utilities must come up through the patio, so it is planned before the slab |
Straight runs, L-shapes and U-shapes
A straight run with a grill, a side burner, clear counter and storage doors below is the most common outdoor kitchen in Los Angeles: it fits a typical slab-on-grade lot, needs only a gas line, and leaves the patio for furniture. The mistake is crowding it. Plan at least 18 inches of clear counter on each side of the grill so a platter can land, and keep refrigerator doors out of the cook’s way. An L puts heat on one leg and water and cold on the other, with the sink leg nearest the house. A U adds a third leg for a pizza oven, griddle or bar; keep the opening wide enough for two people to pass, and do not face two heat sources across the aisle.
Islands and bar seating
An island with a raised bar on the guest side is the layout most people picture, and the one that most needs planning before the patio is poured, because gas, conduit and any drain must come up exactly where the island will stand. The usual working counter is 36 inches high and a raised bar is usually 42, which also screens the cook’s mess from the seats. Keep the seating well away from the grill’s heat and smoke.
The four work zones: hot, cold, wet and dry
Outdoor kitchens work best planned as four zones laid out in the order food moves: out of the refrigerator, across the sink and prep counter, onto the grill, and off to the serving side.
| Zone | What lives there | Utilities it needs | Placement rule |
|---|---|---|---|
| Hot | Built-in grill, side burner, griddle, pizza oven, smoker | Gas line with an accessible shutoff | Downwind of seating, manufacturer’s clearances met |
| Cold | Outdoor-rated refrigerator, ice maker, beverage center, kegerator | A GFCI-protected circuit | Away from the grill’s heat, nearest the house |
| Wet | Sink, faucet, trash pull-out | Water supply and a legal drain | Between cold and hot, so prep happens before the grill |
| Dry / serving | Clear counter, bar overhang, drawers | Usually none | On the guest side |
Not every kitchen needs every zone. A grill island is a hot zone with a landing area; a refrigerator adds a cold zone and a circuit; a sink adds a water line and a drain, the biggest jump in scope. That is why our cost tiers step up as they do: a grill island typically runs $6,000 to $16,000, a kitchen with a sink and refrigerator $13,000 to $35,000, and a full kitchen with a pizza oven, a bar and a cover $40,000 to $85,000 or more. These are budgeting ranges, not a quote; the only real number is a written proposal after a site visit.
Is a sink worth it? For a cook who preps outside or hosts often, yes; for someone who carries trays out to grill, it is a lot of plumbing for a little convenience. Decide before the trench is dug.
Materials that survive Southern California sun
Outdoor kitchens here are used most of the year and take a beating indoor kitchens never see: strong UV, surfaces heated by direct afternoon sun, winter rain, and salt air near the coast. Choose materials for that, not by copying an indoor kitchen.
| Component | Choices that hold up | Choices to avoid or handle carefully |
|---|---|---|
| Island frame | Steel studs with cement board; concrete block on a footing for heavy veneer | Wood framing around a grill unless the manufacturer allows it with an insulated jacket |
| Island finish | Stucco to match the house, stone or brick veneer, porcelain or ceramic tile | Large runs with no movement joints |
| Counter | Granite in a darker color, porcelain slab, sealed poured concrete | Light, porous stones that stain from grease and wine; any engineered surface its maker does not rate for outdoor use |
| Doors and drawers | Stainless steel, with a higher-grade alloy near the coast | Lower-grade stainless in salt air, which shows surface rust |
| Refrigeration | Units rated by their maker for outdoor use | Indoor refrigerators, which are not built for summer heat |
| Flooring around it | Pavers, broom-finished or textured concrete, porcelain pavers | Smooth troweled concrete or polished stone where grease and water land |
Counters deserve the most thought, since there is more of them than people expect once a bar overhang is counted. Granite takes heat and sun and shows the fewest stains in a darker slab. Poured concrete can be cast around appliances but needs sealing and will develop hairline crazing. Porcelain slab is heat-proof and color-stable but needs a fabricator who has cut it before. Tile, as on the Encino kitchen, is the budget-friendly, repairable option, with more cleaning at the grout lines.
Color matters too: dark counters get hot to the touch in direct afternoon sun, so an uncovered kitchen is more comfortable with a mid-tone surface. For the surfaces around the kitchen, our guide to what hardscaping includes compares pavers, concrete and stone, and if the kitchen sits on a raised platform, our article on repairing or replacing a deck covers composite versus wood.
Covered outdoor kitchens: shade, rain and smoke
A cover turns an outdoor kitchen used on mild evenings into one used at noon in August and through a January shower, and it protects the counters and appliances from sun. But a roof over a grill gives heat and smoke somewhere to collect, and the cover becomes a permitted structure with its own clearances.
- Open lattice or pergola. Filtered shade, smoke escapes, no rain protection. Our pergola cost guide compares wood and aluminum.
- Solid cover. Full shade and rain protection. Over a grill it needs a vent hood rated for outdoor use or an open, noncombustible design, plus the manufacturer’s overhead clearance. We are an authorized Alumawood installer; a solid Alumawood cover over a kitchen typically runs $30 to $55 per square foot, or $45 to $75 insulated (budgeting ranges, not a quote). See our patio cover cost guide and our patio cover page.
- Louvered roof. Open for smoke, closed for rain; the motor needs a circuit.
Grill makers are specific about overhead construction: Blaze’s use and care guide for its LTE gas grills calls for at least 6 feet between the countertop and overhead construction and forbids installation under unprotected combustible overhead construction, and Weber’s installation guide for its Summit built-in gas grills says never to locate the grill under an unprotected overhang. Ignore it and the result is soot on the ceiling, then heat damage to the framing.
A practical compromise is to roof the prep, cold and seating zones and leave the grill bay open to the sky, or to set the grill at the open edge of the cover under a hood. Both are decisions for the drawing stage.
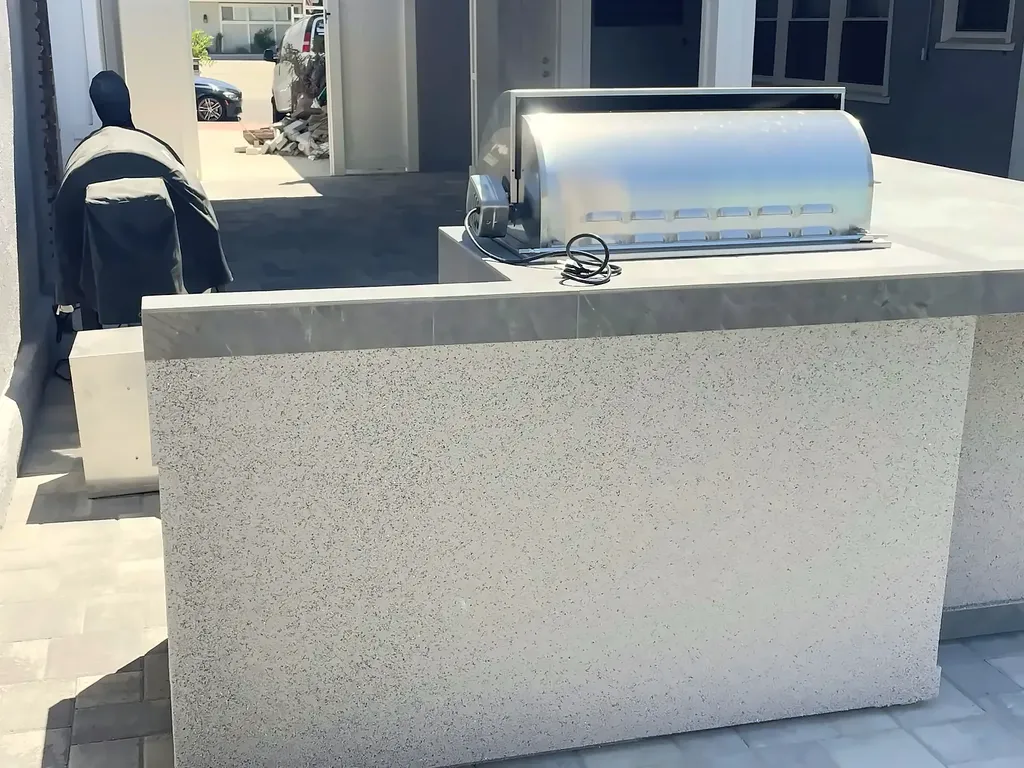
Utilities: gas, electrical, water and drainage
The utilities are the part you do not see, the part that most decides the price and build order, and the part where permits are not optional. In the City of Los Angeles, LADBS requires a plumbing permit for any installation or modification of fuel gas piping and drainage systems, and an electrical permit for any electrical work. Other cities set their own rules, and we confirm them for each address.
Gas: natural gas or propane
A built-in grill is best fed by a natural gas line, trenched, pressure-tested and inspected, ending in an accessible shutoff at the island. Weber’s installation guide for its Summit built-in grills, for example, says a manual shutoff valve must be installed outdoors and be accessible, with the gas supply hard-piped to it. We fit a sediment trap at the island too, and check that the existing meter and piping can carry the added burner load. A propane tank in a vented cabinet avoids the trench on a small island far from the meter, but it runs out mid-dinner.
The island must be vented, too. Blaze’s guide notes that propane is heavier than air and settles low while natural gas rises, and calls for openings at both upper and lower levels; Weber recommends at least 100 square inches of venting per side, on two sides, top and bottom.
Electrical: GFCI, weather-resistant receptacles and panel capacity
Lights, a refrigerator, a rotisserie and a few outlets add up. The 2025 California Electrical Code, in effect since January 1, 2026 and based on the 2023 National Electrical Code, requires ground-fault circuit-interrupter (GFCI) protection for receptacles outdoors at a dwelling (section 210.8(A)(3)). Section 406.9(B)(1) requires 15- and 20-amp receptacles in a wet location to be listed weather-resistant and to have an enclosure that stays weatherproof with a plug inserted (an extra-duty “in-use” cover). We run the kitchen on its own circuit, in conduit.
The surprise on older houses is a full panel that needs work before a new circuit can be added. We check it on the site visit; our guide to electrical panel upgrade cost explains what is involved, and our electrical page covers the work itself.
Water and drainage
A sink needs a cold water supply (hot water is optional and adds a heater) and a drain that goes somewhere legal, normally the house sewer through a trap and vent. The drain needs fall all the way back to the connection and is inspected before backfill. Our plumbing page covers the trade side. The patio should also slope away from the island and the house so water does not pool at the cabinet doors.
Clearances to combustibles: the manual is the rule
There is no single clearance number. The installation manual for the specific model sets the distances to combustible construction, and the inspector reads it. Two manufacturers show how much they differ:
- Weber Summit built-in gas grills: the installation guide requires 24 inches of clearance from any surface or structure at the back and sides, and says the island, countertops and adjacent work areas must be built from noncombustible materials only.
- Blaze LTE gas grills: the use and care guide calls for at least 14 inches from the sides and 16 inches from the back to any combustible material, and says an insulated jacket is required if the outdoor kitchen is built of combustible materials.
So choose the grill, download its manual, and design the island to it before the frame goes up. A noncombustible island removes most problems; what remains is whatever sits beside and above the grill, such as a wood fence, a wood cover, an eave or a tree.
Fire hazard zones and the California WUI Code
If your lot is in a wildland-urban interface area, which the code defines as a state-identified Fire Hazard Severity Zone or another area the local enforcing agency designates as at significant wildfire risk, structures around the kitchen fall under the 2025 California Wildland-Urban Interface Code (Title 24, Part 7):
- Section 504.7: unenclosed accessory structures attached to a house with habitable space, other than decks, must be heavy timber or built of noncombustible materials, exterior fire-retardant-treated wood, or other ignition-resistant materials. An attached cover over the kitchen falls here.
- Section 504.11: applies to attached or detached miscellaneous structures that need a building permit, including trellises, arbors, patio covers and gazebos. Under 504.11.2, one that is less than 3 feet from the house must be noncombustible or ignition-resistant.
The full text is in Chapter 5 of the California WUI Code. A noncombustible island under a metal cover is the easy route in a fire zone. Our wildfire home hardening guide explains how to check your zone and what else the code asks of the house.
Permits for an outdoor kitchen
Three kinds of permit can be involved:
- Plumbing permit for the gas line and for a sink drain and water supply. In Los Angeles, LADBS requires one for any installation or modification of fuel gas piping or drainage.
- Electrical permit for any new circuit, outlet or light. LADBS requires one for any electrical work.
- Building permit for a cover over the kitchen, and for an island that is structural, such as a tall block wall. In the City of Los Angeles, the list of work exempt from a building permit in LAMC 91.106.2 does not include patio covers, and its $2,500 value exemption does not apply to work that affects structural stability or public safety.
HOA approval is separate; in many Orange County communities the architectural committee reviews the kitchen and cover before the city permit is filed. We prepare that package and pull the permits; they are in the proposal, not a change order. Be wary of a bid that prices a handsome island and says “gas and electrical by others”: it leaves the hardest parts unowned.
The planning order that avoids rework
An outdoor kitchen is usually the last thing built in a yard and should be among the first planned. Our sequence:
- Survey the site: meter, panel, sewer, sun, wind, slope and fire zone.
- Choose the appliances, at least the grill, and download their installation manuals.
- Fix the layout and the location in a drawing or 3D design, including any cover.
- Get HOA approval if needed, then file for permits.
- Order long-lead appliances before breaking ground.
- Grade and drainage, then trench and rough in gas, conduit, water and drain; inspect before backfill.
- Pour footings for the island and any cover posts, then build the patio base and surface.
- Frame the cover and get it inspected, then frame and sheath the island.
- Template counters once the appliances are on site; fabricate and set.
- Set appliances, finish the island, final inspections, then the gas tie-in and first cookout.
In a whole-yard project, utilities and sleeves go in before pavers or concrete; our backyard remodel cost guide covers the sequence and budget, and our outdoor living design ideas page covers shade, fire features and levels across a yard.
Outdoor Kitchen Design FAQs
What is the best layout for an outdoor kitchen?
For most Los Angeles yards, an L-shape: the grill on one leg, the sink and refrigerator on the other. A straight run suits narrow yards and smaller budgets, a U suits cooks with several heat sources, and an island with bar seating suits entertaining because the cook faces the guests.
How far should an outdoor kitchen be from the house?
Far enough to meet the grill maker’s clearances, which vary by model; Weber’s Summit built-in guide requires 24 inches at the back and sides. Beyond that, aim for a short walk from the back door, with smoke drifting away from the house.
Can you put an outdoor kitchen under a patio cover?
Yes, if the cover is designed for it. The grill’s overhead clearance must be met (Blaze sets 6 feet from countertop to overhead construction for its LTE grills), and a solid cover needs a vent hood rated for outdoor use or a noncombustible, open-sided design.
Do outdoor kitchen outlets need GFCI protection?
Yes. The 2025 California Electrical Code requires GFCI protection for outdoor receptacles at a dwelling under section 210.8(A)(3), and section 406.9(B)(1) requires receptacles in wet locations to be weather-resistant and to have an in-use cover that stays weatherproof with a plug inserted. The work also needs an electrical permit.
Do I need a permit to build an outdoor kitchen in Los Angeles?
For the utilities, yes. LADBS requires a plumbing permit for any installation or modification of fuel gas piping or drainage and an electrical permit for any electrical work. A cover over the kitchen needs a building permit, and patio covers are not on the list of exempt work in LAMC 91.106.2. Other cities set their own rules, and we confirm them for each address.
What is the best countertop for an outdoor kitchen in Southern California?
Granite in a darker color is the safest choice: it handles heat, sun and stains. Porcelain slab is heat-proof and color-stable but needs an experienced fabricator; sealed concrete will develop fine hairline cracks. Check that the maker rates any surface for outdoor use.
Natural gas or propane for a built-in grill?
Natural gas, where the run is practical: it never runs out, and if a sink or refrigerator is planned, the trench is dug anyway. Propane in a vented cabinet suits a small island far from the meter.
How much does an outdoor kitchen cost?
In Los Angeles, a grill island typically runs $6,000 to $16,000, a kitchen with a sink and refrigerator $13,000 to $35,000, and a full kitchen with a pizza oven, a bar and a cover $40,000 to $85,000 or more. These are budgeting ranges, not a quote; our cost guide has the line items.
Plan your outdoor kitchen with us
The right design depends on where your gas meter and panel are, how the yard drains, where the sun sets and whether the lot is in a fire zone. The site visit is free and takes about two hours, and you will have a written proposal within 48 hours with the layout, the utility runs, the permits and the appliances broken out separately.