
Category: Outdoor Living

Patios, patio covers, pavers, concrete, fences and backyard remodels.

  • DIY Pavers vs. Hiring a Professional: Which Is Right for You?

    DIY Pavers vs. Hiring a Professional: Which Is Right for You?

    DIY pavers make sense for a small walkway under about 100 to 150 square feet or a small, flat patio on well-draining soil; driveways, patios of about 300 square feet or more, pool decks, retaining walls and tricky drainage need a professional. Pavers cost about $3 to $5 per square foot, professional installation about $15 to $25 or more.

    Installing pavers can look surprisingly simple. Excavate the area, add gravel, spread sand, place the pavers, and fill the joints. After watching a few online tutorials, many homeowners start wondering why professional installation costs so much more than the pavers themselves.

    That reaction is understandable.

    Pavers may cost approximately $3 to $5 per square foot depending on the material, while a professionally installed project may cost approximately $15 to $25 per square foot or more. Both are typical Los Angeles budgeting ranges, not a quote. Once homeowners see that gap, it is natural to think, “We could rent a plate compactor for the weekend and do this ourselves.”

    Sometimes, that is a reasonable decision. A small, straightforward paver project can be a manageable DIY job for a capable homeowner. However, the part most people see—the paver pattern—is not the part that determines whether the installation will last.

    Most of the work that makes a paver project successful happens underground.

    Excavation depth, soil conditions, base preparation, compaction, grading, drainage, and edge restraints determine whether the surface stays level or begins sinking, shifting, and collecting water. Those mistakes may not appear immediately. A poorly prepared patio can look great for a year before the problems begin.

    The right choice depends less on whether you are physically capable of laying pavers and more on the size of the project, the soil conditions, the drainage risks, and the cost of fixing a mistake.

    On this page

    Why Homeowners Consider Installing Pavers Themselves

    The biggest reason is cost, but the decision is usually more nuanced than simply wanting the lowest price.

    Professional paver installation is labor-intensive. Contractors must excavate and remove soil, deliver heavy base material, compact the base in layers, establish the correct slope, cut pavers, install edge restraints, and manage drainage before the finished surface is complete.

    When homeowners compare the cost of the pavers with the total installed price, it can feel like most of the quote is labor. That is often what starts the DIY conversation.

    Other common reasons include:

    • The installation looks simple in online videos.
    • The area is small and feels manageable.
    • The homeowner has experience with landscaping, concrete, decking, or similar work.
    • Pavers can be removed and repositioned if the pattern is incorrect.
    • The homeowner wants full control over what is installed beneath the surface.
    • The homeowner previously hired a contractor who cut corners on another project.

    Pavers are more forgiving than poured concrete in one important way: they can usually be lifted and relaid. Concrete cannot simply be “un-poured” if the finish, slope, or layout is wrong.

    However, that flexibility can create a false sense of security. Although the pavers can be repositioned, correcting a failed base may require removing most of the installation and starting over.

    The Pavers Are Not the Hard Part

    Placing the pavers is usually the most visible and satisfying part of the job. It is also the part homeowners tend to focus on when deciding whether they can complete the project themselves.

    In our experience at Green Design and Build, a licensed general contractor (CSLB #1110975) based in Van Nuys, the paver installation itself is rarely the main problem. The most common failures involve:

    • Insufficient excavation
    • An inadequate base depth
    • Improper base material
    • Poor compaction
    • Incorrect grading
    • Missing or weak edge restraints
    • Poor drainage planning
    • Bedding sand that is too thick or uneven

    Approximately 90% of what makes a paver installation last is completed before the first paver is placed.

    A project can have an attractive pattern, clean cuts, and perfectly aligned joints while still being built on an unstable foundation. The installation may look successful on completion day, but the underlying problems can appear after repeated rain, soil movement, seasonal temperature changes, or regular foot and vehicle traffic.

    That delay is what makes base-preparation mistakes so deceptive.

    A Real Example of a DIY Patio That Failed

    One project that stands out involved a backyard patio of approximately 300 square feet. It connected the home’s back door to a detached garage.

    The homeowner completed the patio over two weekends using paver base material purchased from a large home-improvement store. From the surface, the finished patio looked good.

    The problems did not become obvious until approximately 14 months later.

    The Patio Was Not Excavated Deeply Enough

    The homeowner excavated approximately four inches total.

    The proper total depth depends on the soil, climate, paver thickness, base material, and intended use. For this particular patio, the project required closer to seven to nine inches to accommodate the compacted base, bedding layer, and paver.

    Instead, the pavers were essentially placed over a shallow layer of gravel sitting on native clay soil.

    Clay can expand when wet and contract as it dries. It can also compress unevenly under traffic and seasonal movement. Without a properly prepared base, the patio did not have enough support to distribute weight evenly.

    A Hand Tamper Was Used Instead of a Plate Compactor

    This was one of the most important mistakes.

    A hand tamper may make the surface feel firm, but it cannot provide the same compaction energy as a vibratory plate compactor. It may compress the upper portion of the material without adequately stabilizing the full base layer.

    For many installations, the base should be placed and compacted in lifts. That means adding a controlled layer of aggregate, compacting it thoroughly, adding another layer, and compacting again.

    Dumping the full amount of base material into the excavation and compacting only the top does not create the same result.

    The Patio Did Not Have a Consistent Drainage Slope

    The homeowner attempted to establish the slope by eye.

    The surface ended up nearly flat, with a slight low point near the middle of the patio. Rather than directing water away from the home and toward a safe drainage area, the patio allowed water to collect in the center.

    A typical target for many patio installations is approximately a 1% to 2% slope, or around one-quarter inch per foot, depending on the site and drainage plan.

    The exact slope should be planned before excavation and checked throughout the base installation—not guessed after the pavers are already in place.

    The Damage Appeared More Than a Year Later

    After approximately 14 months, sections of the patio began settling unevenly.

    Pavers along the main walking path to the garage sank nearly an inch below neighboring pavers. The surface became visibly uneven and started creating trip hazards.

    Water also pooled in the center after rain. The repeated standing water contributed to polymeric sand washing out of the joints. Once the joints weakened, weeds and ants moved in, and the affected area continued to settle.

    The patio looked successful for more than a year. The installation did not fail immediately because base-work mistakes often punish homeowners on a delay.

    The Repair Required a Partial Teardown

    Correcting the patio required removing approximately 70% of the pavers.

    The repair included:

    • Removing the visibly affected pavers
    • Removing several feet of surrounding pavers to locate the full extent of the unstable base
    • Excavating deeper into the native clay
    • Replacing unsuitable material with compactable aggregate
    • Installing and compacting the base in proper lifts
    • Checking elevations with a laser level
    • Rebuilding the slope toward an appropriate drainage path
    • Relaying and realigning the pavers
    • Installing fresh polymeric joint sand

    The repair ultimately cost more than hiring a professional from the beginning. The difference was not enormous, but the homeowner paid for materials and equipment twice and lost additional weekends completing the original installation and the repair.

    Paver Projects That Can Be Reasonable to DIY

    We do not believe every paver project requires professional installation.

    Some projects are reasonable for a capable homeowner who is willing to research the process, use the right equipment, and avoid rushing the base preparation.

    Small Walkways

    A straight or gently curved walkway under approximately 100 to 150 square feet may be a manageable DIY project.

    Walkways generally carry limited weight, and a small area is easier to excavate, grade, compact, and correct. If a section settles slightly, the repair may only require lifting and resetting a limited number of pavers.

    Small Patios and Garden Areas

    A small seating area, covered patio nook, fire-pit surround, garden border, or stepping-stone-style path may also be realistic.

    The key is keeping the project contained and avoiding areas where improper drainage could affect the home.

    Flat Sites With Favorable Soil

    DIY becomes more practical when the installation area is already relatively level and has naturally well-draining soil.

    Sandy or stable, well-graded soil is generally more forgiving than heavy clay, expansive soil, or an area that remains wet after rain.

    Projects With Limited Consequences

    The best DIY candidates are projects where a minor failure would be inconvenient rather than financially damaging.

    Our rule is straightforward: if the worst realistic mistake would cost a weekend to correct, DIY may make sense. If a mistake could cost thousands of dollars, create a safety issue, or direct water toward the home, professional installation is usually the safer decision.

    Want a real number for your project?

    The site visit and the itemized written estimate are free.

    Paver Projects That Should Usually Be Professionally Installed

    Some projects carry too much structural, drainage, or financial risk to approach as a first-time DIY installation.

    Paver Driveways

    Driveways must support vehicle weight and repeated traffic.

    The required excavation, base thickness, compaction, edge support, and paver selection are less forgiving than they are for a small walkway. An improperly built paver driveway can develop sinking wheel paths, rutting, spreading edges, and major surface movement within a few years.

    A driveway failure is not simply cosmetic. It is a structural failure that can require extensive removal and rebuilding.

    Professional paver driveway installation includes a compacted base engineered for vehicle loads.

    Projects With Retaining Walls

    A retaining wall is a separate discipline involving soil pressure, drainage, reinforcement, footing preparation, and structural stability.

    Failure can create a safety hazard and damage nearby property. A homeowner should not treat a retaining wall as an extension of a basic paver patio project.

    Large Patios

    Once a patio reaches approximately 300 square feet or more, the amount of excavation, grading, material handling, cutting, and compaction becomes significantly more demanding.

    A larger surface also creates more opportunity for small grading errors to become major drainage problems.

    This is especially important when the patio connects directly to the home. Incorrect grading can direct water toward the foundation and contribute to moisture problems that cost far more to fix than the paver installation itself.

    Large patios are usually planned together with a patio cover, so the footings and base are set once.

    Complicated Drainage Areas

    Professional help is strongly recommended when the project is:

    • Near a downspout
    • Located on clay or poorly draining soil
    • Positioned at a low point in the yard
    • On a slope toward the house
    • Near the foundation
    • Near an existing drain
    • Close to a septic system
    • Connected to multiple hardscape surfaces

    Drainage cannot be treated as an afterthought. Before the installation begins, there should be a clear answer to one question: where will the water go?

    Pool Decks

    Pool decks involve additional considerations, including slip resistance, heat retention, material suitability, drainage, and nearby plumbing or structural components.

    The consequences of choosing the wrong material or creating an unsafe slope are greater than they are for a garden walkway.

    The Hybrid Approach: A Practical Middle Ground

    Homeowners do not always have to choose between completing the entire project themselves and hiring a contractor for every phase.

    A hybrid approach can work well.

    A professional can complete the most technically sensitive stages:

    • Excavation
    • Soil evaluation
    • Base installation
    • Compaction
    • Grading
    • Drainage preparation

    The homeowner can then complete some of the visible installation work, such as placing the field pavers, depending on the project and the contractor’s agreement.

    This option allows homeowners to reduce some labor costs while leaving the parts that control long-term performance to someone with the proper equipment and experience.

    It is often a better compromise than attempting the entire installation with inadequate excavation, a hand tamper, and an eyeballed slope.

    For a full backyard remodeling project, we can handle the structural base while you finish the planting and lighting.

    The Real Cost of a DIY Paver Project

    Many homeowners compare the cost of the pavers and gravel with the total professional quote. That is not an accurate comparison.

    A fair DIY budget must include equipment, delivery, hauling, disposal, extra materials, and the value of the homeowner’s time.

    Cost lineTypical figure
    Pavers aloneAbout $3–$5 per sq ft, depending on the material
    Professionally installedAbout $15–$25 per sq ft or more
    Plate compactor rentalAbout $80–$150 per day
    Saw rentalAbout $50–$100 per day, plus blade wear
    Equipment, delivery, disposal, extra materials and surprisesAdd about 20% to 30% to the DIY material estimate

    Equipment and Tool Rentals

    Common rental and equipment costs may include:

    • A vibratory plate compactor
    • A paver saw or wet saw
    • Diamond cutting blades
    • A truck or trailer
    • A wheelbarrow
    • Screed rails and boards
    • A laser level or line level
    • String lines and stakes
    • Rubber mallets
    • Shovels, rakes, and hand tools

    A plate compactor may cost approximately $80 to $150 per day to rent, depending on the machine and location. A saw may add another $50 to $100 per day, not including blade wear or replacement.

    A homeowner learning as they work may need the equipment longer than originally planned.

    Delivery, Hauling, and Disposal

    Base material and pavers are extremely heavy.

    A personal vehicle may not be capable of carrying the required weight. Even a pickup truck may require several trips. Delivery fees, truck rentals, trailer rentals, fuel, and help unloading should all be included in the budget.

    Excavated soil, sod, concrete, roots, and old landscaping materials also have to go somewhere. They may require a hauling service, dump trailer, dumpster, or disposal fees.

    The amount of soil removed from a relatively small patio often surprises homeowners.

    Materials That Are Commonly Forgotten

    DIY budgets frequently leave out:

    • Edge restraints
    • Restraint spikes
    • Geotextile fabric when appropriate
    • Bedding sand
    • Polymeric joint sand
    • Extra aggregate
    • Extra pavers for cuts and breakage
    • Drainage materials
    • Replacement blades
    • Additional material for over-excavated areas

    Real excavation is rarely a perfect rectangle. Roots, soft soil, buried debris, and uneven ground can all increase the amount of material required.

    The Time Commitment

    Excavation almost always takes longer than expected.

    Homeowners may encounter sprinkler lines, large roots, rocks, buried concrete, old landscape fabric, utility concerns, or compacted soil that is difficult to remove.

    A project planned for one weekend can easily become a three-weekend project.

    Proper compaction also takes time. The base should not be rushed simply because the plate compactor must be returned before the rental location closes.

    The Cost of Mistakes

    Professionals do not charge only for physical labor. Part of the price reflects the experience required to avoid expensive failures.

    We refer to this as mistake insurance.

    DIY savings are real only when the installation is completed correctly the first time. If the base fails, the homeowner may pay twice for rentals, materials, hauling, joint sand, and labor.

    For a more honest comparison, take the initial DIY material estimate and add approximately 20% to 30% for equipment, delivery, disposal, extra materials, and unexpected costs.

    Then compare that adjusted number with the professional quote.

    The gap is often smaller than it first appeared, especially when the homeowner assigns some value to their own labor and weekends.

    How to Evaluate a Paver Contractor

    Hiring a professional does not automatically guarantee a quality installation. The contractor still needs to be properly evaluated.

    A beautiful portfolio is useful, but fresh pavers almost always look good. Homeowners need to understand what will be installed underneath them.

    The Contractor Should Discuss Soil and Drainage

    A strong contractor should ask about:

    • The soil type
    • Existing drainage
    • Nearby downspouts
    • The slope of the yard
    • The home’s foundation
    • Existing concrete or hardscape
    • Intended traffic and weight
    • Where runoff will be directed

    If the first conversation focuses entirely on paver color and pattern without discussing the site conditions, the contractor may be prioritizing appearance over performance.

    The Base Specifications Should Be in Writing

    The contract should identify, as applicable:

    • Excavation depth
    • Base material
    • Base thickness
    • Compaction method
    • Compaction stages
    • Bedding material
    • Edge-restraint system
    • Drainage approach
    • Paver type
    • Joint material
    • Warranty terms

    The base material should generally be a compactable, angular aggregate rather than round pea gravel. Angular material locks together under compaction. Round gravel tends to move rather than create the same stable foundation.

    The correct specification will vary based on the soil, climate, project type, and local construction requirements.

    Ask for Older References

    A recently completed project is not the best test of long-term workmanship.

    Ask for references from projects completed at least one or two years ago. That gives the installation time to experience rain, traffic, temperature changes, and soil movement.

    Questions for previous customers may include:

    • Have any pavers settled or shifted?
    • Does water drain correctly?
    • Have the joints opened?
    • Did the contractor honor the warranty?
    • Was the final price consistent with the contract?

    Verify Licensing and Insurance

    Do not rely only on a contractor saying they are licensed and insured.

    Request the license number and verify it on the Contractors State License Board’s Check a License page; confirm the classification matches the work, the bond is active and workers’ compensation is on file. Our guide to verifying a contractor’s license in California walks through it. Insurance documentation should also be current and verifiable.

    Permit requirements vary by location and project scope. Larger patios, projects near property lines, drainage modifications, and related structural work may require local approval.

    Warning Signs a Contractor May Be Cutting Corners

    Several red flags can indicate that the price is being reduced by skipping the parts homeowners cannot see.

    The Bid Is Dramatically Lower Than Every Other Quote

    There is no secret method that makes excavation, hauling, aggregate, compaction, cutting, and skilled labor disappear.

    A very low quote may mean the contractor is reducing the excavation depth, using less base material, skipping compaction stages, avoiding disposal costs, or leaving important items out of the contract.

    The Contract Only Says “Install Paver Patio”

    A vague scope gives the homeowner very little protection.

    If the contract does not state what is happening beneath the pavers, the contractor has room to use the least expensive installation method possible.

    The Contractor Cannot Explain the Compaction Process

    Ask how the base will be installed and compacted.

    A qualified contractor should be able to explain whether the material is placed in lifts, what equipment is used, and when compaction occurs.

    Only compacting the top at the end is not the same as compacting each layer during installation.

    Drainage Is Not Discussed

    If water management is not part of the conversation, it may not be part of the plan.

    The contractor should be able to explain the intended slope and where runoff will be directed.

    The Contractor Wants a Large Upfront Payment

    In California the down payment on a home improvement contract cannot exceed $1,000 or 10 percent of the price, whichever is less, and later payments cannot run ahead of work completed or materials delivered to your property. A paver contractor asking for a third or half up front “for materials” is asking for something the law does not allow. See our guide to contractor payment schedules in California.

    A detailed payment schedule should be tied to measurable progress.

    The Contractor Uses High-Pressure Sales Tactics

    “Today only” pricing and pressure to sign immediately are not signs of construction quality.

    Homeowners should have enough time to review the scope, compare the base specifications, verify the license, contact references, and understand the warranty.

    The Contractor Avoids Permit Questions

    Not every paver installation requires a permit. Requirements depend on the location, size, drainage changes, related structures, and proximity to property lines.

    However, a contractor who automatically dismisses permits without checking local requirements may be willing to ignore other standards as well.

    The Best Question to Ask a Paver Contractor

    One of our favorite questions is:

    “Walk us through exactly what happens between finishing the excavation and placing the first paver.”

    A qualified contractor should be able to explain the process clearly, including:

    • Subgrade evaluation
    • Soil preparation
    • Geotextile fabric when appropriate
    • Base material and depth
    • Compaction in lifts
    • Elevation and slope checks
    • Edge-restraint preparation
    • Bedding-sand screeding

    The answer does not need to sound overly technical. It should be specific.

    A vague response such as, “We prep it and lay everything down,” does not explain enough about the work that determines whether the installation will last.

    DIY Pavers or Professional Installation: How to Decide

    DIY pavers can be a good choice when the project is small, the soil drains well, the site is relatively flat, and the consequences of minor settlement are limited.

    Professional installation is usually the better choice for driveways, large patios, pool decks, complicated drainage conditions, retaining walls, heavy clay soil, and projects next to the foundation.

    The most important question is not simply, “Can we lay these pavers?”

    It is, “Can we excavate, compact, grade, and manage drainage correctly enough that the installation will still perform several years from now?”

    Our rule of thumb is simple:

    If a mistake would cost one weekend to fix, DIY may be reasonable.

    If a mistake could cost thousands of dollars, cause structural failure, create a safety concern, or send water toward the home, hire a professional—or at least hire one to complete the excavation, base, grading, and drainage work.

    The finished pavers are what everyone sees. The work underneath them is what determines whether the project lasts.

    If you would rather not do it yourself, see how we approach paver driveways, walkways and patios.

    Frequently Asked Questions

    Can I install pavers myself?

    Yes for a small walkway under about 100 to 150 square feet or a small patio on flat, well-draining soil, if you excavate to the full depth, compact the base in lifts with a plate compactor and set a consistent slope away from the house. Driveways, large patios, pool decks and retaining walls should be professionally installed.

    What slope should a paver patio have?

    A typical target for many patios is approximately a 1% to 2% slope, or around one-quarter inch per foot, depending on the site and drainage plan. Plan it before excavation and check it throughout the base installation.

    How much can DIY pavers save?

    The pavers cost about $3 to $5 per square foot against about $15 to $25 or more installed, but add about 20% to 30% to the DIY material estimate for equipment, delivery, disposal, extra materials and surprises before comparing it with a professional quote.

    Sources

    • CSLB Industry Bulletin, Progress Payment Restrictions — the down payment on a home improvement contract “may not exceed $1,000 or 10 percent of the contract price, whichever is less.” The bulletin cites Business and Professions Code sections 7159 and 7159.5.
    • CSLB, Check a License — where to look up a license number, its status and classification, and whether the bond and workers’ compensation coverage are current.

    Get a written paver price for your yard

    We will walk the site, confirm what your city requires, and send an itemized written proposal with every allowance named. The site visit and the estimate are free.
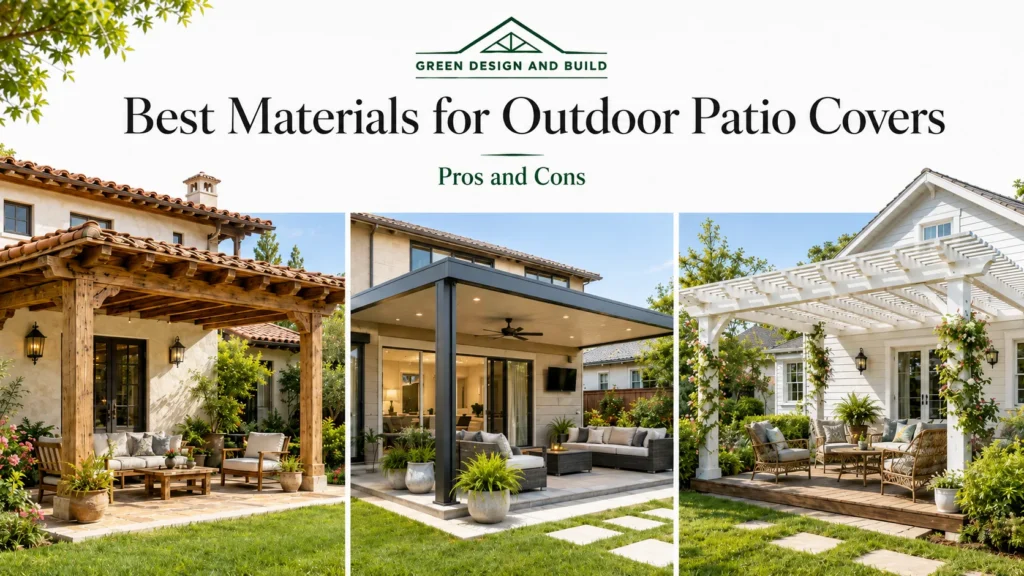
  • Best Materials for Outdoor Patio Covers: Pros and Cons

    Best Materials for Outdoor Patio Covers: Pros and Cons

    For most Los Angeles homes the best patio cover material is Alumawood: a wood look without rot, termites or restaining, at about $25 to $45 per square foot installed as lattice or $30 to $55 solid. Insulated aluminum ($45 to $75) suits an outdoor room with lights and a fan; real wood ($40 to $80) a custom look with upkeep.

    Choosing the best material for an outdoor patio cover is not as simple as asking which option looks the best or costs the least.

    As a licensed general contractor (CSLB #1110975) based in Van Nuys, Green Design and Build has found that the right patio cover material depends on how you actually plan to use your backyard, how much sun the property gets, whether you want full or partial shade, how much maintenance you are willing to deal with, and whether you want to add features like recessed lights, ceiling fans, a TV, heaters, or an outdoor kitchen.

    There isn’t one perfect patio cover material for every home.

    For most homeowners, we recommend Alumawood because it gives you a strong balance of appearance, durability, value, and low maintenance. For homeowners who want to create a true outdoor living space and are concerned about heat, we often recommend insulated aluminum panels. Real wood can be beautiful for someone who wants a natural, custom architectural look and understands the maintenance involved. Lattice works well when the goal is filtered shade and an open feeling. Steel can make sense for certain custom designs and larger structural spans.

    The most important question isn’t simply, “What’s the best patio cover material?”

    The better question is:

    What’s the best patio cover material for the way you’re actually going to use the space?

    On this page

    Best Patio Cover Materials at a Glance

    The most common outdoor patio cover materials and systems we discuss with homeowners include:

    • Alumawood and other aluminum patio cover systems
    • Insulated aluminum patio panels
    • Real wood
    • Lattice patio covers
    • Steel

    Each one has advantages and disadvantages. The right choice comes down to your property, lifestyle, expectations, and budget.

    MaterialWhat it does wellTrade-offBest for
    AlumawoodWood look without termites, rot, warping or restaining; holds up in sunNot real woodMost homes that want value and low maintenance
    Insulated aluminum panelsFinished ceiling, less heat radiating down, suits lights and fansHigher upfront costAn outdoor room used daily, strong afternoon sun
    Real woodCustom, natural look with larger beamsRepainting, restaining or sealing, possible termitesCustom or higher-end homes, owners who accept the upkeep
    LatticeFiltered shade, airflow and an open feelingNo full rain protection; does not block all heat or sunPartial shade where some sunlight is wanted
    SteelVery strong for larger spansMore expensive, heavier, needs rust protectionCustom projects with a structural or design reason

    For what each of these materials costs installed, by size, see our guide to patio cover cost in Los Angeles.

    Alumawood Patio Covers: My Most Common Recommendation for Homeowners

    The material we recommend most often is probably Alumawood, especially for homeowners here in Southern California.

    The reason is pretty simple: you get the appearance of wood without a lot of the maintenance that comes with real wood.

    With Alumawood, you don’t have to worry about termites, rotting, warping, or constantly repainting and restaining it the way you might with natural wood. It holds up well in sunny conditions, and for many homeowners, it simply makes sense because they want something that looks good without becoming another item on their annual maintenance list.

    For most residential projects, Alumawood offers a good balance between cost, appearance, durability, and maintenance. For the product itself (lattice, solid and insulated systems, colors, permits and how to pick an installer), see our Alumawood patio cover buyer’s guide.

    Pros of Alumawood Patio Covers

    Some of the biggest advantages include:

    • Low maintenance compared with real wood
    • No concern about termites damaging the aluminum itself
    • No rotting
    • No regular staining required
    • Available in finishes designed to create a wood-like appearance
    • Good overall value for many residential backyards
    • Can provide full shade when used as a solid patio cover
    • Can often be designed to accommodate lighting, fans, and other features when planned correctly

    Cons of Alumawood Patio Covers

    The biggest disadvantage is that it is not real wood.

    Some homeowners can immediately see or feel the difference, especially if they have a highly custom, traditional, or architectural home where authentic natural materials are important to the overall design.

    For someone who loves the warmth, texture, and character of real wood, an aluminum system may not create exactly the same feeling.

    But for a homeowner who tells me, “I want something practical, clean-looking, durable, and relatively low maintenance,” Alumawood is usually a very strong option.

    Real Wood Patio Covers: Beautiful, Custom, but Higher Maintenance

    Real wood is probably one of the most beautiful patio cover materials when it’s designed and built correctly. You can customize it, paint it, stain it, use larger beams, and make the structure feel like a true extension of the home’s architecture.

    For certain properties, especially higher-end or custom homes, wood can look incredible.

    The tradeoff: maintenance.

    Wood is a natural material. Over time, it can move, crack, fade, and weather. Sun exposure can affect the finish. Moisture can cause damage. Termites may become a concern. Depending on the property and exposure, the cover may eventually need to be repainted, restained, sealed, or repaired.

    There is nothing wrong with choosing wood in the right situation.

    Choose wood because you understand what comes with it and still love it, not because you saw one beautiful picture online and nobody explained what the material might require five, ten, or fifteen years later.

    Pros of Real Wood Patio Covers

    Real wood can offer:

    • A warm, natural appearance
    • Greater customization possibilities
    • The ability to paint or stain the material
    • A high-end architectural look
    • Larger or more decorative beams depending on the design and engineering
    • A traditional appearance that may better complement certain homes

    Cons of Real Wood Patio Covers

    Homeowners should also understand the potential downsides:

    • More maintenance than aluminum
    • Repainting or restaining may be necessary over time
    • Possible sun damage and fading
    • Possible cracking or movement as the material ages
    • Moisture concerns
    • Potential termite damage
    • Higher long-term maintenance costs

    We probably would not recommend it to someone who tells us, “I don’t want to think about this again for the next 15 years.”

    Insulated Patio Covers: Best for Comfort and Outdoor Living Spaces

    Insulated patio panels are another option we really like, especially when a homeowner actually plans to spend a lot of time underneath the patio cover.

    If you are trying to create more of an outdoor room than just a shaded area, insulated panels can make a lot of sense.

    Maybe you want:

    • Recessed lights
    • A ceiling fan
    • A TV
    • Comfortable outdoor furniture
    • Speakers
    • Heaters
    • An outdoor kitchen
    • A space for family dinners or entertaining

    An insulated aluminum system can provide a clean, finished ceiling appearance while also helping reduce some of the heat radiating down from the roof compared with a basic single-skin metal roof.

    This is especially important when a backyard gets heavy direct sunlight.

    Pros of Insulated Patio Covers

    Some of the biggest benefits include:

    • Full shade
    • Better comfort under heavy sun exposure compared with a basic single-skin aluminum roof
    • A cleaner, more finished ceiling appearance
    • Excellent potential for creating an outdoor living area
    • Can work well with recessed lighting and ceiling fans when planned correctly
    • Low maintenance compared with real wood
    • Good rain protection when properly installed

    Cons of Insulated Patio Covers

    The biggest downside is usually the higher upfront cost.

    For a homeowner who only wants basic shade over a small seating area, an insulated system may be more than they actually need.

    But for someone who plans to use the space every day, especially in a backyard with strong afternoon sun, I think the additional value can absolutely make sense.

    A Real Homeowner Example: Why the Best Material Isn’t Always the One You Originally Wanted

    One project that stands out involved a homeowner who originally thought they wanted a wood patio cover because they loved the warm, natural appearance.

    But once we started talking about how they actually used their backyard, it became clear that wood probably wasn’t the best fit for their lifestyle.

    They had a busy household and spent a lot of time outside with their family. They wanted something they could enjoy without constantly worrying about maintenance.

    One of their biggest concerns was heat because the backyard received a lot of direct sun, especially in the afternoon. They also wanted recessed lighting and a ceiling fan so the patio could feel more like an extension of the house.

    Instead of simply agreeing with what they originally requested, we walked them through the differences between real wood, standard Alumawood, lattice, and insulated panels.

    Wood would have looked beautiful, but they really didn’t want to deal with repainting, staining, possible termite issues, or repairs later.

    Lattice wasn’t going to give them enough shade because they wanted to use the patio during the hottest parts of the day.

    Standard Alumawood was definitely a good option, but because heat and comfort were such major concerns, we recommended an insulated aluminum patio cover.

    For their lifestyle, it simply made more sense.

    They got:

    • Full shade
    • A clean, finished ceiling
    • Space for recessed lights
    • A ceiling fan
    • Less maintenance than real wood
    • A backyard area they could actually use more comfortably

    Most importantly, they ended up with a space that worked for the way they lived instead of something that only looked nice in pictures.

    That is something I always try to explain to homeowners. The best patio cover isn’t necessarily the one you originally had in mind or even the most expensive option.

    It’s the one that fits how you actually live.

    Lattice Patio Covers: Best for Partial Shade and an Open Feeling

    Lattice is completely different from a solid patio cover because the goal is not complete protection from the sun or rain.

    It is about filtered shade, appearance, airflow, and maintaining an open feeling.

    Lattice is for homeowners who still want sunlight coming through and don’t want the backyard to feel dark or completely enclosed.

    It can look beautiful over:

    • Pool areas
    • Gardens
    • Walkways
    • Outdoor seating areas
    • Backyards where the homeowner wants partial rather than full shade

    But expectations are important.

    A lattice patio cover is not going to provide full rain protection, and it won’t block all the heat or sunlight.

    If a homeowner tells us their number one concern is that the backyard becomes unbearably hot at 3:00 or 4:00 in the afternoon, lattice probably isn’t the first thing we are going to recommend.

    Especially if the property receives heavy western afternoon sun.

    Lattice is great when you want filtered shade.

    It is not the right choice when you expect it to perform like a fully covered roof.

    Pros of Lattice Patio Covers

    • Allows some sunlight through
    • Creates filtered shade
    • Maintains an open and airy feeling
    • Can complement gardens, pools, and sitting areas
    • Good option for homeowners who don’t want full shade

    Cons of Lattice Patio Covers

    • Does not provide complete rain protection
    • Does not block all sunlight
    • May not provide enough comfort in areas with intense afternoon sun
    • Is not ideal when maximum shade is the main goal

    Steel Patio Covers: Strong but Not Necessary for Every Backyard

    Steel is probably the option we recommend least often for a typical residential patio cover.

    That doesn’t mean steel is bad. Steel is extremely strong and can be an excellent choice for certain projects.

    It can make sense for:

    • Larger structural spans
    • Custom architectural designs
    • Certain modern homes
    • Projects where engineering or design requirements call for greater structural capacity

    But most homeowners don’t actually need steel for a standard residential backyard.

    It can be more expensive, heavier, and more complicated to work with. It also needs to be properly protected against rust and corrosion.

    For a typical residential patio cover, we usually would not tell someone they need steel unless there is a structural or specific design reason for it.

    Want a real number for your project?

    The site visit and the itemized written estimate are free.

    The Biggest Mistake Homeowners Make: Choosing Based Only on Price or Appearance

    One of the biggest mistakes we see is homeowners choosing a patio cover based only on the upfront cost or how it looks in a picture.

    A patio cover can look beautiful on day one.

    The question is how it will perform five, ten, or fifteen years later.

    Some homeowners choose the cheapest option because they are trying to save money, which I completely understand. But sometimes they end up with a cover that doesn’t provide enough shade, gets extremely hot underneath, or doesn’t fit the way they actually use their backyard.

    Later, they may start trying to add:

    • Ceiling fans
    • Extra shade
    • Electrical features
    • Different panels
    • Additional modifications

    At that point, they may end up spending more than they would have if they had chosen the right system from the beginning.

    The cheapest proposal is not always the cheapest project in the long run.

    Don’t Ignore the Direction of the Sun

    Another major mistake is failing to consider where the sun actually hits the property.

    I’ve seen homeowners focus so much on the patio material and design that they don’t think about what happens at 3:00 or 4:00 in the afternoon.

    You can install a beautiful lattice patio cover, but if your main goal is to sit outside comfortably in the late afternoon and your backyard gets heavy direct western sun, you may quickly realize that you’re still receiving much more heat and sunlight than expected.

    The opposite can happen with a solid cover.

    A homeowner may want maximum shade without thinking about how the new structure could affect the natural light coming into the house.

    You have to look at the entire property.

    Ask:

    • Which direction does the house face?
    • Where does the strongest afternoon sun come from?
    • Where are the windows and doors?
    • How much natural light do you want to preserve?
    • What time of day will you actually use the patio?
    • Are you trying to create full shade or filtered shade?

    Those answers may completely change my recommendation.

    Think About How You Will Actually Use the Patio

    Before choosing a material, I always want to understand how the homeowner plans to live in the space.

    Are you entertaining guests?

    Do you have kids?

    Will you have family dinners outside?

    Do you want a TV?

    Do you need recessed lighting?

    Will you install ceiling fans or heaters?

    Do you want to sit outside during the hottest part of the afternoon?

    Do you want protection from rain?

    How much maintenance are you realistically willing to do?

    Those answers usually tell me much more about what material I should recommend than simply asking, “Which one looks the best?”

    Our outdoor living page shows how patio covers combine with kitchens, hardscape and shade.

    Rain Protection Depends on More Than the Material

    A solid Alumawood cover, insulated panel system, or properly built wood patio cover can all provide good rain protection.

    Lattice obviously will not provide the same protection.

    But even with a solid patio cover, the installation matters just as much as the material.

    You need proper:

    • Flashing
    • Waterproofing
    • Drainage
    • Gutters where appropriate
    • Attachment to the house

    A great material installed poorly can still leak.

    That is why we don’t think homeowners should only ask what material is being installed. They should also ask how the contractor plans to attach it, waterproof it, and manage rainwater.

    Planning for Lights, Fans, TVs, and Other Features

    A lot of patio cover systems can accommodate electrical features, but they should be planned before construction whenever possible.

    We always want to know upfront whether the homeowner wants:

    • Recessed lights
    • A ceiling fan
    • A TV
    • Heaters
    • Speakers
    • Electrical outlets
    • An outdoor kitchen

    These decisions can affect the structure, electrical planning, blocking, circuits, and the type of patio cover we recommend.

    A homeowner may say, “I’ll just add a ceiling fan later.”

    But if the proper support or electrical preparation wasn’t installed during construction, adding that fan later may become more complicated and expensive.

    Even when you’re not installing every feature immediately, it’s smart to discuss future plans before the patio cover is built.

    What to Ask Before Choosing a Patio Cover Contractor

    Before making a final decision, homeowners need to look beyond the total price and the picture of what the finished patio is supposed to look like.

    One of the biggest mistakes we see is comparing two estimates and assuming they include the same thing.

    They may not.

    Two estimates can involve completely different:

    • Materials
    • Product specifications
    • Structural systems
    • Installation methods
    • Warranties
    • Electrical work
    • Drainage systems
    • Permit responsibilities

    Two patio covers can look almost identical in a photograph and be completely different in terms of quality and installation.

    Ask Exactly What Product Is Being Installed

    Don’t just ask, “Is it Alumawood?”

    Ask:

    • Who is the manufacturer?
    • What is the product line?
    • What type of roof panel is being used?
    • What thickness or gauge applies?
    • What finish are you getting?
    • What color are you getting?
    • What warranty applies?

    The contractor should be able to explain exactly what you’re paying for.

    Ask How the Patio Cover Will Attach to the House

    This is a very important question homeowners often don’t think about until there’s a leak or another problem.

    Ask:

    • Is it attached to the fascia?
    • Is it attached directly to the wall?
    • Will there be a ledger?
    • How is it being flashed?
    • How will water be prevented from getting behind the attachment point?

    This is one of the biggest differences between a quality installation and a cheap one.

    You can use an excellent material, but if the attachment and waterproofing are handled poorly, you can still have problems.

    Ask Where the Rainwater Will Go

    Ask one simple question:

    Where is the rainwater actually going to go?

    Does the patio cover include gutters?

    Where will the downspouts terminate?

    Will the water dump next to the foundation?

    Will it drain toward a walkway?

    Could it create standing water?

    Could it affect the neighboring property?

    A lot of people think about shade but don’t think about water until the first heavy rain.

    Ask About Permits Before Signing

    Permit requirements can depend on factors such as the city, size of the patio cover, attachment method, height, electrical work, and other project details.

    Before signing, get clear answers to questions like:

    • Is a permit required?
    • Who is responsible for pulling it?
    • Are permit fees included in the proposal?
    • Are plans required?
    • Is engineering required?
    • Are inspections included?

    Get these details in writing.

    The last thing you want is to be halfway through construction and suddenly discover an additional permit, engineering, plan, or city fee that nobody explained before the project started.

    Our cost guide explains when an LADBS permit for a patio cover is required, what it costs and how long plan check takes.

    Ask Exactly What “Electrical Included” Means

    Electrical work is another area where homeowners sometimes assume more is included than actually is.

    If you want lights, fans, outlets, heaters, speakers, or a TV, ask exactly what the proposal includes.

    For example:

    • How many lights?
    • What type of lights?
    • Are switches included?
    • Is the wiring included?
    • Is a new electrical circuit required?
    • Can the existing panel handle the additional load?
    • Is patching included if walls need to be opened?
    • Is painting included afterward?

    Don’t simply accept the words “electrical included.”

    Make sure you know what that actually means.

    Ask About Posts, Beams, and Footings

    Homeowners should also understand how the patio cover will be structurally supported.

    Ask:

    • How many posts will there be?
    • Where will they be located?
    • What size beams will be used?
    • Are new concrete footings required?
    • Will posts attach to existing concrete?
    • Is the existing slab adequate?

    A lot of homeowners understandably want fewer posts because they want a cleaner, more open view.

    But you cannot simply remove posts without considering the span, beam size, structural requirements, and engineering.

    The design has to work structurally, not just visually.

    Ask What Happens to Existing Stucco, Concrete, Roofing, and Landscaping

    Another important question is what happens where the new patio cover meets the existing property.

    Will anything need to be cut or disturbed?

    Ask whether the project may affect:

    • Stucco
    • Roofing
    • Fascia
    • Concrete
    • Pavers
    • Landscaping
    • Paint

    Then ask who is responsible for restoring those areas. If the cover ties into the house roof, our guide to roof permits in Los Angeles explains when LADBS requires a permit for that roofing work.

    Will stucco patching be included?

    Will painting be included?

    If concrete or pavers need to be disturbed, who puts everything back?

    These smaller details are often exactly where change orders and misunderstandings happen later.

    Understand the Difference Between a Material Warranty and a Workmanship Warranty

    Ask about warranties, but don’t stop at asking, “Is there a warranty?”

    Ask what the manufacturer covers and what the contractor covers, because those are two different things.

    A manufacturer may provide coverage for the material itself, but that doesn’t necessarily mean the warranty covers:

    • Improper installation
    • Flashing problems
    • Leaks caused by workmanship
    • Electrical issues
    • Labor

    Ask:

    • How long is the material warranty?
    • How long is the workmanship warranty?
    • What exactly is covered?
    • What is excluded?
    • Who do I call if there’s a problem?

    Those details matter.

    Red Flags to Watch Out for When Hiring a Patio Cover Contractor

    One of my biggest red flags is when a contractor becomes uncomfortable because a homeowner asks detailed questions.

    A good contractor should be able to explain the material, installation method, drainage, permits, electrical work, and warranty in a way that makes sense.

    They shouldn’t make you feel like you’re being difficult just because you’re asking what you’re paying for.

    Another major red flag is a vague proposal.

    If an estimate simply says:

    “Install a 300-square-foot patio cover.”

    That’s not enough.

    The proposal needs to identify details such as:

    • Approximate dimensions
    • Type of patio cover
    • Material
    • Manufacturer or product where applicable
    • Solid versus lattice design
    • Number and approximate location of posts
    • Selected color, if known
    • Electrical features
    • Drainage components
    • Demolition, if applicable
    • Permit responsibility
    • Major exclusions

    The more vague the scope is, the easier it becomes for the homeowner and contractor to have completely different expectations.

    The One Question Every Homeowner Should Ask Before Signing

    Before you sign a contract, ask the contractor one simple question:

    “What exactly am I getting from start to finish, and what could possibly cost me extra?”

    Ask about:

    • Permits
    • Engineering
    • Electrical upgrades
    • Hidden damage
    • Rotten fascia
    • Concrete footings
    • Stucco repair
    • Painting
    • Moving drains
    • Existing structural conditions
    • Anything else that may not be visible until work begins

    A contractor can’t always predict every hidden condition.

    But they should be honest about the possibilities.

    Which Patio Cover Material Offers the Best Overall Value?

    The best overall value for most homeowners is usually Alumawood or an insulated aluminum system, depending on the budget and how much the space will actually be used.

    If you want low maintenance and good overall value, Alumawood is hard to beat.

    If you want maximum comfort and are trying to create a true outdoor room, I would lean toward insulated panels.

    If you want a natural, custom architectural look and don’t mind the maintenance, real wood can be beautiful.

    If you want partial shade with a more open feeling, lattice may make sense.

    If the project is highly custom, requires larger spans, or has specific modern structural requirements, steel may be worth considering.

    There isn’t one right answer for everyone.

    Final Thoughts: Choose the Material for Your Lifestyle, Not Just the Picture

    Stop thinking only about what looks good today and start thinking about how you want to live in the space for years to come.

    Are you going to have family dinners outside?

    Do you have kids?

    Do you entertain?

    Does the backyard get heavy afternoon sun?

    Do you want a TV, lights, and ceiling fans?

    Do you want protection from rain?

    How much maintenance are you really willing to do?

    Once you answer those questions, the right patio cover material usually becomes much clearer.

    And don’t choose a contractor based only on who can start the fastest or who gives you the lowest number.

    Look at whether the contractor is properly licensed for the work being performed, whether appropriate insurance is in place, whether the contract clearly explains the scope, whether the materials are specifically identified, and whether the contractor takes the time to understand how you’re actually going to use the space.

    Because a quality patio cover isn’t just about putting a roof over your backyard.

    It’s about making sure the structure is sound, properly waterproofed, drains correctly, complements the house, supports the features you want, and continues to perform the way it should in the years ahead.

    The goal shouldn’t just be to build a patio cover.

    The goal should be to create a space you’re actually going to enjoy and use without looking back later and saying, “I wish someone had explained this to me before I chose it.”

    Frequently Asked Questions

    What is the best patio cover material for most homes?

    For most homes, Alumawood: a wood look with no termites, rot or restaining and a strong balance of cost, durability and maintenance. Insulated aluminum panels are the better choice for an outdoor room with lights and a fan, especially under strong afternoon sun.

    Does a lattice patio cover keep out rain?

    No. Lattice gives filtered shade, airflow and an open feeling, but it does not provide full rain protection or block all of the heat and sunlight.

    Can I add a ceiling fan to a patio cover later?

    Sometimes, but if the support and electrical preparation were not installed during construction, adding a fan later becomes more complicated and expensive, so discuss lights, fans and other features before the cover is built.

    Get a written patio cover price for your yard

    We will walk the site, confirm what your city requires, and send an itemized written proposal with every allowance named. The site visit and the estimate are free.

Call Free Estimate